
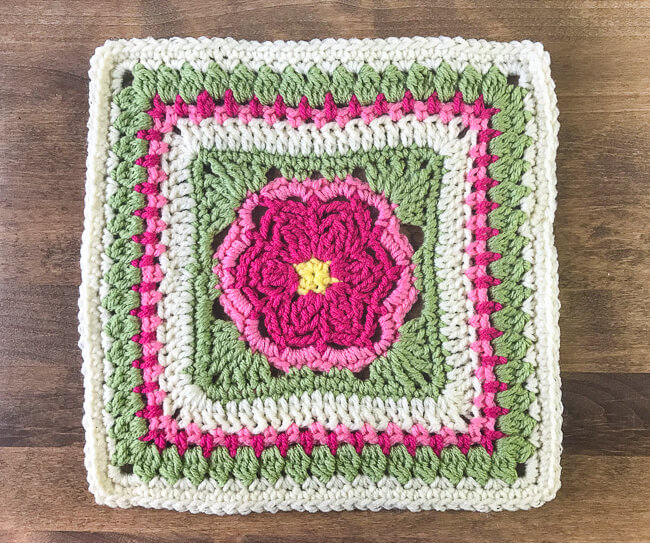
This free Caterpillar stitch afghan square crochet pattern creates a colorful 12-inch motif with an eye-catching overlay design. Long double crochet stitches reach into earlier rounds to form the distinctive lines that inspired the Caterpillar Square’s name.
The square is worked from the center outward in 15 joined rounds using four colors of worsted- or Aran-weight yarn. Use the color combination shown here or choose your own palette to emphasize the repeating geometric pattern.
Add the finished square to a blanket, pillow, tote bag, or wall hanging. It also coordinates with my floral afghan squares for a colorful English Garden-inspired blanket.
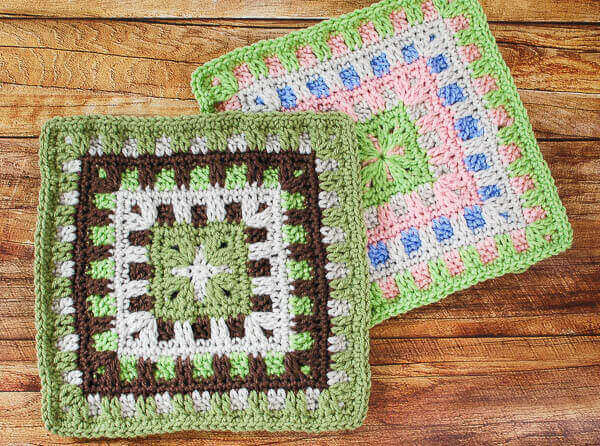
Caterpillar Stitch Afghan Square Crochet Pattern
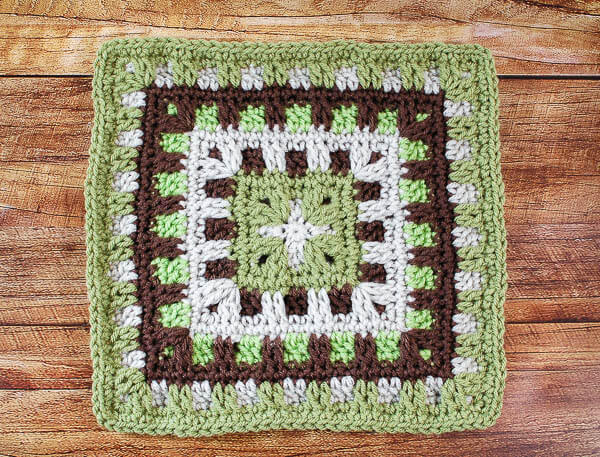
Pattern Details
- Skill level: Intermediate
- Yarn: Worsted- or Aran-weight yarn
- Hook: 5.5 mm (US I-9)
- Finished size: Approximately 12 × 12 in. (30.5 × 30.5 cm)
- Construction: Worked from the center outward in 15 joined rounds
- Colors: Four
- Technique: Overlay long double crochet stitches
- Gauge: Not essential, but coordinating squares should be blocked to the same size
Supplies
- Four colors of worsted- or Aran-weight yarn, such as Lion Brand Vanna’s Choice
- 5.5 mm (US I-9) crochet hook
- Yarn needle
- Scissors
- Stitch markers, optional
- Blocking mat and rustproof pins, optional
Resources and tutorials you may find helpful in following this crochet pattern include Crochet Abbreviations, the U.S. to U.K. Crochet Conversion Chart, How to Make a Magic Ring, Standing Stitches in Crochet, and the Invisible Join and Fasten-Off Method.
Crochet Abbreviations
- CA = color A
- CB = color B
- CC = color C
- CD = color D
- ch = chain
- dc = double crochet
- ldc = long double crochet
- rep = repeat
- sc = single crochet
- sk = skip
- sl st = slip stitch
- sp(s) = space(s)
- st(s) = stitch(es)
- yo = yarn over
This pattern is written in U.S. crochet terms.
Pattern Notes
- The square is worked from the center outward in joined rounds.
- Do not turn after completing a round.
- The beginning ch-3 counts as the first dc.
- The beginning ch-1 does not count as a stitch.
- Join each round with a sl st unless otherwise instructed.
- Fasten off and join the next color where indicated.
- Work each ldc in front of the intervening rounds to create the overlay design.
- Pull the initial loop of each ldc up to the height of the current round. This prevents the stitch from pulling or distorting the square.
- In Round 2, the ldc stitches are worked into the center of the magic ring.
- In Rounds 6, 10, and 14, the ldc stitches are worked into the indicated unworked stitches three rounds below.
- Consider placing a stitch marker in the center stitch of each corner increase to make the corner placements easier to identify.
- The square finishes with 140 sc around the outer edge.
- Finished measurements may vary depending on your yarn, hook, tension, and blocking.
Special Stitch
Long double crochet (ldc): Yo, insert the hook into the indicated stitch, space, or ring below the current round. Yo and pull up a loop to the height of the working round. Yo and pull through 2 loops, then yo and pull through the final 2 loops.
Work the ldc in front of the intervening rounds so it remains visible on the right side of the square.
Caterpillar Stitch Afghan Square Instructions
Make a magic ring.
As an alternative, ch 4 and join with a sl st in the farthest ch from the hook to form a ring.
Round 1: With CA, ch 3 (counts as the first dc), work 1 dc in the ring, ch 4. *Work 2 dc in the ring, ch 4; rep from * 2 more times. Join in the top of the beginning ch-3 and fasten off CA — 8 dc and 4 ch-4 corner sps.
Round 2: Join CB in the same st as the join. Ch 1 (does not count as a st), work 1 sc in the same st and 1 sc in the next dc.
Working in front of Round 1, work 2 ldc in the center of the magic ring, 3 sc in the next ch-4 corner sp, and 2 ldc in the center of the magic ring.
*Work 1 sc in each of the next 2 dc from Round 1. Working in front of Round 1, work 2 ldc in the center of the magic ring, 3 sc in the next ch-4 corner sp, and 2 ldc in the center of the magic ring; rep from * 2 more times.
Join in the first sc — 20 sc and 16 ldc.
Round 3: Ch 1, work 1 sc in the same st as the join and in each of the next 4 sts, then work 3 sc in the next corner st. *Work 1 sc in each of the next 8 sts and 3 sc in the next corner st; rep from * 2 more times. Work 1 sc in each of the final 3 sts. Join in the first sc and fasten off CB — 44 sc.
Round 4: Join CC in the same st as the join. Ch 3 (counts as the first dc), work 1 dc in the next st, ch 2, sk the next 2 sts, work 1 dc in each of the next 2 sts, ch 4, sk the next st, work 1 dc in each of the next 2 sts, ch 2, and sk the next 2 sts.
*Work 1 dc in each of the next 2 sts, ch 2, sk the next 2 sts, work 1 dc in each of the next 2 sts, ch 4, sk the next st, work 1 dc in each of the next 2 sts, ch 2, and sk the next 2 sts; rep from * 2 more times.
Join in the top of the beginning ch-3 — 24 dc, 8 ch-2 sps, and 4 ch-4 corner sps.
Round 5: Ch 1, work 1 sc in the same st as the join and 1 sc in the next dc, 2 sc in the next ch-2 sp, 1 sc in each of the next 2 dc, and 5 sc in the next ch-4 corner sp.
*Work 1 sc in each of the next 2 dc, 2 sc in the next ch-2 sp, 1 sc in each of the next 2 dc, 2 sc in the next ch-2 sp, 1 sc in each of the next 2 dc, and 5 sc in the next ch-4 corner sp; rep from * 2 more times.
Work 1 sc in each of the next 2 dc and 2 sc in the final ch-2 sp. Join in the first sc and fasten off CC — 60 sc.
Round 6: Join CA in the same st as the join. Ch 1, work 1 sc in the same st and 1 sc in the next st.
Working in front of Rounds 4 and 5, work 1 ldc in each of the 2 unworked sts directly below from Round 3. Sk the next 2 sts of the current round and work 1 sc in each of the next 2 sts.
*Work [2 ldc in the unworked corner st from Round 3, sk the next 2 sts of the current round, work 3 sc in the following st, and work 2 ldc in the same corner st from Round 3]. Sk the next 2 sts of the current round and work 1 sc in each of the next 2 sts.
**Work 1 ldc in each of the next 2 unworked sts directly below from Round 3, sk the next 2 sts of the current round, and work 1 sc in each of the next 2 sts; rep from ** once more. Rep from * 2 more times.
Work [2 ldc in the unworked corner st from Round 3, sk the next 2 sts of the current round, work 3 sc in the following st, and work 2 ldc in the same corner st from Round 3]. Sk the next 2 sts of the current round and work 1 sc in each of the next 2 sts. Work 1 ldc in each of the next 2 unworked sts directly below from Round 3.
Join in the first sc — 36 sc and 32 ldc.
Round 7: Ch 1, work 1 sc in the same st as the join and in each of the next 8 sts, then work 3 sc in the next corner st. *Work 1 sc in each of the next 16 sts and 3 sc in the next corner st; rep from * 2 more times. Work 1 sc in each of the final 7 sts. Join in the first sc and fasten off CA — 76 sc.
Round 8: Join CD in the same st as the join. Ch 3 (counts as the first dc), work 1 dc in the next st, ch 2, sk the next 2 sts, work 1 dc in each of the next 2 sts, ch 2, sk the next 2 sts, and work 1 dc in each of the next 2 sts.
*Ch 4, sk the next st, and work 1 dc in each of the next 2 sts. **Ch 2, sk the next 2 sts, and work 1 dc in each of the next 2 sts; rep from ** 3 more times. Rep from * 2 more times.
Ch 4, sk the next st, work 1 dc in each of the next 2 sts, ch 2, sk the next 2 sts, work 1 dc in each of the next 2 sts, ch 2, and sk the final 2 sts.
Join in the top of the beginning ch-3 — 40 dc, 16 ch-2 sps, and 4 ch-4 corner sps.
Round 9: Ch 1, work 1 sc in the same st as the join and 1 sc in the next dc. Work 2 sc in the next ch-2 sp, 1 sc in each of the next 2 dc, 2 sc in the next ch-2 sp, 1 sc in each of the next 2 dc, and 5 sc in the next ch-4 corner sp.
*Work [1 sc in each of the next 2 dc and 2 sc in the next ch-2 sp] 4 times. Work 1 sc in each of the next 2 dc and 5 sc in the next ch-4 corner sp; rep from * 2 more times.
Work 1 sc in each of the next 2 dc, 2 sc in the next ch-2 sp, 1 sc in each of the next 2 dc, and 2 sc in the final ch-2 sp. Join in the first sc and fasten off CD — 92 sc.
Round 10: Join CC in the same st as the join. Ch 1, work 1 sc in the same st and 1 sc in the next st.
Working in front of Rounds 8 and 9, work 1 ldc in each of the next 2 unworked sts directly below from Round 7. Sk the next 2 sts of the current round and work 1 sc in each of the next 2 sts. Work 1 ldc in each of the next 2 unworked sts from Round 7. Sk the next 2 sts of the current round and work 1 sc in each of the next 2 sts.
*Work [2 ldc in the unworked corner st from Round 7, sk the next 2 sts of the current round, work 3 sc in the following st, and work 2 ldc in the same corner st from Round 7]. Sk the next 2 sts of the current round and work 1 sc in each of the next 2 sts.
**Work 1 ldc in each of the next 2 unworked sts directly below from Round 7, sk the next 2 sts of the current round, and work 1 sc in each of the next 2 sts; rep from ** 3 more times. Rep from * 2 more times.
Work [2 ldc in the unworked corner st from Round 7, sk the next 2 sts of the current round, work 3 sc in the following st, and work 2 ldc in the same corner st from Round 7]. Sk the next 2 sts of the current round and work 1 sc in each of the next 2 sts. Work 1 ldc in each of the next 2 unworked sts from Round 7, sk the next 2 sts of the current round, and work 1 sc in each of the next 2 sts. Work 1 ldc in each of the next 2 unworked sts from Round 7.
Join in the first sc — 52 sc and 48 ldc.
Round 11: Ch 1, work 1 sc in the same st as the join and in each of the next 12 sts, then work 3 sc in the next corner st. *Work 1 sc in each of the next 24 sts and 3 sc in the next corner st; rep from * 2 more times. Work 1 sc in each of the final 11 sts. Join in the first sc and fasten off CC — 108 sc.
Round 12: Join CA in the same st as the join. Ch 3 (counts as the first dc), work 1 dc in the next st, ch 2, sk the next 2 sts, work 1 dc in each of the next 2 sts, ch 2, sk the next 2 sts, work 1 dc in each of the next 2 sts, ch 2, sk the next 2 sts, and work 1 dc in each of the next 2 sts.
*Ch 4, sk the next st, and work 1 dc in each of the next 2 sts. **Ch 2, sk the next 2 sts, and work 1 dc in each of the next 2 sts; rep from ** 5 more times. Rep from * 2 more times.
Ch 4, sk the next st, work 1 dc in each of the next 2 sts, ch 2, sk the next 2 sts, work 1 dc in each of the next 2 sts, ch 2, sk the next 2 sts, work 1 dc in each of the next 2 sts, ch 2, and sk the final 2 sts.
Join in the top of the beginning ch-3 — 56 dc, 24 ch-2 sps, and 4 ch-4 corner sps.
Round 13: Ch 1, work 1 sc in the same st as the join and 1 sc in the next dc. Work [2 sc in the next ch-2 sp and 1 sc in each of the next 2 dc] 3 times. Work 5 sc in the next ch-4 corner sp.
*Work [1 sc in each of the next 2 dc and 2 sc in the next ch-2 sp] 6 times. Work 1 sc in each of the next 2 dc and 5 sc in the next ch-4 corner sp; rep from * 2 more times.
Work [1 sc in each of the next 2 dc and 2 sc in the next ch-2 sp] 3 times. Join in the first sc and fasten off CA — 124 sc.
Round 14: Join CB in the same st as the join. Ch 1, work 1 sc in the same st and 1 sc in the next st.
Working in front of Rounds 12 and 13, work 1 ldc in each of the next 2 unworked sts directly below from Round 11. Sk the next 2 sts of the current round and work 1 sc in each of the next 2 sts. Repeat this sequence 2 more times.
*Work [2 ldc in the unworked corner st from Round 11, sk the next 2 sts of the current round, work 3 sc in the following st, and work 2 ldc in the same corner st from Round 11]. Sk the next 2 sts of the current round and work 1 sc in each of the next 2 sts.
**Work 1 ldc in each of the next 2 unworked sts directly below from Round 11, sk the next 2 sts of the current round, and work 1 sc in each of the next 2 sts; rep from ** 5 more times. Rep from * 2 more times.
Work [2 ldc in the unworked corner st from Round 11, sk the next 2 sts of the current round, work 3 sc in the following st, and work 2 ldc in the same corner st from Round 11]. Sk the next 2 sts of the current round and work 1 sc in each of the next 2 sts.
Work 1 ldc in each of the next 2 unworked sts from Round 11, sk the next 2 sts of the current round, and work 1 sc in each of the next 2 sts. Repeat this sequence 2 more times.
Join in the first sc — 68 sc and 64 ldc.
Round 15: Ch 1, work 1 sc in the same st as the join and in each of the next 16 sts, then work 3 sc in the next corner st. *Work 1 sc in each of the next 32 sts and 3 sc in the next corner st; rep from * 2 more times. Work 1 sc in each of the final 15 sts.
Join in the first sc — 140 sc.
Fasten off. For the neatest finish, use the Invisible Join and Fasten-Off Method.
Weave in all the yarn ends securely.
Blocking the Finished Square
Gently block the square to approximately 12 × 12 in. (30.5 × 30.5 cm), arranging the corners and overlay stitches evenly.
See my How to Block Knit and Crochet Items guide for additional help.
A free French translation of the Caterpillar Square pattern was provided by Véronique Malanda Mavouala de ChezHoraive. Download the French translation PDF.
Complete the English Garden Afghan
Mix the Caterpillar Square with these coordinating garden-inspired motifs:
- Dahlia Bloom Afghan Square Crochet Pattern
- Daisy Afghan Square Crochet Pattern
- Aubrieta Bloom Afghan Square Crochet Pattern
- Browse More 12-Inch Crochet Square Patterns
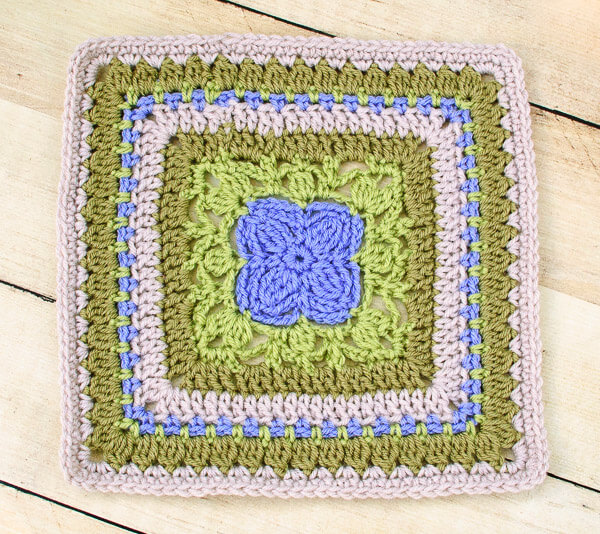
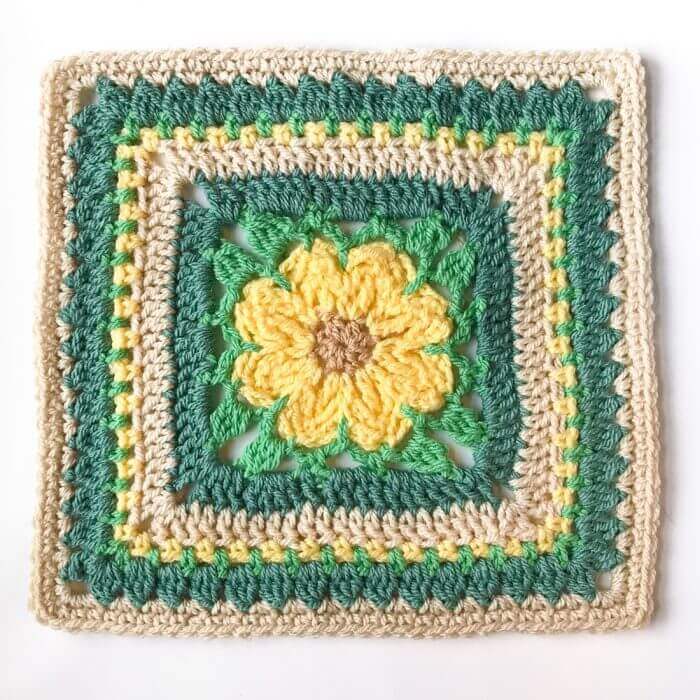
When your motifs are complete, use my Easy Method for Joining Crochet Squares or try the popular Join-As-You-Go Granny Square Method.
More Crochet Square Patterns
- Classic Crochet Granny Square Pattern
- Heart Granny Square Crochet Pattern
- Peace Sign Granny Square Crochet Pattern
- Owl Granny Square Pattern and Appliqué
- Cluster Burst Granny Square Pattern
- Browse More Crochet Square Patterns
Find an Edging for Your Crochet Blanket
- Granny Square Afghan Edging Pattern
- Quick and Easy Crochet Edging Patterns
- Free Crochet Border Pattern from Every Which Way Crochet Borders
- Cluster Burst Afghan Crochet Edging Pattern


Having a big problem with Row 8.
I’ve got 76 stitches as I should have but the first Ch4 brings me to the middle of the first side, not the corner. (I reckon there should be 19 stitches per side ie 76/4 but I only use half that number before I get to the Ch4 section of the pattern.) I’ve tried and retried about 5 times. Is the pattern wrong?
I now think I messed up on an earlier row. I’m fairly new to crocheting and kept getting ‘lost’ in the rows with the pattern and counting. How do folk remember where they are when the lines are long with several repeats?
Hey, sooo beutiful and I am for sure making a bag with these! But how many ‘yarn wrenches’ of each color do you use for 1?
Please make a video or something. I’m on round two and already beyond confused. How can I work an ldc three rows down when there’s only one row so far? And when you say “work 1 sc in same st as join and in next dc, working in front of stitches from Round 1”, does that mean work 1sc in same st as join and in next dc, or in next dc working in front of stitches from round one?
Round 2. The Ldc into the magic ring. Where “into” because based on your green/brown/white square photo it clearly isn’t into the middle/center ring area. Where do I attach the stitch for the Ldc if I want it to look like that square? Am I attaching it around the bottom of one of the round 1 dc stitches?
I see that it does go to the middle on the other square example.
Same question and if you look at the Moogly CAL site their square goes into the middle too. Kind of confusing to have two different examples!!
Is there a tutorial to follow?
Not at this time, only the written pattern here.
What a great design! I love it!