
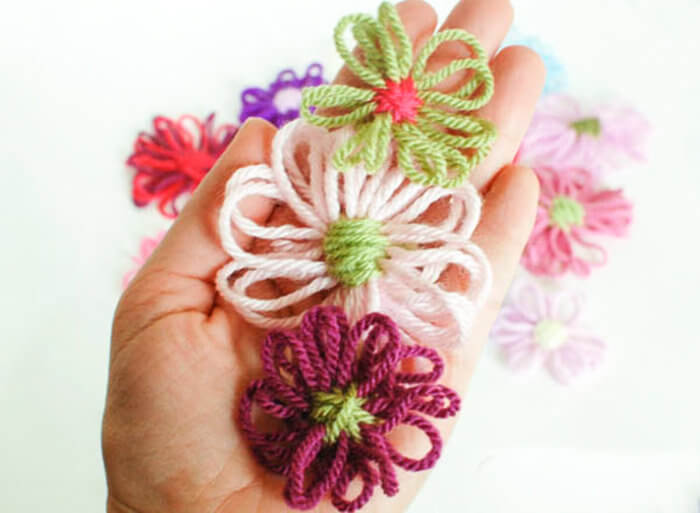
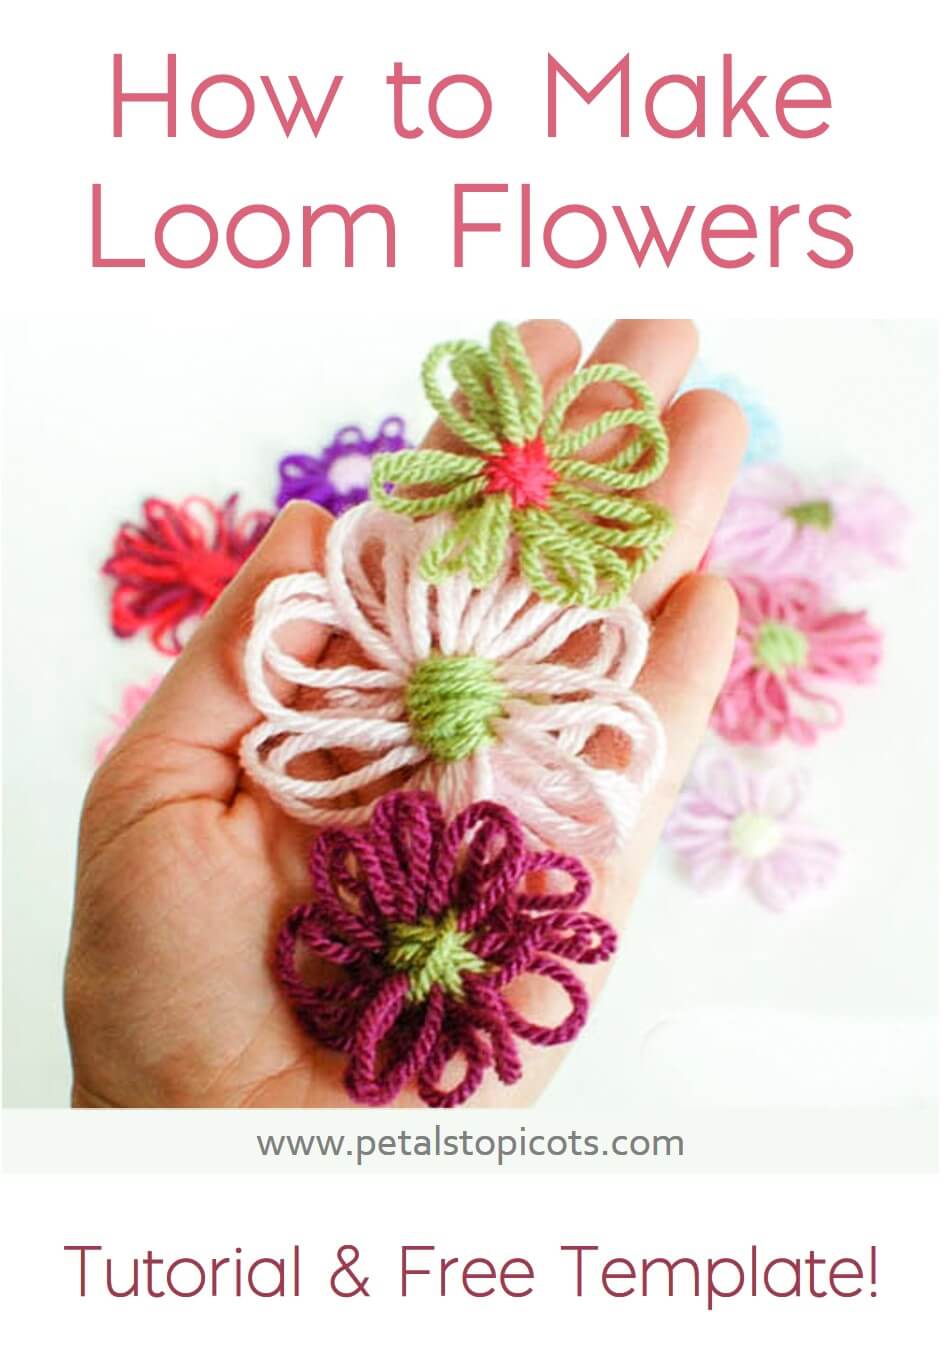
These pretty loom flowers are so quick and simple to make! All you need is a round flower loom, some leftover yarn, and a tapestry needle. You can use a store-bought flower loom like this one from Clover, or easily make your own using the free printable flower loom template I’ve included below.
The template includes two sizes for making 2-inch and 3-inch loom flowers. Once your loom is ready, I’ll show you step by step how to wrap the yarn, secure the center, and remove your finished flower from the loom.
Already have a flower loom? You can skip right down to the flower loom instructions and start making your flowers.
These little yarn flowers are perfect for embellishing everything from baby hats and scarves to spring and Easter decor. They’re also a great way to use up small amounts of leftover yarn from your stash!
Want to try something a little different? You can also use your flower loom to make a wire loom flower instead of using yarn. It’s a fun variation that creates pretty, delicate petals that can be shaped by hand.
Free Printable Flower Loom Template
Making your own flower loom is super easy. To make your own loom, you will need:
- A piece of cardboard or thin plastic
- A pen or pencil for tracing
- Scissors or an X-Acto knife
- A printout of the flower loom template below
The template includes two flower loom sizes for making 2-inch and 3-inch flowers. First, you will need to download and print the loom template. Click here or on the picture below.
Download the Free Flower Loom Template: The printable PDF includes templates for making 2-inch and 3-inch loom flowers.
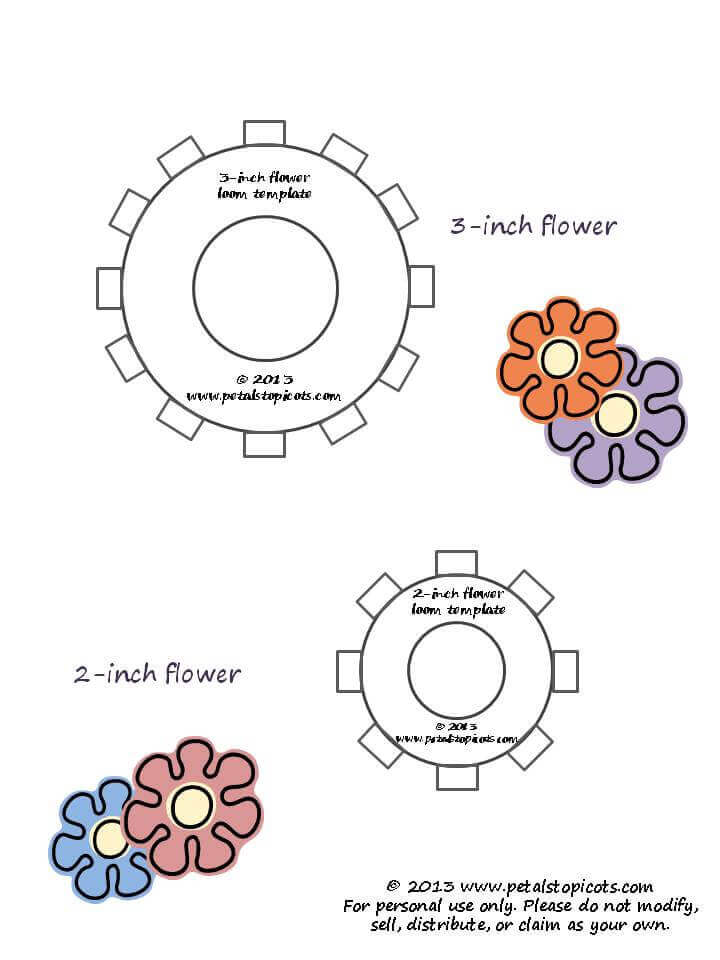
Once printed, cut out the desired loom size, then trace the shape onto cardboard or plastic.
Cut out the traced loom shape, including the center hole.
How to Make Loom Flowers
Step 1: Wrap the Yarn Around the Loom
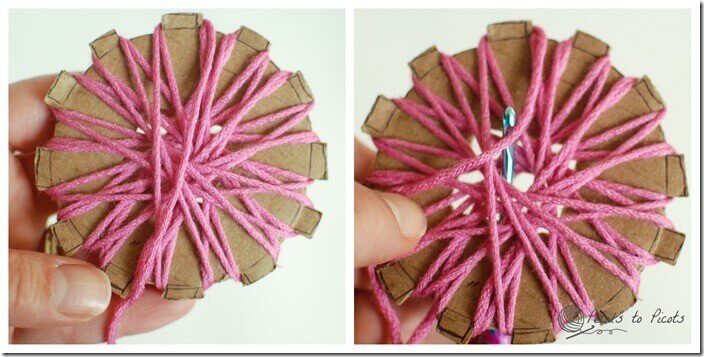
To start, insert the tail end of your yarn through the center of your loom and place a finger over the tail to secure it. Then, wrap the long end of your yarn around the top tab.
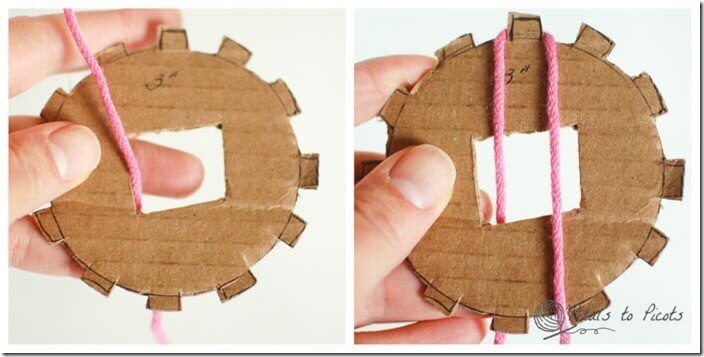
Step 2: Wrap the Yarn Around the Flower Loom
Wrap the yarn around the tab on the opposite side of the loom. Working clockwise, wrap the yarn over the next tab, then down around the opposite tab.
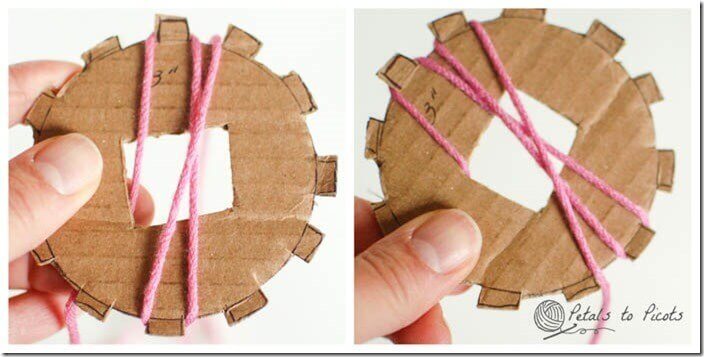
Continue wrapping the yarn around each tab and its opposite around the loom and repeat for a second pass. There should be two loops around each tab when you’re finished.
Step 3: Secure the Yarn
Leaving a few inches of tail, cut your yarn and use a tapestry needle or your hook to pull the tail through the center. Tie a knot with the two tails behind the loom to secure.
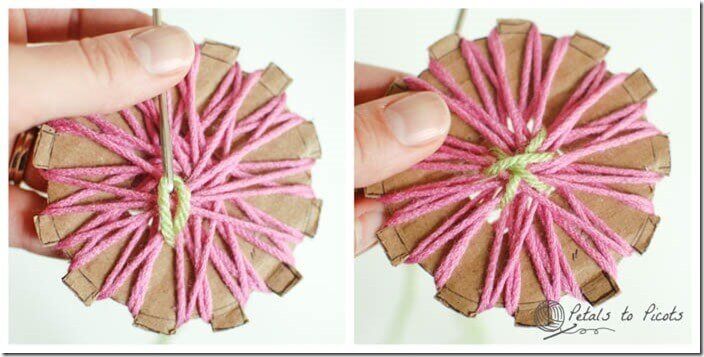
Step 4: Stitch the Center of the Flower
Use a coordinating color to stitch around the center. Starting from behind the flower loom, use a tapestry needle to make crisscross stitches to secure all the petals. Continue stitching until the petals are secure and until you like how the center looks.
You can continue with the crisscross pattern or finish off by making all your stitches in one direction. You can even use a third color to make an accent stitch around the center.
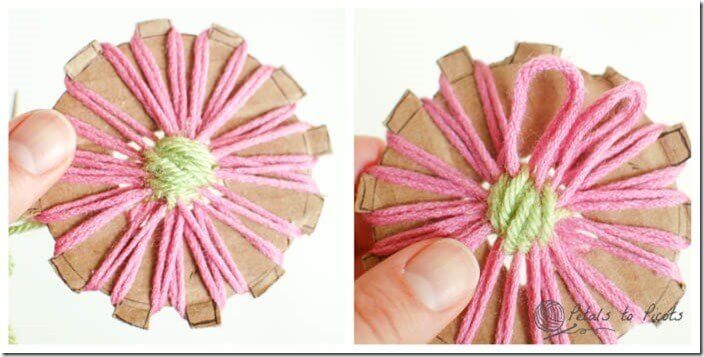
Step 5: Remove the Flower From the Loom
Once you’re finished with the center, bring the yarn to the back of the flower loom and knot the ends to secure. Gently pull each loop off the tabs to remove the flower from the loom.
And voilà! You have a pretty loom flower!
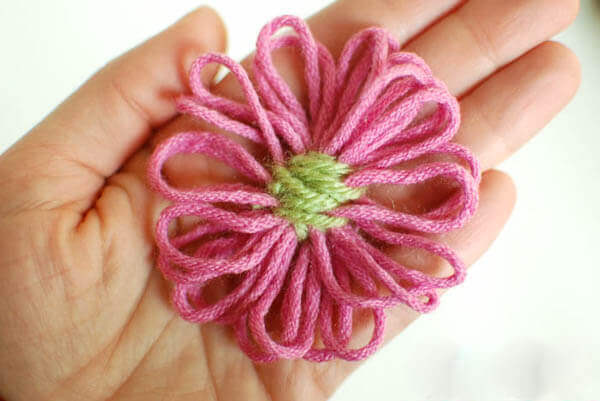
So quick and easy that you can whip up a bunch in no time at all! I think I want to use these to embellish my burlap wreath from Valentine’s Day. What do you think?
Find more free crochet flower patterns here.
You May Also Enjoy These Flower Projects
- Wire Loom Flower
- Crochet Flower Face Cleansing Pads Pattern
- Flower Scrubby Crochet Pattern, Scrubby Dishcloth
- Swirl Flower Crochet Pattern – Embellish Anything!
- Crochet Flower Bracelet
Find Community
I would love to see your finished projects; share them with me on Instagram, Facebook, or the Petals to Picots Community.


Thanks for the tutorial! I have been looking for a simple, airy flower for some time now!
These are so cute. What would be the best way to attach these to something, like a beanie hat for example? I wouldn’t want it to lose it’s fluffy look.
Hi Linda 🙂 I would sew them on, concentrating mostly on the center. Hope that helps.
I had to make a loom flower and I find you! How luky I am! Both the tools and tuto. Thank you so much!
My pleasure, Silvia! Glad you enjoyed it 🙂
So nice
Hi , the link to the template is not working, thanks in advance, best regards susanne
It’s all fixed now. Thanks for letting me know, Susanne 🙂
Great Tutorial – can see a lot of these appearing as brooches on my page soon 🙂
Ooooh … Can’t wait to see them!
Fantastic! I used to make those years ago and with some felt embellishments made Santa faces on them to hang on the Christmas tree. Can’t for the life of me remember what happened to the loom I used then. Thank you for sharing it – now I can do them again 🙂
My pleasure, Elly! Enjoy 🙂
Kara, what a great tutorial! Pinned it!
Thanks, Marilyn 🙂
I love this! So great! Thanks so much for linking up on Hookin On Hump Day!
Thanks, Tamara!
I recently got a loom flowers magazine and though of ordering a little loom through e-bay or etsy, but here you are with this wonderful tute!!
Thank you so much!!
Yay! Glad it is a help. Good luck with all your flowers 🙂