
Crochet standing stitches are an alternative to beginning chains and are handy to have in your repertoire. They are also the perfect trick for granny squares! The thing that is so wonderful is they look just like a stitch because they are a stitch! Yay for no more telltale beginning chains.
If you are working in the round, you can pair a standing stitch with the invisible join and fasten off technique I shared here, and it will be virtually impossible to tell where the final join and fasten off was made!! So how is it done? I will show you step-by-step below. Spoiler: it’s really simple!
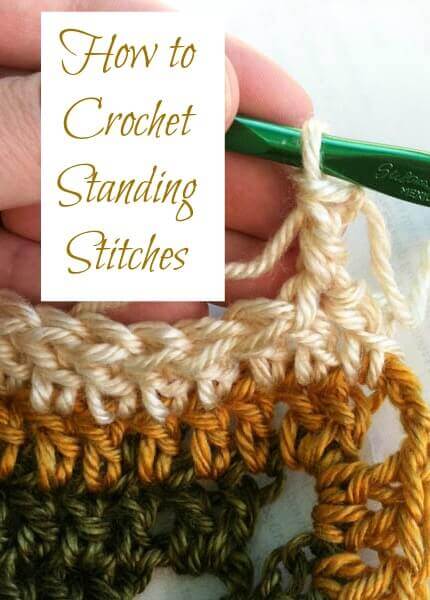
How to Crochet Standing Stitches
Basically, a standing stitch is worked just like a regular stitch except that you start it with a slip knot on your hook.
In my example below, I am working on the Lion Brand Little Boy Blue Blanket Pattern, which calls for a row of double crochets. So I am going to yarn over first and go into the stitch and work a double crochet as usual. If you are doing a single crochet, you would not need to yarn over first but instead go directly into the stitch and work the single crochet as usual, and so on.
Here is how to work a standing stitch for double crochet …
1. Start with a slip knot on your hook. 2. Yarn over, holding onto the tail so it doesn’t flip back around. 3. Insert your hook into the first stitch
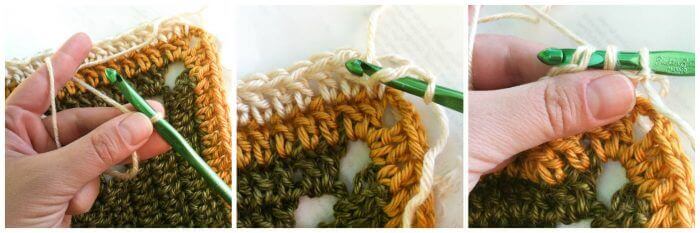
4. Yarn over and pull up a loop (3 stitches on your hook). 5. Now complete as you would a regular double crochet (that is, yarn over and pull through 2 loops twice) …
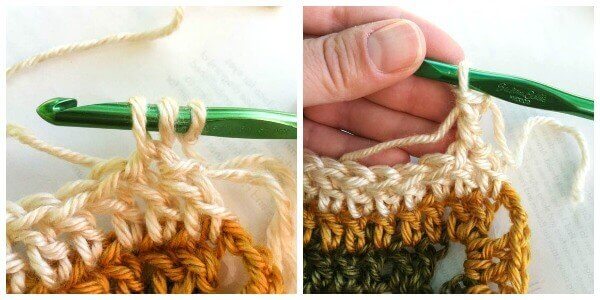
That is all there is to it. Pretty handy, huh! I use this method pretty much any time I need to join a new yarn. Hope you find it helpful too!
You can find more helpful crochet tutorials and tricks on my Tutorials Page here.
Tutorials You May Find Helpful
- How to Crochet Buttonholes
- How to Fix Your Yarn Ball Winder
- Free Metric Conversion Guide for Knitting and Crochet
- Four Crochet Techniques That Will Bring Your Craft to the Next Level!


Thanks so much for such a clear, concise tutorial. I finally understand this stitch!
Thank you, Kara. I will be trying this tip for sure!
I’ve been crocheting for almost 65 yrs I have been less than diligent about new stitches and techniques but since I have struggled with beginning chains for years thought I would check this out. Thank you so much. I have to practice but first attempt was impressive.
I always have had trouble with missing the last stitch when making a back and forth crocheting project resulting in an uneven edge and having to take out and redo. Then one day at the beginning of a row I did not make my usual chain 3 turning chain, but instead I simply made a double crochet in the first stitch after the turn. It doesn’t look right since it seems very bulky, BUT when I got to it on the end of the next row I found the last stitch very easy to find and once the last dc is completed it looks totally correct AND makes for a very clean end of row and turn.
So, instead of making a chain 3 turning chain: yarn over, insert into the first dc of the next row, pull up a loop resulting in 3 loops on hook, continue as usual for a dc. It works wonderfully.
Great tip! Thanks for sharing 🙂
Thanks, Vera. I have trouble with that too. I’m definitely going to try your tip!
My only problem with this method is that the pattern I am working on right now is in the round (making lots of squares for an heirloom afghan), and when I come back around to the standing DC the joining just doesn’t look quite right. Any tips for joining it after going through a round?
I’d like to see a video of this on YouTube linked here. Any chance?
This also works even when you’re not joining a new thread. What I do is turn, sl st into first st, yo, insert hk into same st, yo, then complete dc as normal. For a sc, start with the sl st, insert hk into same st, and complete as normal. Same for hdc.
This is absolutely briliant!