
This easy crochet hexagon pattern is worked just like a classic granny square, but with two extra corners to create the six-sided shape. Using basic double crochet stitches, you can make these colorful granny hexagons in just a few quick rounds.
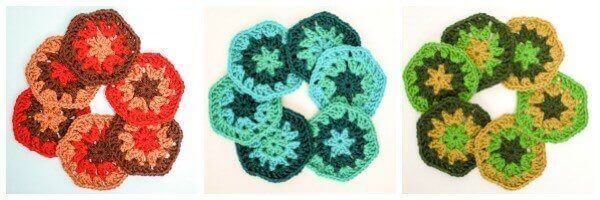
One of my favorite things about crochet hexagons and other granny motifs is being able to play with color. You can pick one or two colors or go crazy mixing and matching color palettes. They also make a great scrapbuster project for using up those leftover yarn bits in your stash!
The basic granny hexagon is worked in three rounds of double crochet stitches. The fourth and final round creates the edging and can also be used to join your motifs. You can work Round 4 on each hexagon and use a slip stitch join, or work the final round while joining with my Join-As-You-Go (JAYGO) method.
I used these motifs to make my hexagon crochet blanket, where I chose the JAYGO method and saved Round 4 for joining.
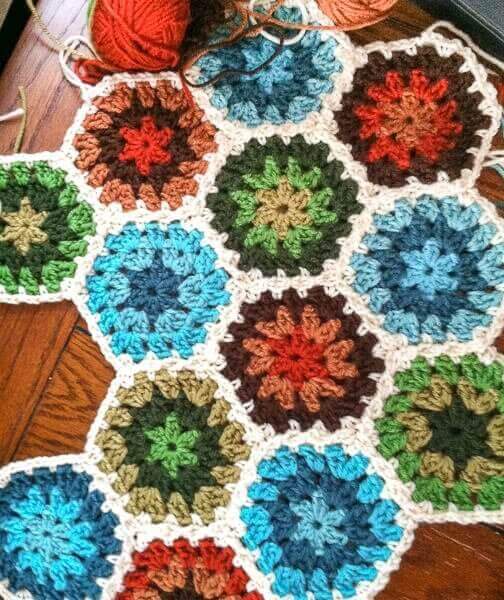
For my hexagon afghan, I wanted to use up some of the colors that I had left over from my Kaleidoscopic Afghan and purchased some new colors as well.
Here’s what I picked …
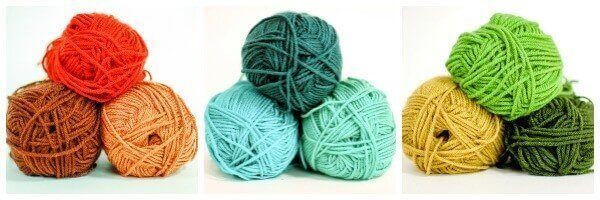
These are the Brava Worsted Yarns from KnitPicks that I chose:
Reds/Browns: Persimmon, Paprika, Sienna
Blues: Tidepool, Cornflower, Tranquil
Greens: Fig, Peapod, Dublin
What You Need
- Yarn: Worsted-weight yarn in your choice of colors
- Hook: H-8 / 5 mm crochet hook
- Notions: Tapestry needle and scissors
Easy Granny Hexagon Crochet Pattern
Helpful Crochet Resources: Refer to my Crochet Abbreviations, U.S. to U.K. Crochet Conversion Chart, and How to Make a Magic Ring {photo & video tutorial} as you work through the pattern.
Add this pattern to your Ravelry library.
Note: You may also see this style of motif referred to as a hexagon granny square. Whatever you call it, the construction is very similar to a classic granny square, with six corners instead of four.
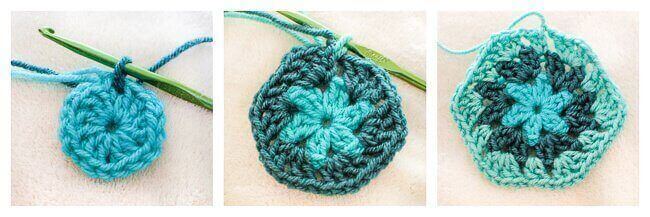
With CA, make a magic ring (as an alternative to the magic circle, you can ch 4 and join with a slip stitch in the furthest chain from the hook to form a ring).
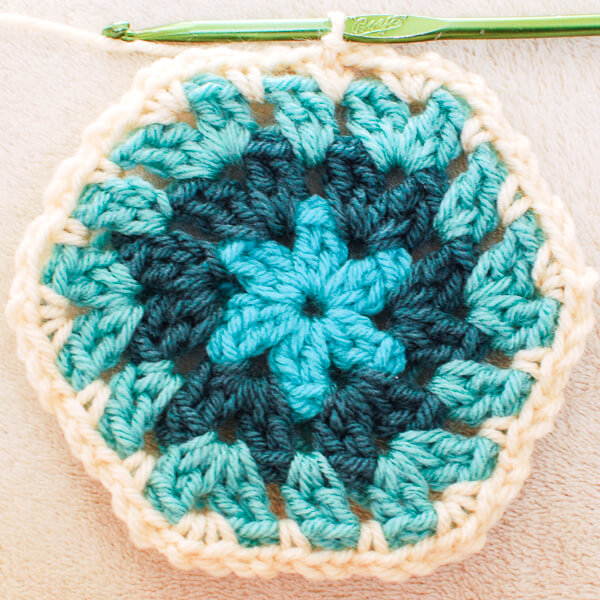
Round 1: Ch 3 (counts as dc), 1 dc in ring, ch 1, *2 dc in ring, ch 1, rep from * 4 more times, join with a Sl st to first st and fasten off — 12 dc.
Round 2: Join CB in the last ch-sp made (I do this so I can start crocheting over those pesky ends as I go), ch 3 (counts as dc), [1dc, ch 1, 2 dc] in same ch-sp, ch 1, *[2dc, ch 1, 2 dc] in next ch-sp, ch 1, rep from * 4 more times, join and fasten off — 24 dc.
Round 3: Join CC in the last ch-sp made, ch 3 (counts as dc), 1 dc in same ch-sp, ch 1, [2dc, ch 1, 2 dc] in next ch-sp, ch 1, *2 dc in next ch-sp, ch 1, [2dc, ch 1, 2 dc] in next ch-sp, ch 1, rep from * 4 more times, join and fasten off — 36 dc.
Weave in the rest of those pesky ends.
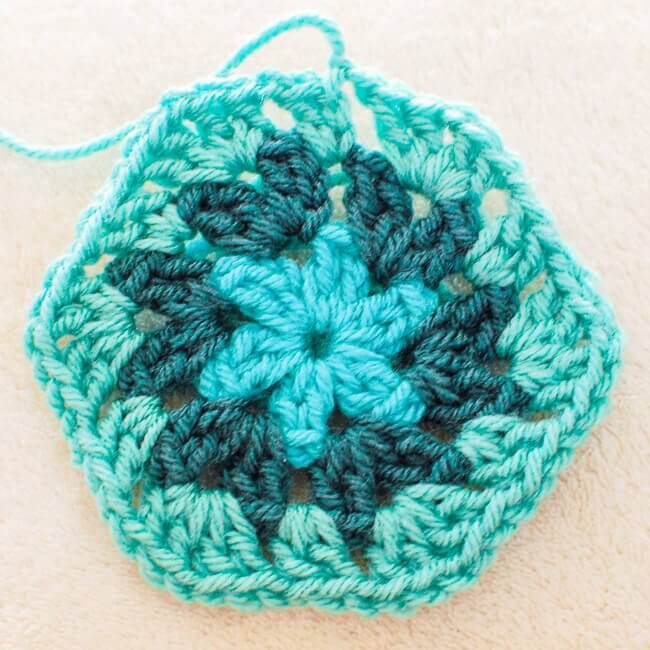
Final Hexagon Round
Depending on your joining method, you can work this fourth and final round on all the hexagons and then join them. Or you can work this round while joining your crochet hexagons using the JAYGO method.
If choosing the JAYGO method, work this round on your first hexagon only and then click over to my tutorial for joining hexagons with the JAYGO method.
Round 4: Join edging color in the last ch-sp made, ch 1 (does not count as st), 1 sc in same ch-sp, ch 2, 1 sc in next ch-sp, ch 2, [1sc, ch 1, 1 sc] in corner ch-sp, ch 2, *1 sc in next ch-sp, ch 2, 1 sc in next ch-sp, ch 2, [1sc, ch 1, 1 sc] in corner ch-sp, ch 2, rep from * around, join and fasten off — 24 scs and 24 ch-sps.
For my edging and joining color, I chose a pretty cream, also from the Brava Worsted line from KnitPicks.
Completing Your Hexagon Project
Now that you see how quick and easy these crochet hexagons work up, you can go crazy mixing and matching colors. You will be surprised how quickly those little hexes stack up!
If your project needs a straight edge, you may also need half hexagons, along with an edging pattern that fills in the smaller valleys.
To make your own hexagon blanket, click over to my hexagon crochet blanket pattern page for a complete resource on each step.
So many color combinations!!
More Crochet Patterns


How would the finished edges look? I am almost finished with my blanket but not sure about finishing edges/borders.
There are so many ways you can finish. I am working on a tutorial now to show how I did it. Hopefully I will have it up for you soon 🙂
Wow, these are so pretty! Can’t wait to do some of those!
Thanks, Teri!
Unos trabajos muy bonitos y originales . Enhorabuena por tu blog , hay mucho arte .Un saludo
Kara, you always have the best tutorials! I can’t wait to see the joining one! Thanks so much for linking up on Hookin on Hump Day!
I have never made hexagon shaped grannies before…but I just pinned and tweeted this so I can be sure to add these to my “to make” list!
Oh my goodness, those ends just KILL me. It’s such a downer after having fun making all those pieces, lol!
Fun pattern!
This is absolutely beautiful! Thank you for sharing- this just got added to my to-do list!!!
Oh my goodness I LOVE this Kara!! It is turning out beautifully. I wish I had the patience for something like this, but I get board to easily.:(
This is a really beautiful Granny! It goes together so well ~ looks flawless!