
I recently took my kids to see Despicable Me 2 and now my one daughter is minion crazy. She asked if I would make her a pencil case like this colorful stripey one that I shared with you, but as a crochet minion. I took on that challenge and here is what I came up with. She loves it! Hope your little ones do too!
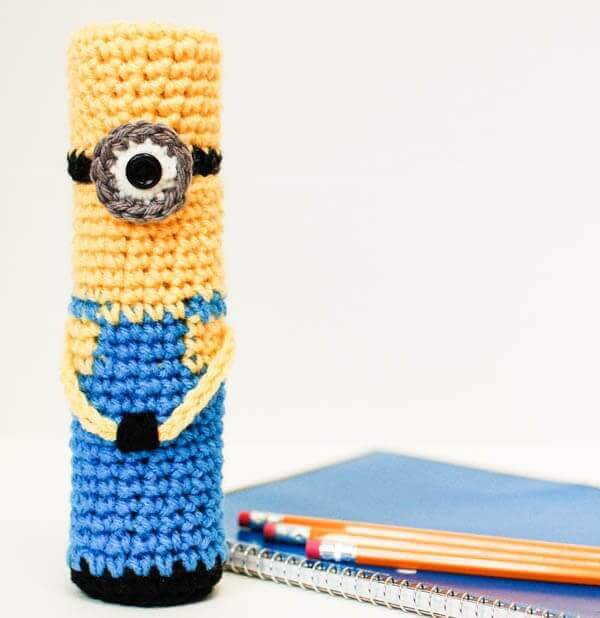
Crochet Minion Pencil Case
Here’s what you need:
- cardboard paper towel tube
- worsted weight yarn, small amounts of black, blue, yellow, white, and gray
- G hook
- ½ in. black button
- tapestry needle, scissors
Helpful Crochet Resources: Refer to my Crochet Abbreviations and U.S. to U.K. Crochet Conversion Chart as you work through the pattern.
Color Change Tip: In the stitch before the color change is to begin, insert hook as usual and pull up a loop, then yarn over with new color and pull through both loops on hook, continue with new color. Carry old color behind stitches unless directed to fasten off.
Cut cardboard paper towel tube into two pieces, one piece 6 in. long and the second piece 2 in. long. Discard remaining section.
Bottom
With black, make a magic ring.
Round 1: Ch 1 (does not count as st here and throughout), work 6 sc in ring, join — 6 sts.
Round 2: Ch 1, work 2 sc in same st as join and in each st around, join — 12 sts.
Round 3: Ch 1, work 2 sc in same st as join, 1 sc in next, *2 sc in next, 1 sc in next, rep from * around, join — 18 sts.
Round 4: Ch 1, working in back loops only, work 1 sc in same st as join and each st around, join — 18 sts.
Round 5: Join blue, ch 1, work 1 sc in same st as join and each st around, join — 18 sts.
Using the long length of cardboard tube, check your fit. I prefer to then keep the tube placed and continue crocheting around it from here on.
Rounds 6 through 15: Repeat Round 5 — 18 sts.
Round 16: Ch 1, work 1 sc in same st as join, 1 sc into the next st changing to yellow on last yarn over, work 1 sc in each of the next 5 sts changing to blue on last yarn over of fifth st, 1 sc in next 4 sts changing to yellow on last yarn over of 4th st, work 1 sc in each of the next 5 sts changing to blue on last yarn over of fifth st, 1 sc in next 2 sts around, join — 18 sts.
Rounds 17 and 18: Repeat Round 16 — 18 sts.
Round 19: Ch 1, work 1 sc in same st as join and each of the next 6 sts changing to yellow on last yarn over of the sixth st, work 1 sc in each of the next 4 sts changing to blue on last yarn over of fourth st, 1 sc in next 7 sts, join — 18 sts.
Round 20: Join yellow, ch 1, work 1 sc in same st as join and each st around, join — 18 sts.
Rounds 21 through 26: Repeat Round 20 — 18 sts.
Fasten off, leaving a tail of approx. 6 in.
Top
Using the smaller length of tube and yellow yarn, repeat Rounds 1 through 10 of bottom.
Round 11: Join black, ch 1, work 1 sc in same st as join and each st around, join — 18 sts.
Fasten off, leaving a tail of approx. 6 in.
Eye
With white, make a magic ring but do not close up the whole.
Round 1: Ch 1, work 12 sc in ring, join — 12 sts.
Round 2: Join gray, ch 1, work 1 sc in same st as join and each st around — 12 sts.
The center of the eye (the magic ring) is also the buttonhole. Make sure to test the size with your button. The button should go through easily but without slipping through. Use the tail of your yarn to adjust the size of the ring for your button. Once you get the correct size, use a tapestry needle to weave the tail back and forth through the backs of your stitches to secure it.
Finishing
Line up the joining seams and tails of both parts. Using a tapestry needle and the long tails, sew top and bottom together along 5 sts only forming a hinge on which the top will open. Find the center of your front and sew the button on Round 11 of the top piece. Line up the buttonhole (the eye) with the button and sew the bottom of the eye to the bottom piece. Weave in ends.
To make arms, join yellow to center yellow stitch of Round 17 of bottom, chain 17, join to center yellow stitch at other side of Round 17. Using a tapestry needle and black yarn, make a few overlay stitches to secure the arms to the front of the case.

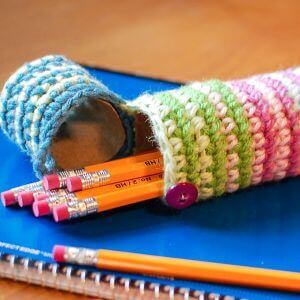
Ready for another pencil case crochet pattern? Check out the free pattern for this striped pencil case.
And you can find even more free crochet patterns here.

Hi Kara,
wanted to let you know, that I made your Minion pencil case for my (big!) granddaughter and her face was very similiar to what I saw, when she was a little girl :-). Have a photo of it but realise, I cannot post it here. Will try on fb.
Thank you!
Best regards from Vienna,
lisa
When I first saw the picture I thought it was made from old Pringles can! Love it!
hii..thankkyouuu sooo much..i m very new to crochetting…but i made it…crochet minion is my first project…i made it for my younger brother…thankyiuuu soo much fr sharing d patternn
So glad you liked it! Congratulations of your first project!!
thankyouu
Thank you for the pattern!! I’ve made it:
This my one,of my favourite things. So thanks 🙂
Hi Kara,
This is an amazing pattern. Thank you so much for sharing it with very good instructions. Loved making it.
Hi, just wanted you to know I tried this pattern and adapted it to fit a sugar free lemonade container(like crystal light). It turned out great and I think the container makes it much more crush free for back packs or whatever
Excellent instructions..a bit tricky working with the tube inside. I emptied my paper towel roll, but afterward, I wish I had used a wrapping paper roll. I’m not sure how durable it is, but my college student will probably just have it in her desk as a decoration! Thank you for your creativity.
So glad you liked it!
So adorable! And really clever the way it buttons closed with the minion’s eye. What a great pattern, thank you!
Thanks, Julie 🙂
Thanks for the pattern loved making it. One down ten more orders to make!!!!!!!
Love the pattern. A quick question – in the rounds where both blue and yellow are used, do you run the yarn across the back or leave tails to sew in after?
Thanks
Hi Pauline :). Yes, for those rounds I carry the yarn across the back. Hope that helps!
Thanks for sharing. I too have used the plastic canvas. Was just thinking to sew the goggle on the strap part and the eye button on the lower half. Guess this is not that different, but thought it might be easier to open and close the case? The original was on the bottom with the chain loop on the top.
Would it work like that do you think?
It sounds like it would but I can’t know for sure 🙂