
I recently took my kids to see Despicable Me 2 and now my one daughter is minion crazy. She asked if I would make her a pencil case like this colorful stripey one that I shared with you, but as a crochet minion. I took on that challenge and here is what I came up with. She loves it! Hope your little ones do too!
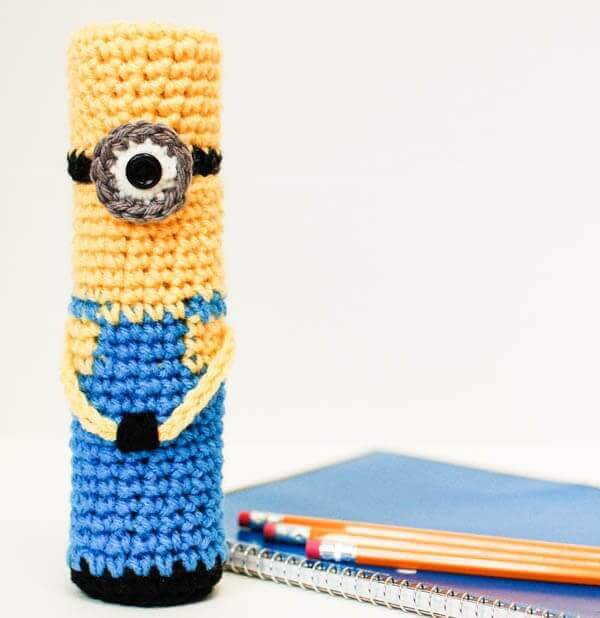
Crochet Minion Pencil Case
Here’s what you need:
- cardboard paper towel tube
- worsted weight yarn, small amounts of black, blue, yellow, white, and gray
- G hook
- ½ in. black button
- tapestry needle, scissors
Helpful Crochet Resources: Refer to my Crochet Abbreviations and U.S. to U.K. Crochet Conversion Chart as you work through the pattern.
Color Change Tip: In the stitch before the color change is to begin, insert hook as usual and pull up a loop, then yarn over with new color and pull through both loops on hook, continue with new color. Carry old color behind stitches unless directed to fasten off.
Cut cardboard paper towel tube into two pieces, one piece 6 in. long and the second piece 2 in. long. Discard remaining section.
Bottom
With black, make a magic ring.
Round 1: Ch 1 (does not count as st here and throughout), work 6 sc in ring, join — 6 sts.
Round 2: Ch 1, work 2 sc in same st as join and in each st around, join — 12 sts.
Round 3: Ch 1, work 2 sc in same st as join, 1 sc in next, *2 sc in next, 1 sc in next, rep from * around, join — 18 sts.
Round 4: Ch 1, working in back loops only, work 1 sc in same st as join and each st around, join — 18 sts.
Round 5: Join blue, ch 1, work 1 sc in same st as join and each st around, join — 18 sts.
Using the long length of cardboard tube, check your fit. I prefer to then keep the tube placed and continue crocheting around it from here on.
Rounds 6 through 15: Repeat Round 5 — 18 sts.
Round 16: Ch 1, work 1 sc in same st as join, 1 sc into the next st changing to yellow on last yarn over, work 1 sc in each of the next 5 sts changing to blue on last yarn over of fifth st, 1 sc in next 4 sts changing to yellow on last yarn over of 4th st, work 1 sc in each of the next 5 sts changing to blue on last yarn over of fifth st, 1 sc in next 2 sts around, join — 18 sts.
Rounds 17 and 18: Repeat Round 16 — 18 sts.
Round 19: Ch 1, work 1 sc in same st as join and each of the next 6 sts changing to yellow on last yarn over of the sixth st, work 1 sc in each of the next 4 sts changing to blue on last yarn over of fourth st, 1 sc in next 7 sts, join — 18 sts.
Round 20: Join yellow, ch 1, work 1 sc in same st as join and each st around, join — 18 sts.
Rounds 21 through 26: Repeat Round 20 — 18 sts.
Fasten off, leaving a tail of approx. 6 in.
Top
Using the smaller length of tube and yellow yarn, repeat Rounds 1 through 10 of bottom.
Round 11: Join black, ch 1, work 1 sc in same st as join and each st around, join — 18 sts.
Fasten off, leaving a tail of approx. 6 in.
Eye
With white, make a magic ring but do not close up the whole.
Round 1: Ch 1, work 12 sc in ring, join — 12 sts.
Round 2: Join gray, ch 1, work 1 sc in same st as join and each st around — 12 sts.
The center of the eye (the magic ring) is also the buttonhole. Make sure to test the size with your button. The button should go through easily but without slipping through. Use the tail of your yarn to adjust the size of the ring for your button. Once you get the correct size, use a tapestry needle to weave the tail back and forth through the backs of your stitches to secure it.
Finishing
Line up the joining seams and tails of both parts. Using a tapestry needle and the long tails, sew top and bottom together along 5 sts only forming a hinge on which the top will open. Find the center of your front and sew the button on Round 11 of the top piece. Line up the buttonhole (the eye) with the button and sew the bottom of the eye to the bottom piece. Weave in ends.
To make arms, join yellow to center yellow stitch of Round 17 of bottom, chain 17, join to center yellow stitch at other side of Round 17. Using a tapestry needle and black yarn, make a few overlay stitches to secure the arms to the front of the case.

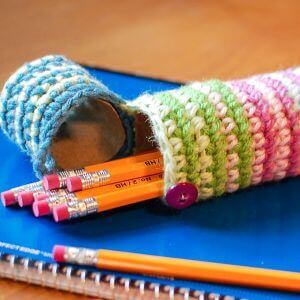
Ready for another pencil case crochet pattern? Check out the free pattern for this striped pencil case.
And you can find even more free crochet patterns here.

I love this minion pencil case it is so so cute. I am going to crochet this cutie for my grandson. He loves “Despicable Me” and so do I. My grandson has seen the second movie but I haven’t.
Thank you very much for sharing your pattern.
Was wondering what to do with the leftover yarn from the large stuffed minion I made last month!
I love this! If nobody has pointed you to Day by Day Crochet (she’s on FB) then I’m going to. She makes custom clay handle crochet hooks and has just made a TON of minion hooks. I can see your pencil holder doubling as a crochet hook case. (Especially if it’s filled with minion crochet hooks!) 😀
I have to check that out. Thanks, Micki!
Thank you so much for sharing this pattern! We also have a family of Despicable Me minion fans! I’m finishing it up now. My paper towel tube ended up collapsing on the ends, so I got some plastic canvas and cut it to the same size as the paper towel tube pieces. I sewed it together into tube shapes, then used it instead of the paper towel tube. At both of the open tube ends I sewed the minion body to the plastic canvas openings to anchor it. It is much sturdier than the paper towel tubes, it is cheap – one sheet was $.59 and will make several – and I think it will last longer. Hope this will help someone! And now my daughter wants a Hello Kitty one….any patterns for that?? Lol.
That’s a great idea!! Thanks so much for sharing. And I’ll have to mull that Hello Kitty idea around 🙂
You did a great job, and a nice idea for the kids, I’m going to try one and see how it comes out. Thanks for sharing.
Hi to do the eye do you change to the grey on round 2 as it does not say so. Many thanks
You are correct, the second round of the eye is done in gray. I will update the pattern now. Thanks for the catch!
This is awesome, Kara! It’s genius that they button is the pupil of the eye! My daughter also LOVES minions!
Thanks so much, Marilyn!
This is so nice too, especially the way you created the little arms and hand:)
Thanks, Elisabeth 🙂
That is so cool! You’re so creative. Thanks for sharing 🙂
Hope you like it 🙂
Your little minion is just so cute! Thanks for sharing your pattern with us. 🙂
Love it Kara! Featured on Moogly! 😀
Thanks so much for the feature, Tamara!!
My pleasure, Debi 🙂
Wow!! That looks cool !! 🙂 I also liked the way you added a button to make the eye:) thanks for sharing!!
So glad you like it, Preeti 🙂