
The Tunisian Simple Stitch (Tss) is one of the first stitches you’ll want to learn when getting started with Tunisian crochet. This basic stitch creates a beautifully textured fabric and is the foundation for many Tunisian crochet patterns.
In this step-by-step tutorial, I’ll show you how to work the Tunisian Simple Stitch, including where to insert your hook, how to finish the last stitch of each row, and how to complete the return pass.
If you’re brand new to this technique, start with my Introduction to Tunisian Crochet tutorial to learn how to make your foundation chain and first row.
The Tunisian Simple Stitch is abbreviated as Tss in crochet patterns. You can find this and other common stitch abbreviations in my Tunisian Crochet Abbreviations and Symbols Chart.
How to Work the Tunisian Simple Stitch
The Tunisian Simple Stitch is worked by inserting your hook under the vertical bars of the stitches in the previous row and pulling up loops across.
Like most Tunisian crochet stitches, each row consists of a forward pass and a return pass.
Step 1: Work the Forward Pass
After completing the return pass of your foundation row, you’ll have one loop remaining on your hook. This loop counts as the first stitch of your next row, so you’ll begin working into the second stitch.
- Insert your hook from right to left under the next vertical bar.
- Yarn over and pull up a loop, leaving it on your hook.
- Continue inserting your hook under each vertical bar and pulling up a loop across the row.
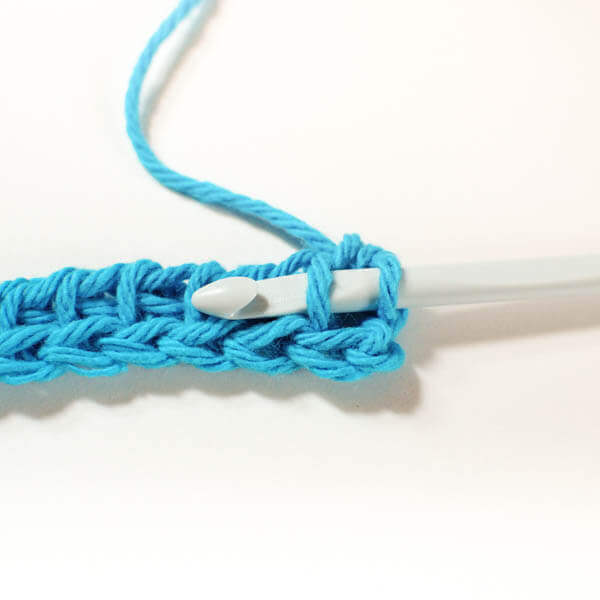
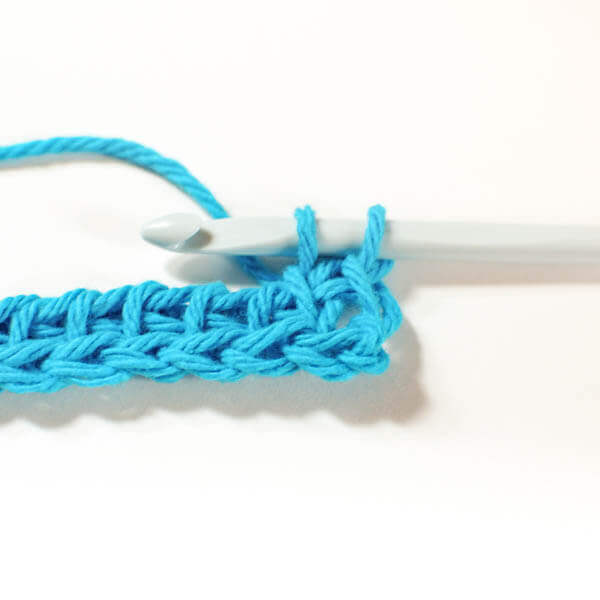
Step 2: Work the Last Stitch
When you reach the last stitch of the row, insert your hook under both the front and back vertical bars (the full V) at the edge.
Yarn over and pull up a loop.
Working through both bars helps create a neat, finished edge along the side of your Tunisian crochet fabric.
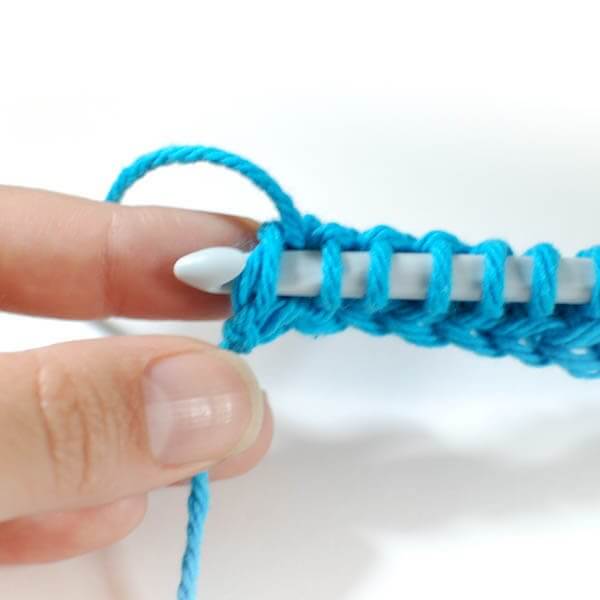
Step 3: Complete the Basic Return Pass
Now you’ll work the loops off your hook using the Basic Return Pass.
- Yarn over and pull through the first loop on your hook.
- Yarn over and pull through the next two loops.
- Continue yarning over and pulling through two loops at a time until only one loop remains on your hook.
You’ve completed one row of Tunisian Simple Stitch!
Repeat the forward and return passes to continue adding rows.
What Does Tunisian Simple Stitch Look Like?
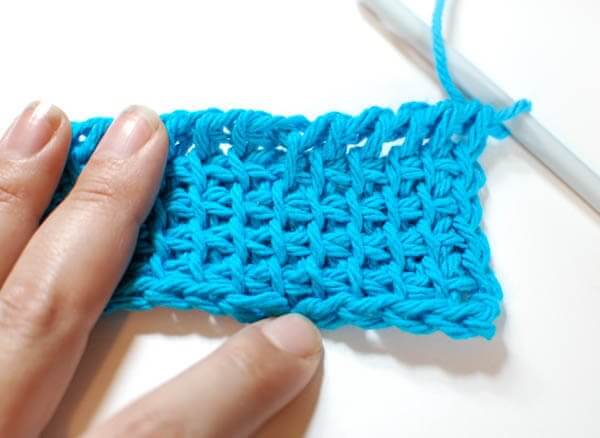
The Tunisian Simple Stitch creates a textured fabric with distinct vertical bars on the front.
Here’s how five rows of Tunisian Simple Stitch look.
Tip: If your fabric starts curling, don’t worry! Curling is common in Tunisian crochet. Using a larger hook and blocking your finished piece can help.
Continue Learning Tunisian Crochet
How did you do? Now that you’ve learned the Tunisian Simple Stitch, you’re ready to explore more stitches!
Follow along with my free Learn Tunisian Crochet in a Week series:
- Getting Started: Introduction to Tunisian Crochet
- Part 1: How to Do the Tunisian Simple Stitch (you’re here!)
- Part 2: How to Do the Tunisian Knit Stitch
- Part 3: How to Do the Tunisian Reverse Stitch
- Part 4: Tunisian Bind Off and Finishing Tips
Once you’ve practiced these techniques, try combining them in my Sampler Washcloth Tunisian Crochet Pattern.
Beginner Tunisian Crochet Projects to Try
Ready to put your new skills to work? These free Tunisian crochet patterns are great opportunities to practice your stitches and make something useful.
- Tunisian Crochet Blanket Pattern – Customize to Any Size!
- Heart Tunisian Crochet Dishcloth Pattern
- Leaf Tunisian Crochet Dishcloth Pattern
- Tunisian Crochet Coaster Pattern
- Tunisian Crochet Dish Drying Mat Pattern
For even more inspiration, browse my complete collection of free Tunisian crochet patterns and tutorials.

Finally! A tutorial on Tunisian crochet that’s clear and complete! Thank you so much!
So glad you found it helpful!
Thanks Kara 😉 I’m following along – I so see what you mean about the ‘curling’! Yikes! Rhondda
Yay! So glad you’re joining 🙂
Hi Kara,
I think I’ve got it! Thankyou! I don’t know how to share a picture on here but here is a link to my Facebook page where I have just posted a picture
https://www.facebook.com/SallyStrawberrycreations
I think the left edge may be a bit dodgy in places but I just need to make sure I go in properly at the end I think.
Thanks
Sally
Awesome!!!
Thanks for sharing, Kara!! That was a great tutorial!!
So glad you liked it, Preeti!