
Changing colors in crochet is easy once you know where to introduce the new yarn. The trick to getting a neat, seamless color change is to switch colors on the final yarn over of the stitch before you want the new color to begin.
This technique works when changing colors within a row or round and helps create a clean transition without an awkward color shift between stitches. I’ll show you how to change colors in both single crochet and double crochet using the step-by-step photos below.
I’m using my Little Boy Blue Blanket Pattern for the examples here, but you can use this same technique for Fair Isle crochet and other colorwork projects, including my Fair Isle Snowflake Christmas Stocking Crochet Pattern.
If you need to change colors at the beginning of a new row or round instead, try my Standing Stitches tutorial. Standing stitches are a great way to introduce a new color without the telltale beginning chain.
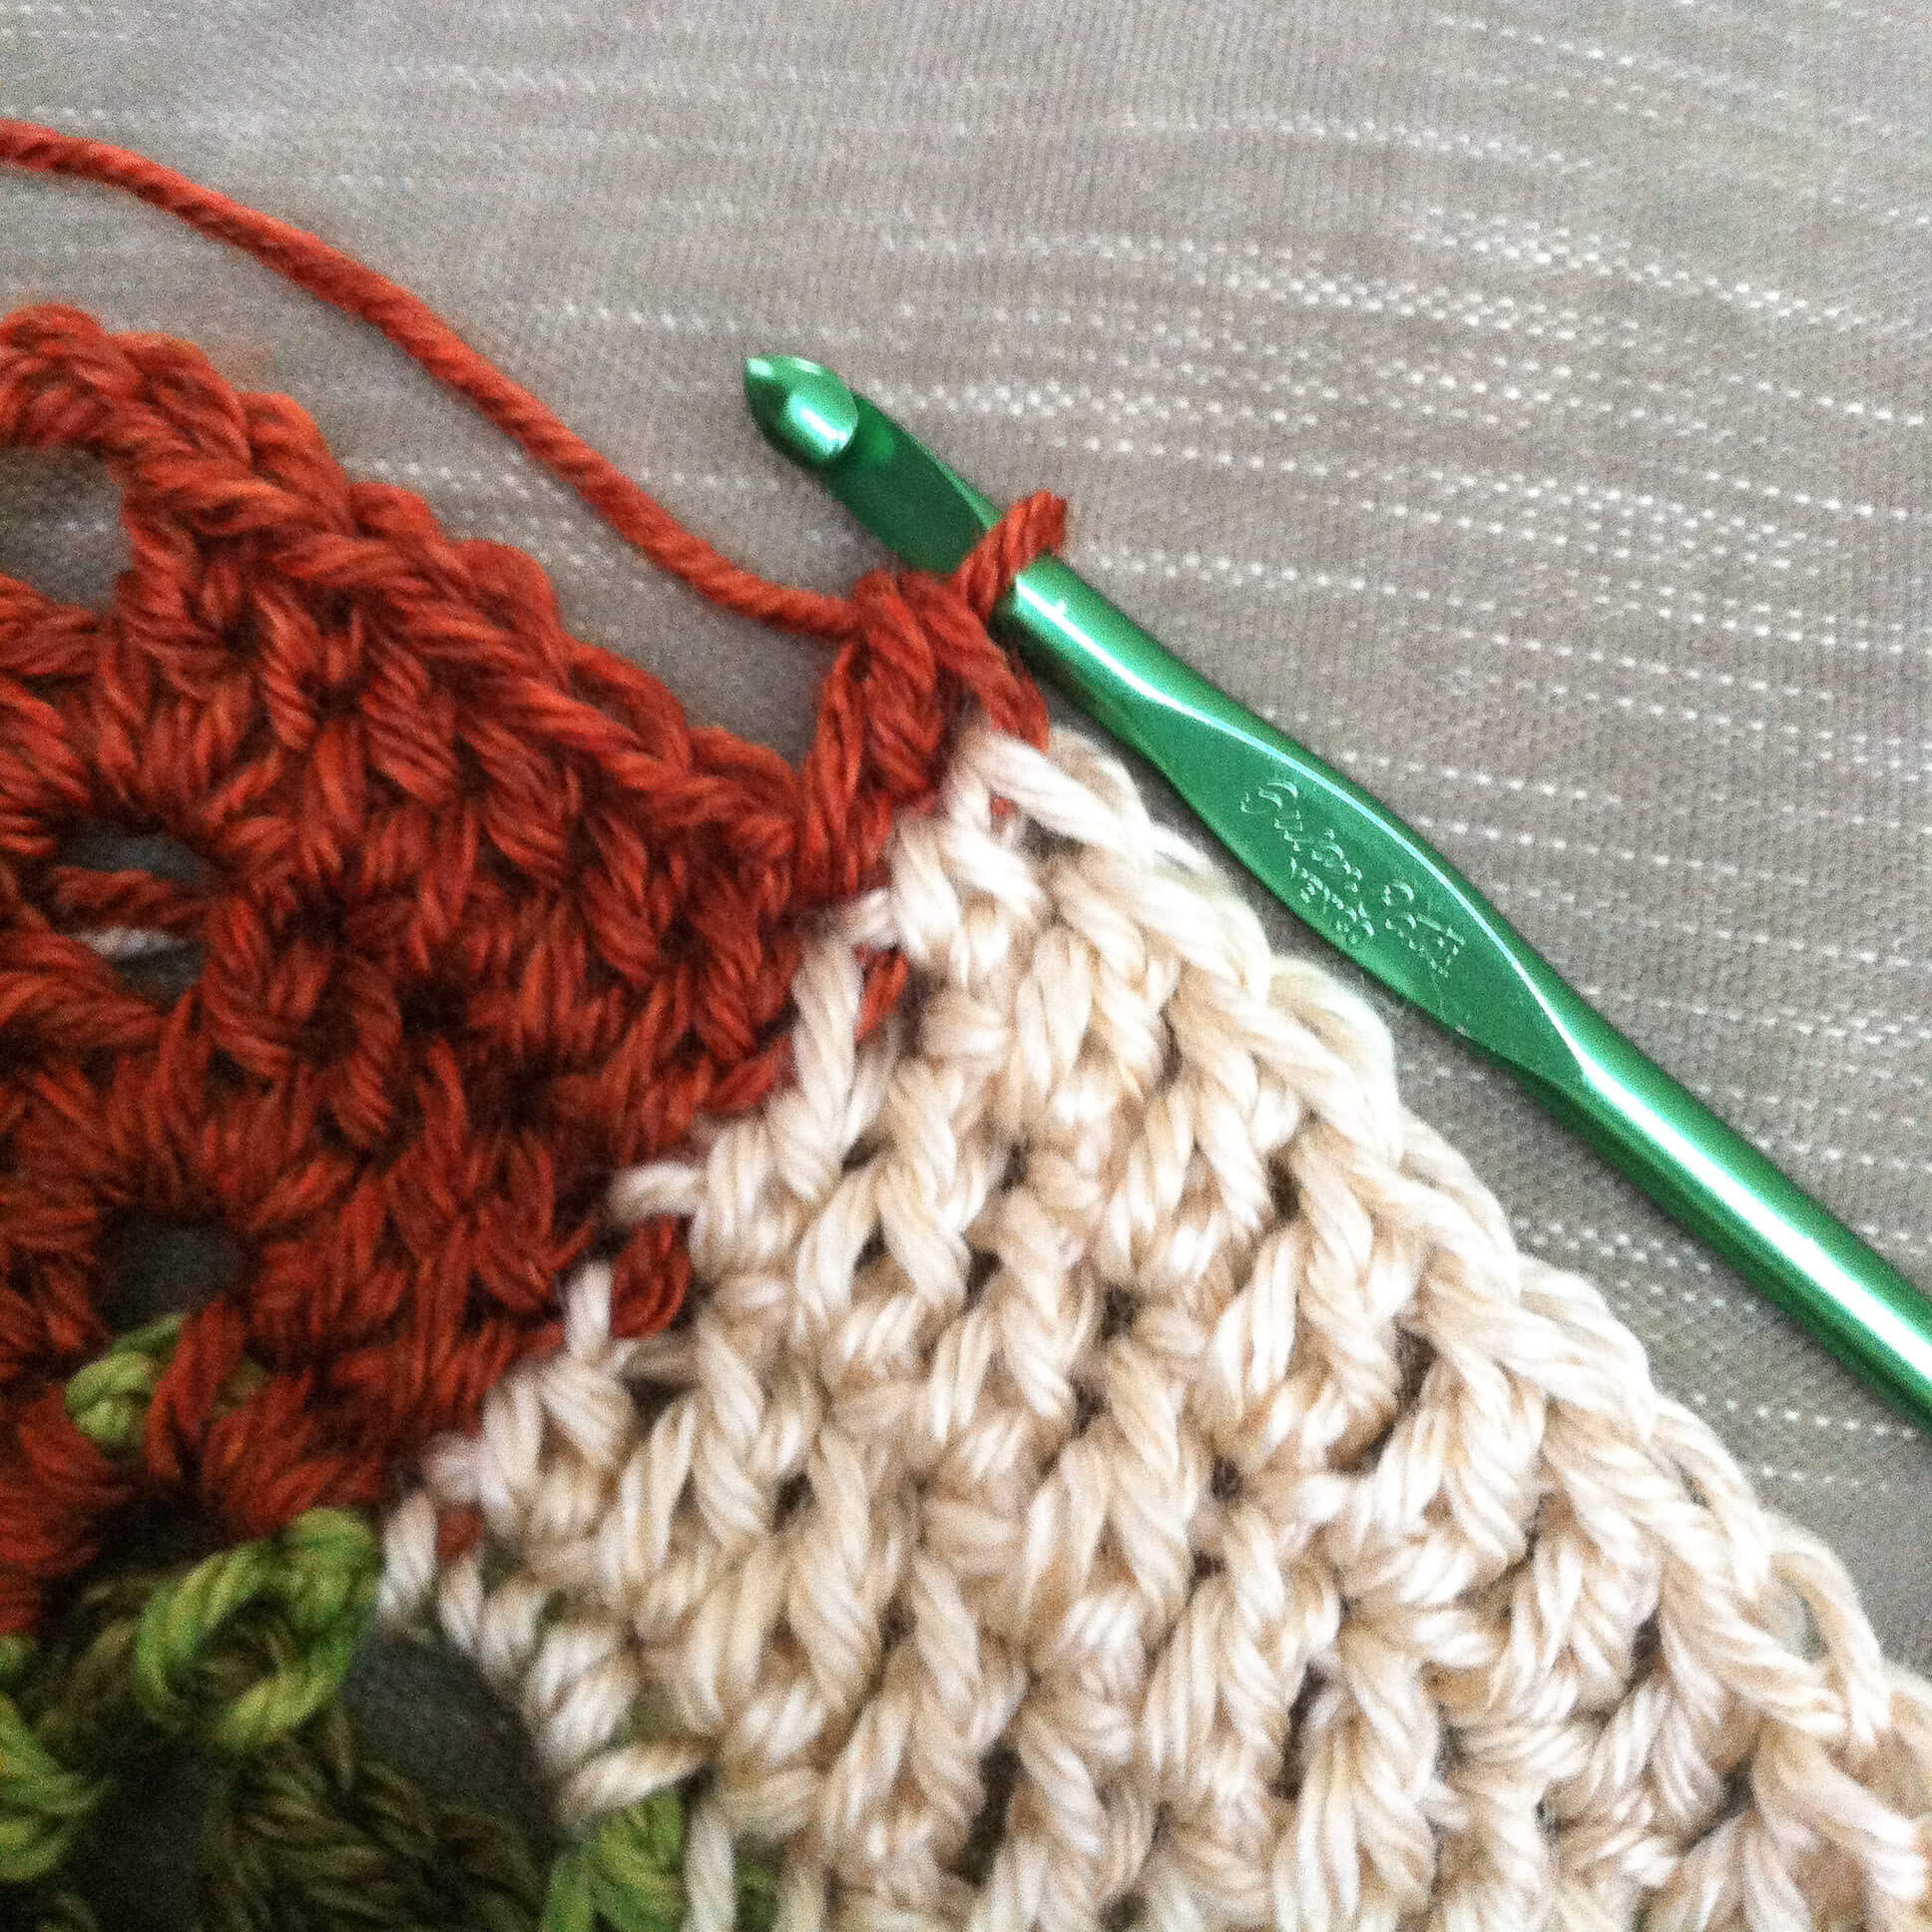
How to Change Colors in Crochet
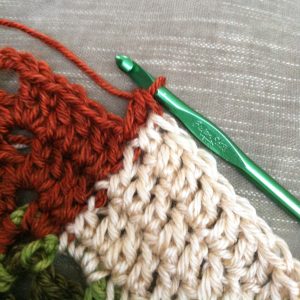
For a neat color change, begin the last stitch in your current color as usual, but complete the final yarn over with your new color. Continue crocheting with the new color as directed in your pattern.
Let’s use some photos to make this easier…
How to Change Colors in Single Crochet
For this project, I have worked my round so far in a cream color and am ready to switch over to another color. For my last stitch with the cream, I would start my single crochet as usual … insert hook where indicated, yarn over and pull up a loop … but for that final yarn over of my stitch, I yarn over and pull the next color through the loops to complete my single crochet. Now just continue with that next color as indicated in the pattern.
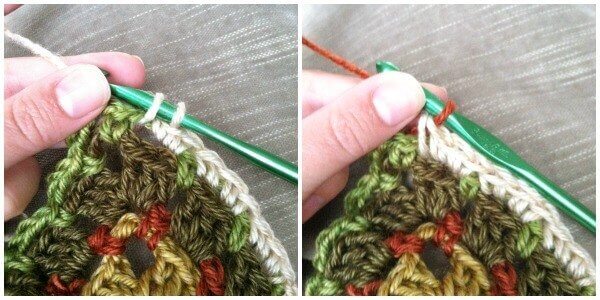
The color change is nice and neat …
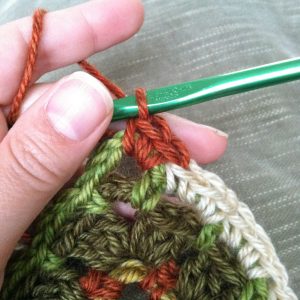
How to Change Colors in Double Crochet
The same technique works for taller stitches, too. The new color is again introduced on the final yarn over of the stitch. In this case, I have worked my round in double crochets and am at the stitch before the next color is to start. I would start my double crochet as usual … yarn over and insert where indicated, yarn over and pull up a loop, yarn over and pull through 2 loops … but for that final yarn over of my stitch, I yarn over and pull the next color through the loops to complete my double crochet.
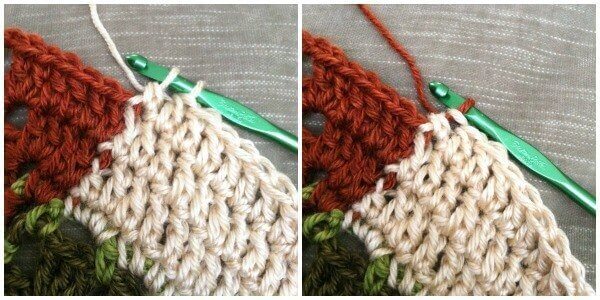
Again, a nice and neat color change …
Should You Carry or Cut the Yarn?
If you’ll be switching back to the first color again soon, you can carry the unused yarn across the row and crochet over it as you work. If you’re finished with the color or won’t need it again for quite a while, fasten it off and weave in the end instead.
So, what do you think? Easy peasy, right?!
More Crochet Tutorials
- How to Work a Foundation Double Crochet {Photo Tutorial}
- How to Work a Foundation Half Double Crochet {Photo Tutorial}
- Textured Crochet Stitch Pattern {Video Tutorial}
- Learn Tunisian Crochet in a Week
Find Community
I would love to see your finished projects; share them with me on Instagram, Facebook, or the Petals to Picots Community.


Thanks for this tutorial. I am in the process of crocheting a two color bag now and needed this.
I am wondering if there is a way to change colors and not have to carry it or cut it and then pick it up the next row a few stitches over ? Do I just drop the yarn in the back and pick it up on the next row but that means the yarn will be in the front to pick it up – hard to explain :-((((
I’ve seen so many tutorials for switching colors as you crochet, and this one is definitely the most helpful and definitely going on my Pinterest board! Thanks so much!
I always seem to have trouble switching colours, so I’ll definitely have to give this a try. Thanks!!
Very good 🙂
Same method to change colors that is used in Tunisian crochet. I’ve been do color changes this way for all my crochet since it works so well and cleanly in Tunisian.
Thanks so much, Diane!
Thank you for the explanation ………….. 🙂
Thanks Kara 🙂 Shared. Have a lovely week, Rhondda
Maschelle, in order to ‘anchor’ your tails, take a darning needle and weave the loose tails in on the back side securely with a back stitch. What is a back stitch? It’s an embroidery stitch. No amount of crocheting over any loose tail will secure it from coming loose and unraveled. Any good crocheter or knitter knows to weave their tails in with a needle.
Thanks for responding, Michelle. That’s what I do too 🙂
I am new to this technique, and want it to work for me as well as it does for, oh, everyone else. My problem is the fact that the new color isn’t anchored securely and as I continue to crochet the initial stitch and first several in the new color work their way lose and the stitching separates. I’ve seen so many projects on video tutorials made using this technique, and it works beautifully and seamlessly for them, so I know it works. What might I be missing after the initial change to the new color? How do you anchor your yarn tails securely? Thank you for the tutorial! I love the earthy colors you are using. I have been crazy over jewel tones, but will never give up on my earth tones. All colors belong in crochet! 😀
Lovely tutorial! 🙂
I am trying to make a baby afghan of an elephant. I have never worked with graphs and changing colors. My is this I basically am using grey for elephant ,white as background and black yarn to outline and grey for everything except bottom of fee and ears which are pinkt, blue eyes and red mouth should I carry the yarn or should I keep changing after each row.
confused need help ready to crap the whole project
thanks
Pat