
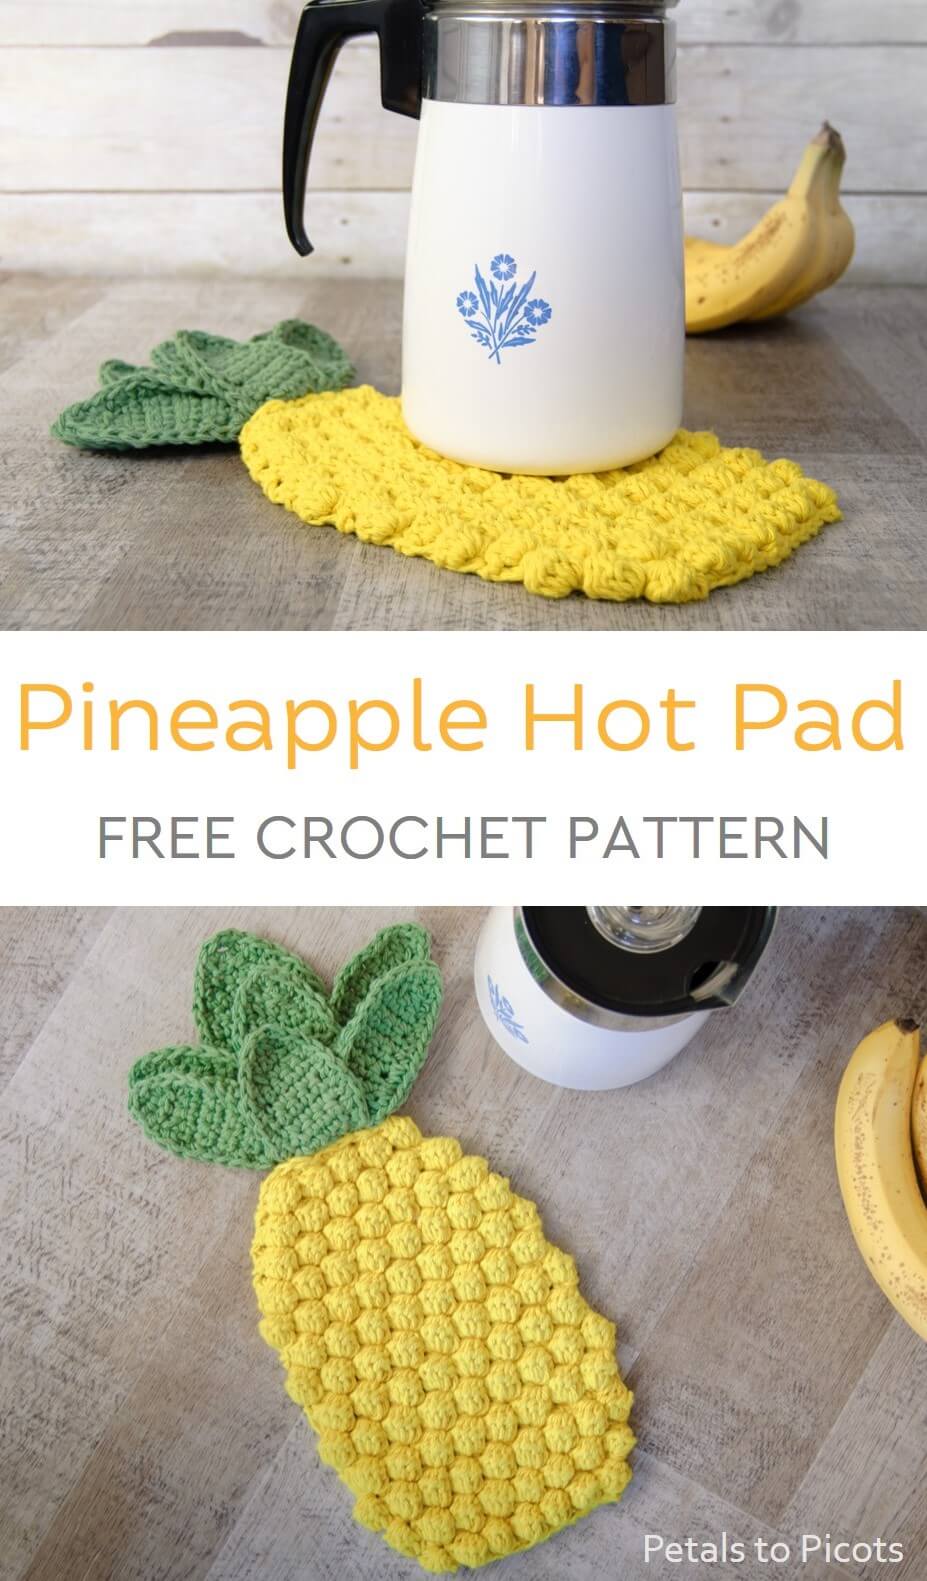
This pineapple crochet hot pad pattern makes for an easy and portable project as well as a bright and cheery addition to your decor. The pineapple has long been used as an expression of welcome and a symbol of hospitality and friendship. What better adornment for your dining table or to gift to a friend!
The cluster stitches used in this hot pad pattern produce a beautifully thick and textured fabric that is perfect for protecting your table from hot dishes. For extra protection, you can use an insulating fabric such as Insul-Bright to line the bottom of the hot pad; however, I have not found that necessary for these.
I stitched mine up with two colors of worsted-weight cotton. Cotton yarn is a must when making crochet hot pads or pot holder patterns. Synthetic yarns like acrylic can melt when a hot dish is placed on it, ruining not only your hot pad but possibly your table as well!
Pineapple Hot Pad
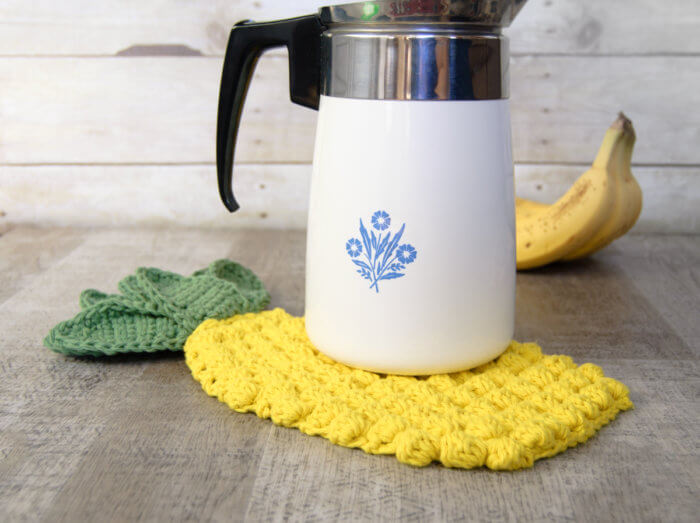
Pineapple Crochet Hot Pad Pattern
Here is what you will need:
- two colors of cotton yarn, approximately 120 yds of yellow and 75 yds of green (shown here in Lion Brand 24/7 Cotton® in the Grass #172 and Lemon #157 colorways)
- US H-8 / 5 mm crochet hook
- yarn needle and scissors for finishing
- Insul-Bright (optional)
Finished hot pad measures approximately 15 in. from bottom of pineapple to top of leaves.
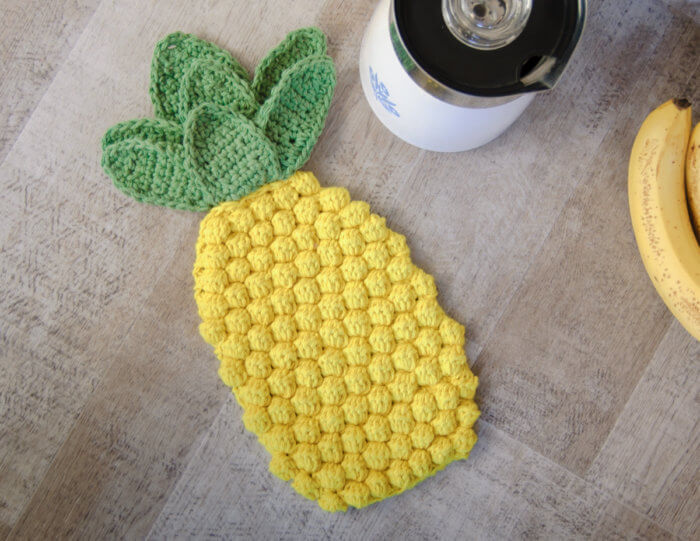
This free crochet pattern is written in U.S. crochet terms and abbreviations. Stitch counts are provided throughout the pattern to help you keep on track.
Helpful Crochet Resources: Refer to my Crochet Abbreviations and U.S. to U.K. Crochet Conversion Chart as you work through the pattern.
Pineapple hot pad Body
Special Stitch: 5 Double Crochet Cluster (5dc-cl) – yarn over and insert hook in specified stitch, yarn over and bring up a loop, yarn over again and pull through 2 loops on hook (2 loops remain on hook), *yarn over and insert hook in same stitch, pull up a loop, yarn over and pull through 2 loops, repeat from * 3 more times (6 loops on hook), yarn over and pull through remaining loops.
Add this pattern to your Ravelry library.
With yellow yarn, chain 14.
Row 1: Work 1 single crochet in second chain from hook and in each chain across, turn — 13 sc.
Row 2: Ch 1 (does not count as stitch here and throughout), work 5dc-cl in first stitch, *sc in next stitch, 5dc-cl in next stitch, repeat from * across, turn — 7 cluster stitches, 6 sc.
Row 3: Ch 1, work 2 sc in first stitch, work 1 sc in next stitch and in each stitch across until the last, work 2 sc in last st, turn — 15 sc.
Row 4: Repeat Row 2 — 8 cluster stitches, 7 sc.
Row 5: Repeat Row 3 — 17 sc.
Row 6: Repeat Row 2 — 9 cluster stitches, 8 sc.
Row 7: Ch 1, work 1 sc in each stitch across, turn — 17 sc.
Row 8: Ch 1, work 1 sc in first stitch, *5dc-cl in next stitch, 1 sc in next stitch, repeat from * across, turn — 8 cluster stitches, 9 sc.
Row 9: Ch 1, work 1 sc in each stitch across, turn — 17 sc.
Row 10: Ch 1, work 5dc-cl in first stitch, *sc in next stitch, 5dc-cl in next stitch, repeat from * across, turn — 9 cluster stitches, 8 sc.
Rows 11 through 18: Repeat Rows 7 through 10 twice.
Rows 19 and 20: Repeat Rows 7 and 8.
Row 21: Ch 1, sc2tog, work 1 sc in next stitch and in each stitch across until the last 2 stitches, sc2tog, turn — 15 sc.
Row 22: Ch 1, work 1 sc in first stitch, *5dc-cl in next stitch, in next stitch, repeat from * across, turn — 7 cluster stitches, 8 sc.
Row 23: Repeat Row 21 — 13 sc.
Row 24: Repeat Row 22 — 6 cluster stitches, 7 sc.
Row 25: Repeat Row 21 — 11 sc.
Row 26: Repeat Row 22 — 5 cluster stitches, 6 sc.
Row 27: Repeat Row 21 — 9 sc.
Fasten off, weave in ends.
Pineapple Leaves
Leaf A (make 1)
With green yarn, chain 8.
Row 1: Work 1 sc in second chain from hook and each chain across — 7 sc.
Rows 2 through 13: Ch 1, work 1 sc in each stitch across, turn — 7 sc.
Row 14: Ch 1, sc2tog, work 1 sc in each of the next 3 sts, sc2tog, turn — 5 sc.
Row 15: Ch 1, sc2tog, work 1 sc in next st, sc2tog, turn — 3 sc.
Row 16: Ch 1, sc3tog — 1 sc.
Edging: Work a sc edging evenly around leaf, working 3 scs in top point and bottom corners.
Fasten off.
Leaf B (make 4)
Chain 5.
Row 1: Work 1 sc in second chain from hook and each chain across — 4 sc.
Rows 2 through 10: Ch 1, work 1 sc in each stitch across, turn — 4 sc.
Row 11: Ch 1, sc2tog twice, turn — 2 sc.
Row 12: Ch 1, sc2tog — 1 sc.
Edging: Work a sc edging evenly around leaf, working 3 scs in top point and bottom corners.
Fasten off.
Leaf C (make 1)
Chain 6.
Row 1: Work 1 sc in second chain from hook and each chain across — 5 sc.
Rows 2 through 9: Ch 1, work 1 sc in each stitch across, turn — 5 sc.
Row 10: Ch 1, sc2tog, 1 sc in next, sc2tog, turn — 3 sc.
Row 11: Ch 1, sc3tog — 1 sc.
Edging: Work a sc edging evenly around leaf, working 3 scs in top point and bottom corners.
Fasten off.
Leaf D (make 1)
Chain 6.
Row 1: Work 1 sc in second chain from hook and each chain across — 5 sc.
Rows 2 through 7: Ch 1, work 1 sc in each stitch across, turn — 5 sc.
Row 8: Ch 1, sc2tog, 1 sc in next, sc2tog, turn — 3 sc.
Row 9: Ch 1, sc3tog — 1 sc.
Edging: Work a sc edging evenly around leaf, working 3 scs in top point and bottom corners.
Fasten off.
Leaf Assembly
Step 1: Place Leaf A down and place a Leaf B over each side, tilting slightly outward. Slightly fold over the bottom corners of each of the Leaf Bs as shown below. Using a tapestry needle and green yarn (a tail from one of the leaves works great for this!), stitch across the bottom through all leaves to secure.
Step 2: Place Leaf C on top of previous leaves, making sure bottoms are aligned. Use a yarn needle and green yarn to stitch across the bottom to secure.
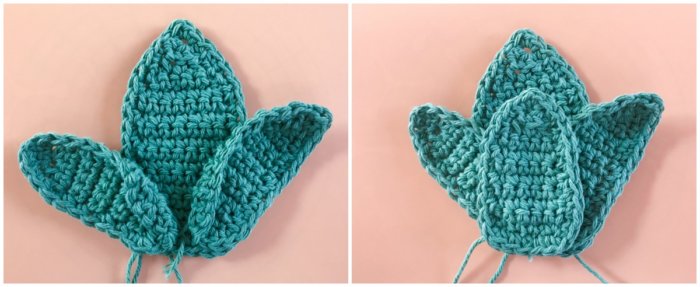
Step 3: Place a Leaf B over each side, tilting slightly outward. Slightly fold over the bottom corners of each of the Leaf Bs as shown below. Using a tapestry needle and green yarn, stitch across the bottom through all leaves to secure
Step 4: Place Leaf D on top of previous leaves, making sure bottoms are aligned. Use a yarn needle and green yarn to stitch across the bottom to secure.
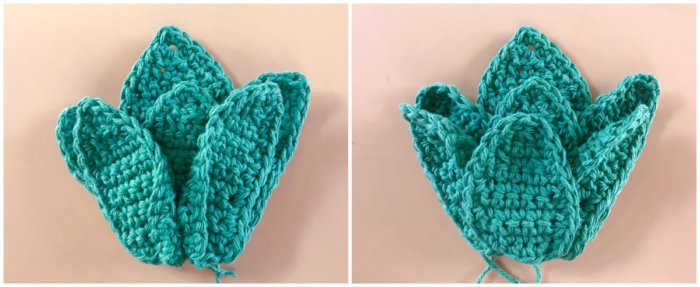
← Step 3 and Step 4 →
Finishing
Fasten off, weave in ends. Using a yarn needle and yellow yarn, stitch leaves to the wrong side of the pineapple body.
OTHER PROJECTS YOU MAY ENJOY:
- Woven Crochet Potholder
- 4 Quick & Easy Crochet Dishcloth Patterns
- Flower Crochet Scrubby
- Woven Placemats
Find more free crochet kitchen patterns here.


Leave a Reply