
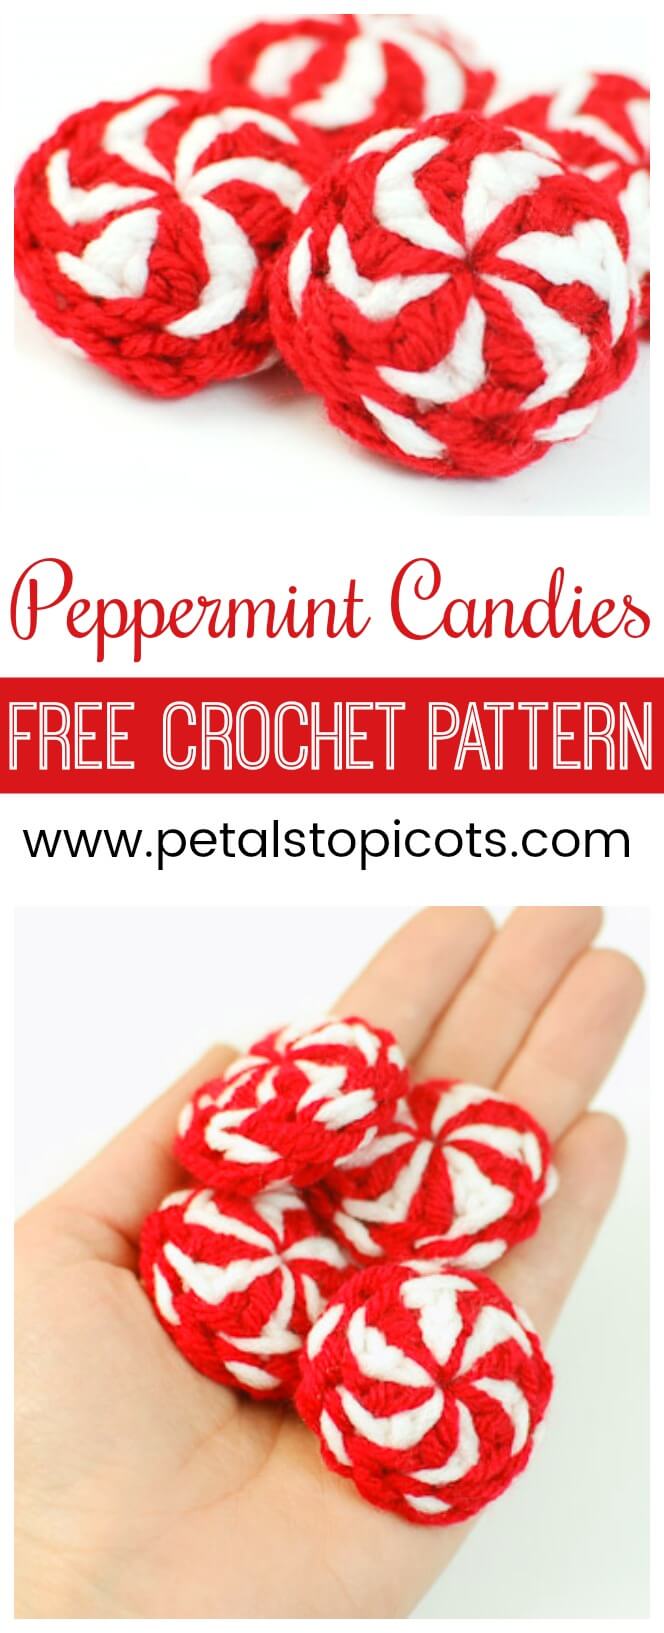
This free peppermint candy crochet pattern is a quick and easy Christmas project you can make with just red and white yarn. These sweet little crochet peppermints have a classic swirled candy design reminiscent of holidays past, and they’re so simple you can easily make a whole bowlful in an evening.
The peppermint candies are worked in the round using basic double crochet stitches, with alternating red and white yarn creating the swirl. I’ve included step-by-step photos below to show you how to change colors seamlessly as you work.
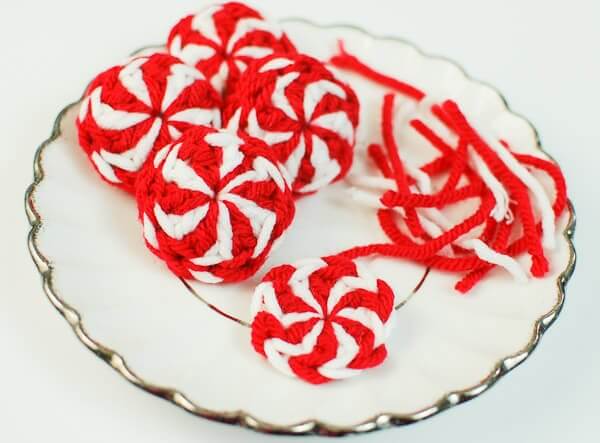
Leave your finished peppermint flat to use as an appliqué or decoration, or crochet two and join them together to make a thicker peppermint candy. They’re perfect for adding to Christmas decorations, garlands, gifts, or a bowl of handmade holiday treats.
Love peppermint crochet? Try my Christmas Peppermint Crochet Scrubby Pattern or my Peppermint Swirl Coasters next.
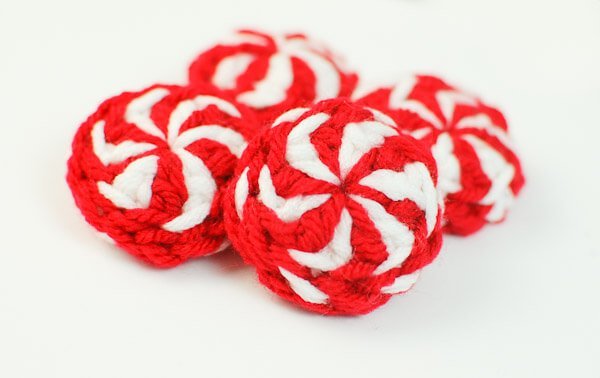
About This Peppermint Crochet Pattern
- Skill level: Easy
- Yarn: Worsted weight yarn in red and white
- Hook: 4 mm (US G-6)
- Stitches used: Chain, double crochet, and slip stitch
- Construction: Worked in the round
- Colors: Red and white
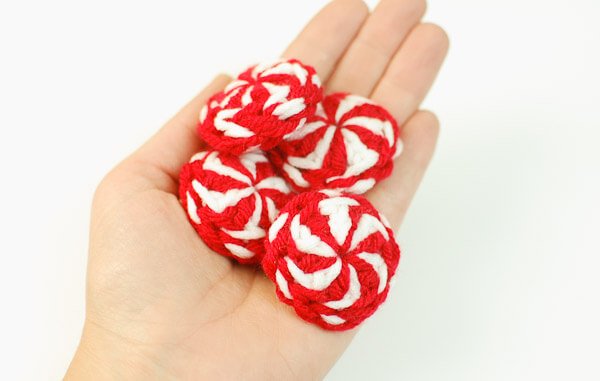
Supplies
Crochet Abbreviations
- ch = chain
- dc = double crochet
- sl st = slip stitch
- st(s) = stitch(es)
Resources and tutorials you may find helpful in following this pattern: Crochet Abbreviations, U.S. to U.K. Crochet Conversion Chart.
Add this pattern to your Ravelry library.
How to Crochet a Peppermint Candy
Each peppermint is made with 12 double crochet stitches worked in the round, alternating between white and red to create the peppermint swirl. To make the color changes as seamless as possible, change colors on the final yarn over and pull-through of each double crochet. The step-by-step photos below will walk you through the process.
With white, ch 3. Join red by pulling up a loop and making a 4th ch as shown (counts as first dc).
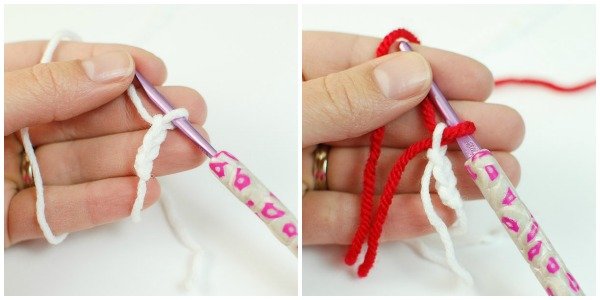
With red, begin making a double crochet by yarning over and inserting the hook into the furthest chain from the hook, pulling up a loop (3 loops on hook), yarn over, and pull through 2 loops (2 loops on hook).
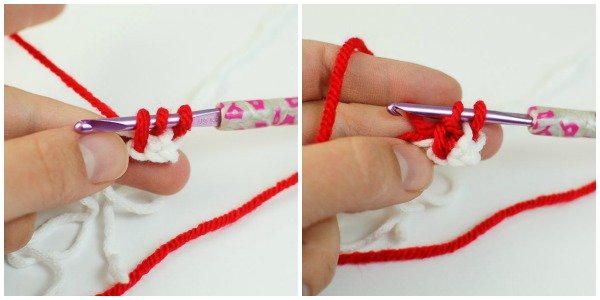
Yarn over and complete double crochet with white. Continuing with white, begin next double crochet by yarning over and inserting the hook back into the same chain as the last double crochet was worked, pull up a loop (3 loops on hook), yarn over, and pull through 2 loops (2 loops on hook). Yarn over and complete double crochet with red.
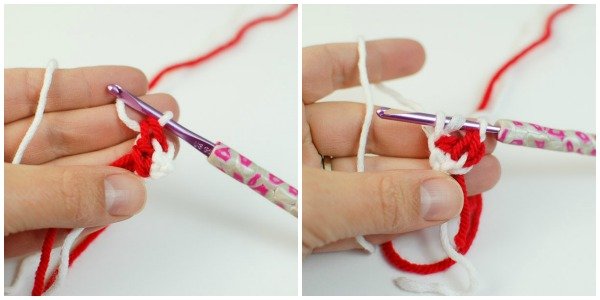
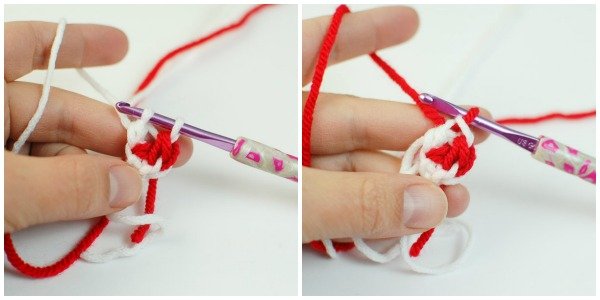
Continue working double crochets into the ring until you have 12 stitches (remember the beginning chain counts as a stitch). On your final double crochet, again yarn over and complete double crochet with white.
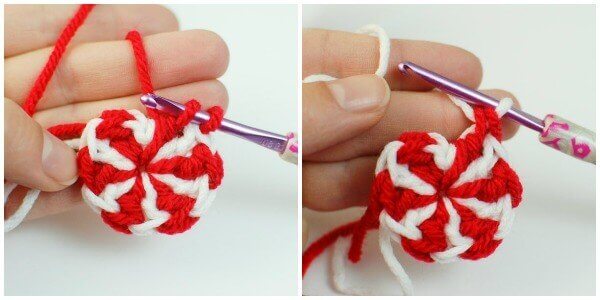
You now have all your stitches done. You can either join the round with a traditional sl st in the top of the beginning chain, or you can try the invisible join. I think the invisible join leaves a nice finish.
Here’s how to do it …
Invisible Join
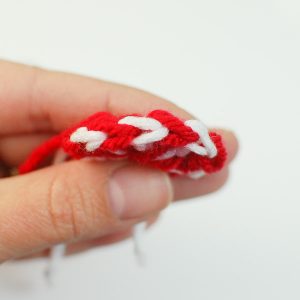
Cut yarn and fasten off after the last stitch. Using a tapestry needle, weave the tail under both loops of the second stitch of the round, then weave it back into the center of the last stitch.
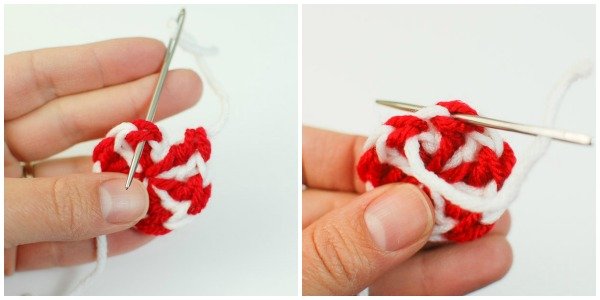
That’s it! It looks just like a regular stitch … cool, huh?!
Finishing Your Crochet Peppermint
You can either weave in your ends now and leave the piece as is or sew two together for more of a candy look.
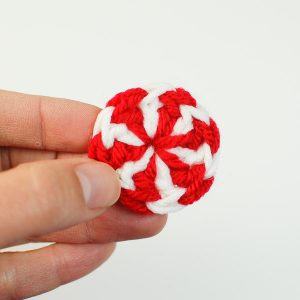
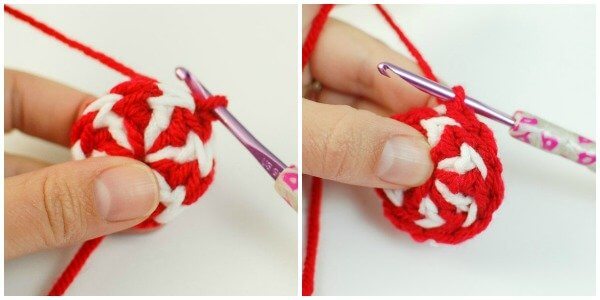
To attach two together, put wrong sides facing and slip stitch through back loops of each.
Finito!
Enjoy!
More Christmas Crochet Patterns
- Christmas Tree Skirt Pattern
- Woodland Christmas Tree Crochet Pattern
- Fair Isle Snowflake Christmas Stocking Crochet Pattern
- Santa Wine Bottle Tote Pattern
Find Community
I would love to see your finished projects; share them with me on Instagram, Facebook, or the Petals to Picots Community.


To cute. These will be perfect for my 4 year old.. to use as hair clips for her ballet peppermint twist act.. 🙂
Great idea!
I know this pattern doesn’t call for it, but I have a magic ring question. I just learned about this technique, it’s pretty cool. But, my problem is my stitches seem to be very tight in the ring which makes them very small. Is this how it should be, or does it just take practice? Are there any other tips you can provide? Thanks so much, love your site.
I do have a magic ring tutorial and video under the menu option for crochet tutorials. It is normal for the stitches to seem slightly bunched together in the ring. Is that what you mean?
Yes, and yours is the tutorial I watched 🙂 Got the link from Repeat Crafter Me.
Love this pattern!! I have already made several but sometimes I end up with a huge hole in the center. I try to tighten and loosen my stitches but still get it. Do you have any suggestions as to what I’m doing wrong? Thanks for the pattern.
Wow Kara! These are so festive and another great tutorial!
I’m wondering… would you be able to do this with just one color and then make it into an ornament?
These peppermints are so cute! I wonder if a 2nd row could be added to make them bigger (to use as a makeup scrubbie)?
That is a fabulous idea! To add a second round, just work 2 dc in each dc around 🙂
I love that Idea Nance I make alot of face scrubbies, so I will make them for sure. Thanks Nance.
Lovely and Super cute!!! Thanks for sharing the pattern.
These look REALLY cute! I so have to make them! Thanks for posting the pattern!
Oh, my…these are super cute!!! you are so creative, Kara 🙂
These are really nice!!!!
thank you so much, xxxxxx Ale
I am so going to enjoy making these, Thankyou Karen