
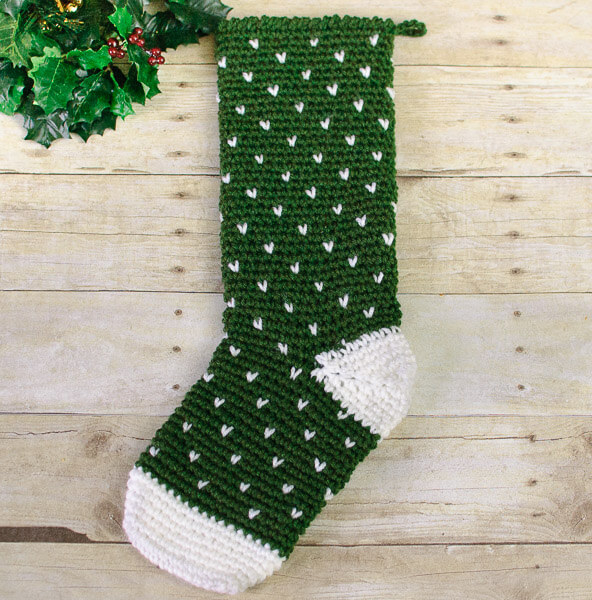
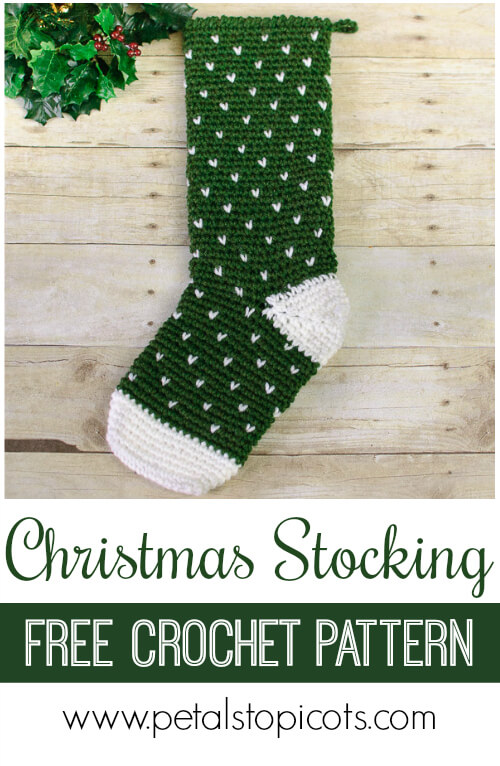
Crochet up this Evergreen Christmas Stocking to add a cozy, handmade touch to your holiday decor! Hang your finished stockings from the mantel or, like me, display them along your stair banister. With its classic design, this stocking fits beautifully into a variety of decorating styles, whether your home is modern, traditional, rustic, or farmhouse.
This free beginner-to-intermediate crochet pattern uses simple single crochet stitches, straightforward color changes, and basic decreases—no special stitches required! All you need is two balls of worsted weight yarn and a weekend to create a beautiful handmade stocking that can become a treasured holiday keepsake for years to come.
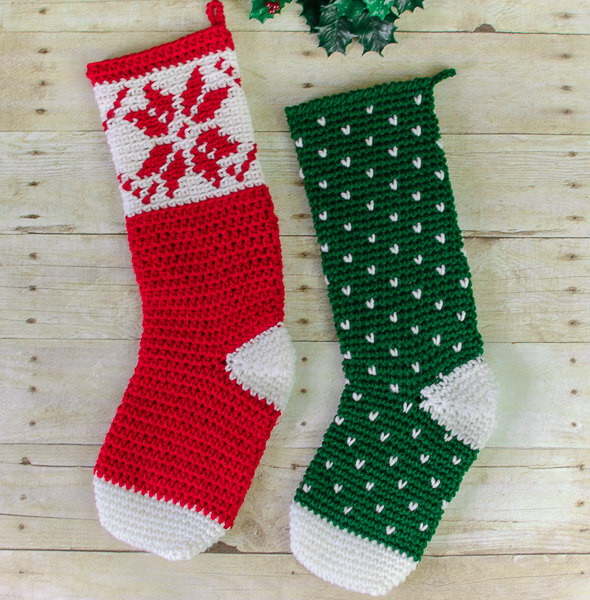
Pair it with the coordinating Fair Isle Snowflake Stocking Crochet Pattern for a beautiful and cozy Christmas display.
About This Pattern
- Skill level: Beginner to intermediate
- Stitches: Single crochet
- Yarn: Worsted weight
- Hook: 5 mm (H-8)
- Finished size: 18.5 in. long × 5.5 in. wide
- Yarn needed: Approximately 218 yards of each color
- Colors: 2
Evergreen Christmas Stocking Crochet Pattern
What You’ll Need
- 2 colors worsted weight yarn, approx. 218 yds each (such as Lion Brand Yarn Vanna’s Choice or as shown here in Knit Picks Brava Worsted in Hunter and White)
- H-8 / 5 mm crochet hook
- stitch markers (optional)
- scissors and tapestry needle for finishing
Available as a convenient, ad-free PDF download here.
Prefer a printable pattern? Get the ad-free PDF version of this stocking pattern, formatted for easy printing.
Pattern Notes
- This free crochet pattern is written in US terms and abbreviations. You can refer to my U.S. to U.K. Crochet Conversion Chart to convert the crochet terms.
- Stitch counts are provided at the end of each round to help you keep on track.
- Gauge: 14 sc and 13 rows = approx. 4 in.
- Finished stocking measures approximately 18.5 in. long and 5.5 in. wide.
- CA = white; CB = green
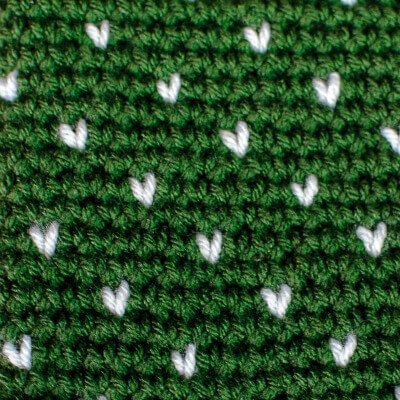
- To create the color change effect shown here, when working the CA single crochet, pull up a loop with CA, then yarn over and finish the stitch with CB.
- This Evergreen Christmas Stocking is not worked as a conventional sock but is designed to lay nicely when hung.
- If you choose to use bulky yarn, please increase the crochet hook size to the appropriate size (the finished dimensions of the stocking will also be larger).
- Beginner to intermediate skill level.
Abbreviations
- CA – color A (white)
- CB – color B (green)
- ch – chain
- sc – single crochet stitch
- Sl st – slip stitch
- st – stitches
- sc2tog – single crochet 2 stitches together (decrease)
- sc3tog – single crochet 3 stitches together (decrease)
- rep – repeat
Crochet Christmas Stocking Instructions
Toe
With CA, ch 11.
Round 1: Insert hook in the second chain from the hook and work 2 sc; work 1 sc in each of the next 8 ch, 4 sc in last ch; rotate to work along opposite side of chain, work 1 sc in each of the next 8 ch, 2 sc in last ch, join with a Sl st in first sc of round – 24 sts.
Round 2: Ch 1 (does not count as st here and throughout), work 2 sc in first st, 1 sc in each of the next 10 sts, work 2 sc in each of the next 2 sts, 1 sc in each of the next 10 sts, work 2 sc in last st, Sl st to join – 28 sts.
Round 3: Ch 1, work 1 sc in each st around, join – 28 sts.
Round 4: Ch 1, work 2 sc in first st, 1 sc in each of the next 12 sts, work 2 sc in each of the next 2 sts, 1 sc in each of the next 12 sts, work 2 sc in last st, join – 32 sts.
Round 5: Ch 1, work 1 sc in each st around, join – 32 sts.
Round 6: Ch 1, work 2 sc in first st, 1 sc in each of the next 14 sts, work 2 sc in each of the next 2 sts, 1 sc in each of the next 14 sts, work 2 sc in last st, join – 36 sts.
Round 7: Ch 1, work 1 sc in each st around, join – 36 sts.
Drop CA but do not fasten off; carry CA up rows inside the stocking.
Foot
Round 8: Join CB, ch 1, work 1 sc in each st around to the last stitch, join – 36 sts.
Round 9: Continuing with CB, ch 1, work 1 sc in each st around, join – 36 sts.
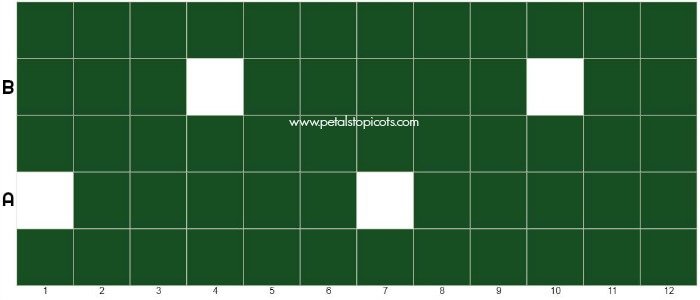
Round 10: Following color changes in row A of the charted pattern below (also see note above on color changes), ch 1, *work 1 CA sc in the next stitch, 1 CB sc in each of the next 5 sts, repeat from * around, join – 36 sts.
Round 11: With CB ch 1, work 1 sc in each st around; join – 36 sts.
Round 12: Following color changes in row B of charted pattern below, ch 1, *work 1 CB sc in each of the next 3 sts, 1 CA sc in next st, *1 CB sc in each of the next 5 sts, 1 CA sc in next st, repeat from * around until 2 sts remain, work 1 CB sc in each of the last 2 sts, join – 36 sts.
Rounds 13 through 24: Repeat Rounds 9 through 12.
Fasten off CB.
Heel Opening
Round 25: On the same side as the fasten-off, Rejoin CB in the center stitch right before a CA st. Ch 1, work 1 sc in same st, ch 18, skip next 18 sts (for the heel), work 1 sc in each of the remaining 17 sts, join – 36 sts.
Leg
Leaving skipped heel sts for now, continue working pattern in sts and chains from Round 25.
Round 26: Following color changes in row B of charted pattern above, ch 1, *work 1 CB sc in each of the next 3 sts, 1 CA sc in next st, *1 CB sc in each of the next 5 sts, 1 CA sc in next st, repeat from * around until 2 sts remain, work 1 CB sc in each of the last 2 sts, join – 36 sts.
Round 27: With CB, ch 1, work 1 sc in each st around, join – 36 sts.
Round 28: Following color changes in row A of the charted pattern above, ch 1, *work 1 CA sc, 1 CB sc in each of the next 5 sts, repeat from * around, join – 36 sts.
Round 29: With CB, ch 1, work 1 sc in each st around, join – 36 sts.
Rounds 30 through 61: Repeat Rounds 26 through 29.
Cuff
Option 1 – Simple Ribbed-Look Cuff (as shown)
Continuing with CB and working back across the sts just made in Row 61, work 1 rev. sc in each st around, join.
Option 2 – Faux Fur Cuff
With faux fur yarn, work 1 sc in each stitch around, join.
Fasten off and use your yarn needle to weave in the ends.
Heel
Round 1: Join CA to first skipped st from Round 25, ch 1, sc2tog decrease, 1 sc in each of the next 14 sts, sc2tog; rotate to work in bottom loops of ch from Round 25, sc2tog, 1 sc in each of the next 14 sts, sc2tog, join in first st – 32 sts.
Round 2: Ch 1, sc2tog, 1 sc in each of the next 12 sts, sc2tog, sc2tog, 1 sc in each of the next 12 sts, sc2tog, join in first st – 28 sts.
Round 3: Ch 1, sc2tog, 1 sc in each of the next 4 sts, sc2tog, 1 sc in each of the next 4 sts, sc2tog, sc2tog, 1 sc in each of the next 4 sts, sc2tog, 1 sc in each of the next 4 sts, sc2tog, join in first st – 22 sts.
Round 4: Ch 1, sc2tog, 1 sc in each of the next 7 sts, sc2tog, sc2tog, 1 sc in each of the next 7 sts, sc2tog, join in first st – 18 sts.
Round 5: Ch 1, sc2tog, 1 sc in each of the next 5 sts, sc2tog, sc2tog, 1 sc in each of the next 5 sts, sc2tog, join in first st – 14 sts.
Round 6: Ch 1, sc2tog, sc3tog, sc2tog, sc2tog, sc3tog, sc2tog, join in first st – 6 sts.
Fasten off, leaving a long tail to sew the hole closed; weave in ends.
Hanging Loop
To make a loop to hang the stocking, join yarn to the top corner, chain 10, St st back in the same stitch as the yarn was joined, fasten off, and weave in ends to secure.
Color Change Chart
See the chart below for the color repeat rows.
Make It a Set
The more the merrier … make a set of crochet stockings with my Fair Isle Snowflake Stocking Pattern.
More Christmas Crochet Patterns
I hope you enjoy these free crochet Christmas stocking patterns! Click here for more free Christmas crochet patterns.
Frequently Asked Questions
What skill level is this crochet Christmas stocking?
This pattern is suitable for beginner-to-intermediate crocheters. It uses single crochet stitches, simple color changes, and basic decreases.
How much yarn do I need for this stocking?
You will need approximately 218 yards of each of the two worsted-weight yarn colors.
Can I make this stocking in different colors?
Absolutely! This stocking would look beautiful in a variety of color combinations. Try traditional red and white, blue and white, or choose colors that coordinate with your holiday decor.
Can I use bulky yarn for this Christmas stocking?
Yes. You can substitute bulky yarn, but you’ll need to increase your hook size accordingly, and the finished stocking will be larger.
Can I add a fur cuff?
Absolutely! An optional faux-fur or sparkly-yarn cuff can be added in place of the finished cuff shown in the pattern.
Find Community
I would love to see your finished stockings; share them with me on Instagram, Facebook, or the Petals to Picots Community.
YOU MAY ALSO ENJOY …
- Crochet Tutorials
- Christmas Crochet … From Dining to Decor
- Lace Angel Pattern
- Peppermint Crochet Scrubby Pattern
- Fair Isle Snowflake Christmas Stocking Crochet Pattern
- Santa Wine Bottle Tote Pattern
- Christmas Tree Crochet Pattern


I am having the same problem. There are no pictures or instructions to help clear this up at all :/
after fasten off, rejoin CB in the “middle” of the crochet st, which is considered the center of the crochet CA st…
excuse me the center or the middle of the crochet st before the
CA crochet st.
omit my other two posts, as I too was finding the instructions confusing after many tries I folded the toe and foot lengthwise to find the center and worked from that point on which gives 18 sts on both sides and makes the toe point instead of a rectangle look.. at rounds 25 which is easier than the original instructions..I also shortened the length of the entire stocking by 4 rnds…
Hello 🙂
I am crocheting your wonderful Evergreen Christmas Stocking, but I am running into trouble in round 25. Can you explain to me, where to rejoin CB excactly? When I rejoin as you say, the pattern doesn’t add up.
Thank you so much!