
This easy crochet rose pattern works up in just two simple rows! Once you’ve crocheted the strip, roll it into shape and secure the layers together to create a pretty rose with lots of dimension.
Use your crochet roses to embellish hats, bags, scarves, and other projects, or make a bunch to create a whole bouquet. You can also pair them with my Crochet Rosebud and Leaf Pattern for even more possibilities.
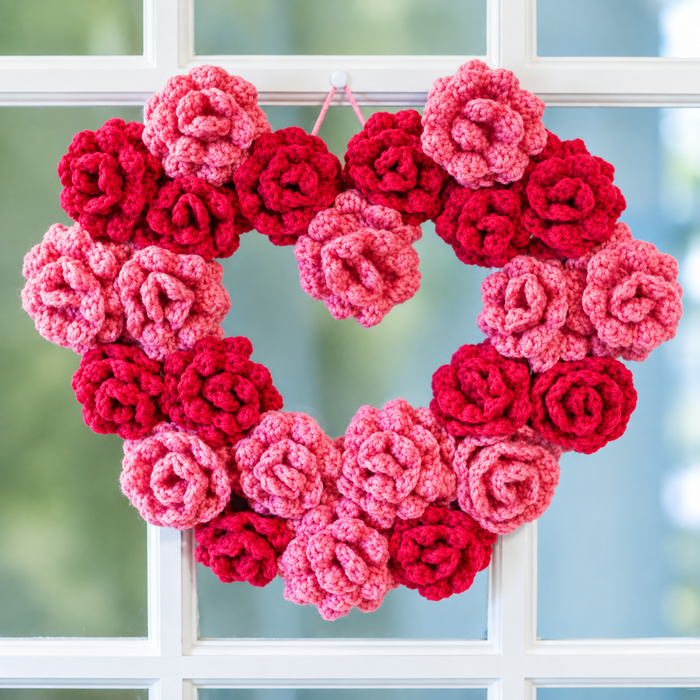
Want to turn your roses into something special? I’ve also included instructions for making the crochet rose heart wreath shown below.
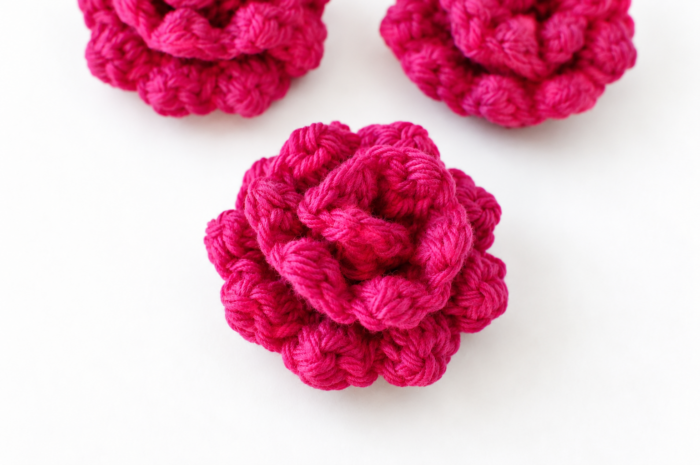
Crochet Rose Pattern
This rose is worked flat in two rows. The increases in the first row create the fullness needed for the flower, while the clusters in the second row form the individual petals. Once finished, the strip is simply rolled into a rose shape and secured at the bottom.
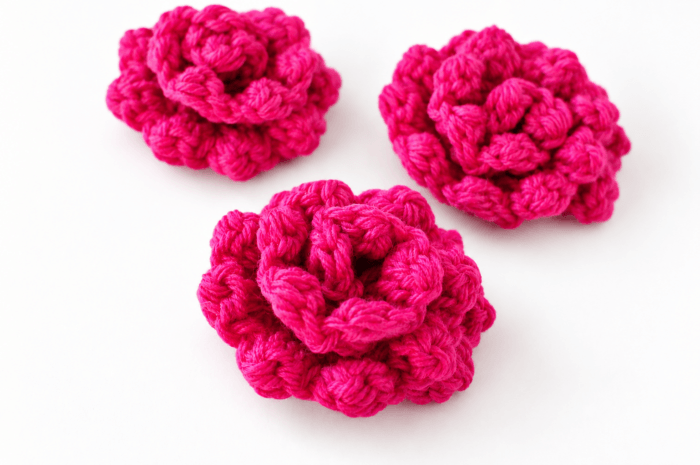
Pattern Details
- Skill level: Easy
- Yarn: Worsted-weight yarn
- Hook: 5 mm (US H-8), or appropriate hook for your chosen yarn
- Construction: Worked flat in two rows, then rolled and secured into shape
Materials
- Small amount of worsted-weight yarn
- 5 mm (US H-8) crochet hook
- Tapestry needle
- Scissors
This free crochet pattern is written in U.S. crochet terms and abbreviations. Stitch counts are provided throughout the pattern to help you keep on track.
Helpful Crochet Resources: Refer to my Crochet Abbreviations and U.S. to U.K. Crochet Conversion Chart as you work through the pattern.
Add this pattern to your Ravelry library.
Special Stitch
Two double crochet cluster (2dc-cl): Yarn over, insert hook into specified stitch, yarn over and pull up loop, yarn over and pull through 2 loops on hook, repeat once more (3 loops will be on hook), yarn over and pull through all 3 loops.
Rose Instructions
Ch 28.
Row 1: Work 2 dc in 4th ch from hook, *1 dc in next, 2 dc in next, rep from * across, turn — 39 sts.
Row 2: *Sl st in first st, ch 1 (does not count as st), 2dc-cl in next, ch 1 (does not count as st), sl st in next, rep from * across, do not turn — 39 sts.
Fasten off, leaving a tail about 6 inches (15 cm) long.
Shaping and Finishing the Crochet Rose
With the stitches from Row 2 facing outward, take the end with the beginning tail and begin rolling the strip into a flower shape. Keep the foundation edge tight as you roll, with the beginning tail in the center and the ending tail on the outside.
The photo below shows how the bottom of your flower should look.
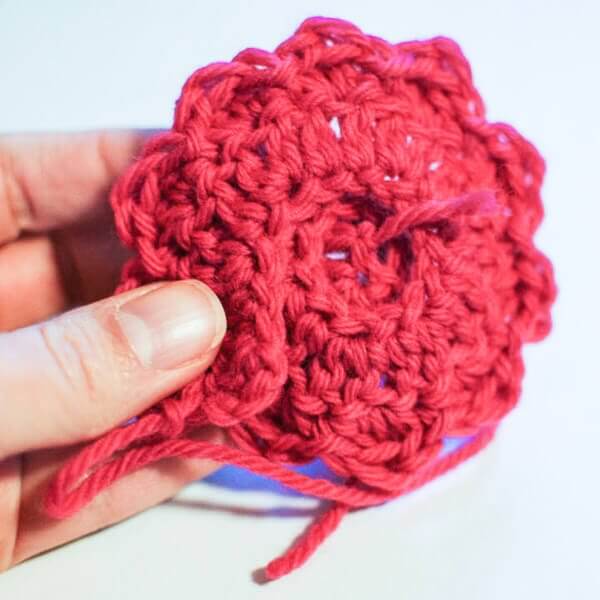
Thread the ending tail onto a tapestry needle and weave it back and forth through the bottom of the rose, making sure to catch all the layers. This will hold the rolled flower securely in place.
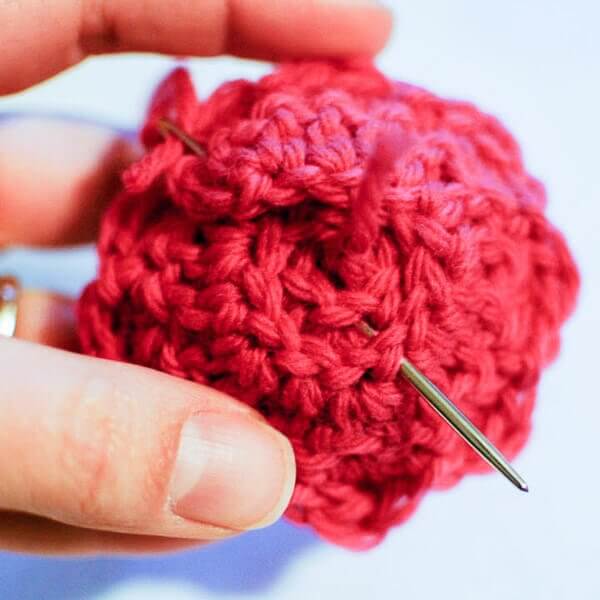
Once your rose is secure, gently adjust the petals until you’re happy with the shape. That’s it! Your crochet rose is ready to use as an embellishment or turn into the pretty wreath below.
Crochet Rose Heart Wreath
Create a whole wreath of crochet roses! I originally made this heart-shaped wreath as a Valentine’s Day decoration, but I loved it so much that I kept it up all year long.
How to Make the Rose Wreath
To make the wreath, you’ll need a heart-shaped base. I originally cut mine from a thick piece of cardboard, but a foam heart wreath form would also work well and provide a sturdier base.
Using the crochet rose pattern above, make enough roses to completely cover your wreath form. I used two coordinating yarn colors, but you could make all your roses in one color or mix several colors for a different look.
Arrange the roses over the form until you’re happy with their placement, then secure them with hot glue. If you’re using a foam wreath form, you can also use pins to help hold the flowers in place.
Crochet a few additional roses if needed to fill any gaps.
And that’s it — you have a pretty crochet rose wreath! Mine started out as Valentine’s Day decor, but the colors can easily be changed to make one for spring, Mother’s Day, weddings, or everyday decorating.
See more creative ways fellow stitchers have used this free crochet rose pattern on Ravelry.
Find more free crochet flower patterns here.
More Crochet Flower Patterns
- Crochet Rosebud and Leaf Pattern
- Sweet and Simple Crochet Flower Pattern
- Stacked Flower Crochet Pattern
- Swirl Flower Crochet Pattern – Embellish Anything!
- Spiral Flower Crochet Pattern
Find Community
I would love to see your finished projects; share them with me on Instagram, Facebook, or the Petals to Picots Community.


Oh awesome! I’ve been looking for a really good rose pattern, and this one is so easy! Thanks for sharing at Hookin On Hump Day, Kara! Pinning this one.
love crochet flowers……will be back to take a good look around. Following you
Janice
How nice!! You did a great job!
Oh, what a beautiful embellishment. I love it, Kara!
Although I’ve mastered the standard scarf and even a blanket or two, my lack of practice leaves me a crochet novice. Still, I think I can tackle these little beauties! While perusing the blogosphere, I came across your lovely corner of the net. So happy to be following along.
Very cute! These would look great on so many different projects!
Very pretty! Love these.
Very pretty! Love these.
These are so cute! thanks for sharing
That’s a really lovely pattern-thank you for sharing!