
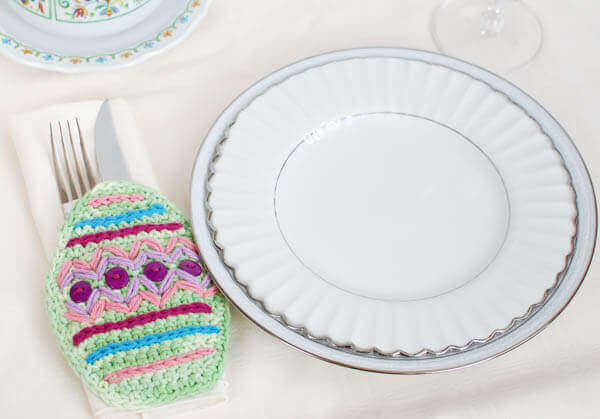
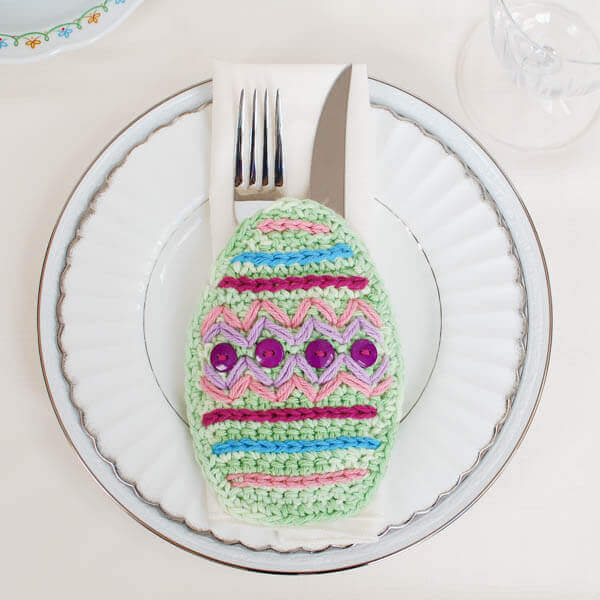
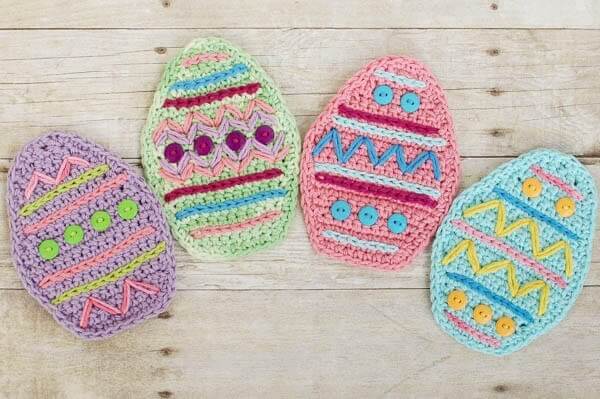
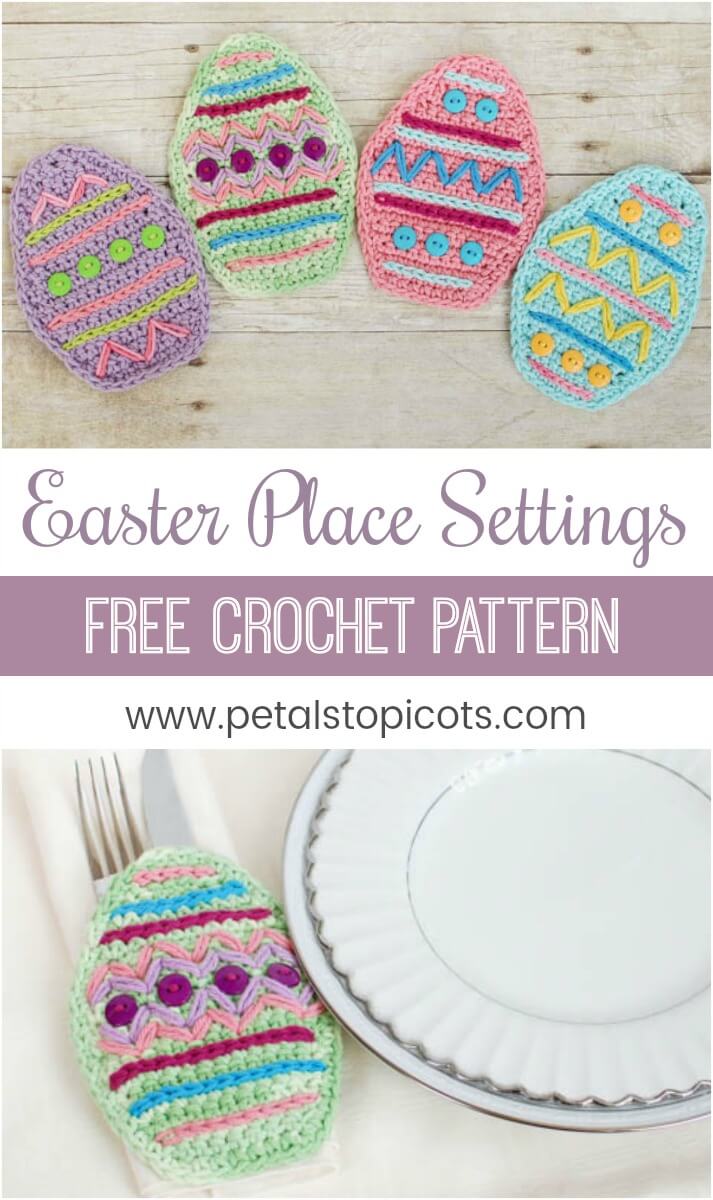
I am so excited to set my table this Easter! I designed this crochet Easter Place Setting Pattern and just love how it came out!! I worked up a bunch in different colors and had so much fun decorating each one. I used buttons and some contrasting stitching here but there are so many options you can use too … ric rac, beads, etc. I even stitched on a little back band to hold a napkin and utensils.
These would even be great as coasters too!
Crochet Easter Place Setting
Here is what you will need to make this Crochet Easter Place Setting Pattern:
- worsted weight cotton yarn in various Spring colors (shown here in Lily Sugar ‘n Cream® Yarn)
- H-8 / 5.0 mm hook
- buttons, ribbon, ric rac, or any type of embellishment you like
- yarn needle and scissors
This free pattern is written in U.S. crochet terms and abbreviations. Stitch counts are provided at the end of each round to help you keep on track.
Resources and tutorials you may find helpful in following this pattern: Crochet Abbreviations, U.S. to U.K. Crochet Conversion Chart.
Add pattern to your Ravelry library.
Egg
Ch 9.
Row 1: Work 1 sc in 2nd ch from hook and each ch across, turn — 8 sts.
Row 2: Ch 1 (does not count as st here and throughout), work 2 sc in first st, 1 sc in each of the next 6 sts, 2 sc in last st, turn — 10 sts.
Row 3: Ch 1, work 1 sc in each st across, turn — 10 sts.
Row 4: Ch 1, work 2 sc in first st, 1 sc in each of the next 8 sts, 2 sc in last st, turn — 12 sts.
Row 5: Ch 1, work 1 sc in each st across, turn — 12 sts.
Row 6: Ch 1, work 2 sc in first st, 1 sc in each of the next 10 sts, 2 sc in last st, turn — 14 sts.
Row 7 through 11: Ch 1, work 1 sc in each st across, turn — 14 sts.
Row 12: Ch 1, sc2tog, 1 sc in each of the next 10 sts, sc2tog in last st, turn — 12 sts.
Row 13: Ch 1, work 1 sc in each st across, turn — 12 sts.
Row 14: Ch 1, sc2tog, 1 sc in each of the next 8 sts, sc2tog in last st, turn — 10 sts.
Row 15: Ch 1, work 1 sc in each st across, turn — 10 sts.
Row 16: Ch 1, sc2tog, 1 sc in each of the next 6 sts, sc2tog in last st, turn — 8 sts.
Row 17: Ch 1, work 1 sc in each st across, turn — 8 sts.
Row 18: Ch 1, sc2tog, 1 sc in each of the next 4 sts, sc2tog in last st, turn — 6 sts.
Row 19: Ch 1, sc2tog, 1 sc in each of the next 2 sts, sc2tog in last st, turn — 4 sts.
Row 20: Ch 1, sc2tog twice, fasten off — 2 sts.
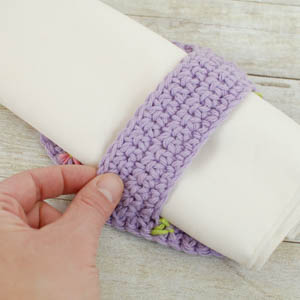
Back Band
Ch 15.
Row 1: Work 1 sc in 2nd ch from hook and each ch across, turn — 14 sts.
Rows 2 through 5: Ch 1, work 1 sc in each st across, turn — 14 sts.
Fasten off leaving a tail of approximately 6 inches.
Finishing
Now is your chance to have lots of fun! Decorate your eggs to your heart’s content … embroider, add some buttons, glue on some ric rac … there is no limit to what you can do!
Once you have your egg decorated, use a tapestry needle and the long tail left on your back band to sew the band to your egg. Stitch together at the edges of rows 7 through 11, weave in ends.
Edging
With the right side of your work facing you, work a sc edging evenly around the egg, working 2 sc at each of the bottom corners of the egg.
Click here for more Free Easter Crochet Patterns.

Video tutorial ???❤️
Those are very cute cozies, Kara!! I liked the idea of the band on the back side 🙂
Thanks so much, Preeti 🙂
Very neat! I love adding little things all around the house for the different holidays. This place setting is a nice addition. Pinning.
So pretty! Thanks so much or sharing.
These are adorable! Will certainly try them.
Buen día. Es precioso. pero no puedo hacerlo, pues a mi me cuesta entender los patrones, por esto, le agradecería si pudiera poner los gráficos o vídeos.
Un saludo,
Carmen of Spain
These are so cute, love them! Perfect for Easter!
Totally agree!