
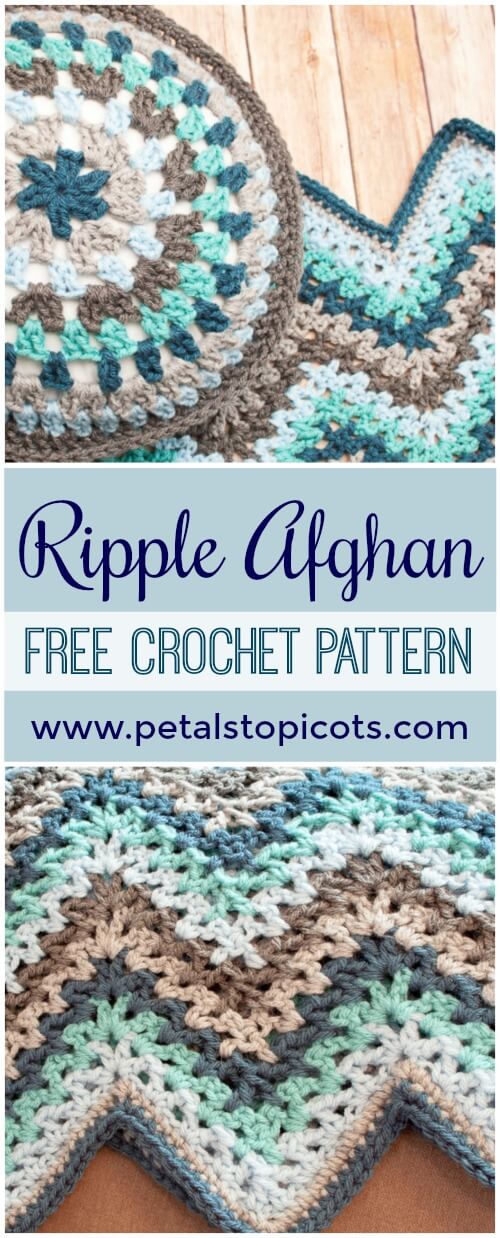
This V-stitch ripple crochet pattern puts a contemporary twist on the classic ripple afghan. Instead of a solid ripple design, V-stitches create a pretty, open texture while increases and decreases give the blanket its wavy shape. It’s just the thing for curling up with on those chilly autumn evenings!
One of my favorite things about ripple afghans is the opportunity to play with color. And don’t let all those color changes intimidate you! The yarn is carried up the sides of the afghan, so there’s no need to fasten off and rejoin with every color change. I’m all about keeping things simple!
When you’re finished with your blanket, you can use your leftover yarn to make a matching pillow. You can find the coordinating crochet pillow pattern here.
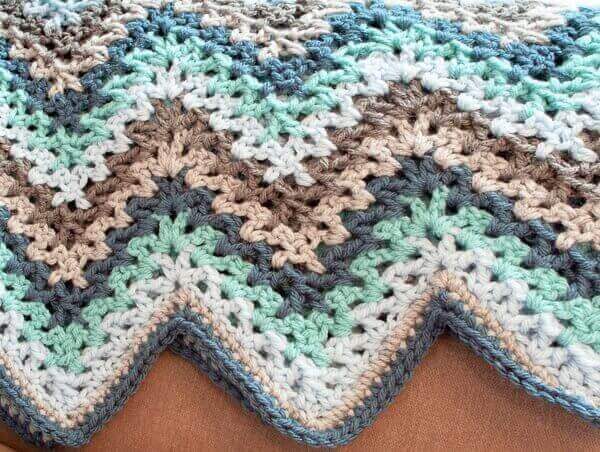
V-Stitch Crochet Ripple Afghan Pattern
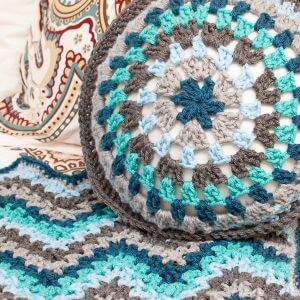
What you need
- 5 coordinating colors of bulky-weight yarn, approx. 272 yards / 249 m of each (shown here using 2 skeins each of Knit Picks Brava Bulky Yarn in Peacock, Cornflower, Dove Heather, Cobblestone Heather, and Sky)
- Color A (CA): Sky
- Color B (CB): Cobblestone Heather
- Color C (CC): Dove Heather
- Color D (CD): Peacock
- Color E (CE): Cornflower
- US K-10½ / 6.5 mm crochet hook
- yarn needle and scissors for finishing
Finished size: Approx. 50 in. × 64 in. (127 × 163 cm)
This free crochet pattern is written in U.S. crochet terms and abbreviations. Stitch counts are provided at the end of each row to help you keep on track.
Helpful Crochet Resources: Refer to my Crochet Abbreviations and U.S. to U.K. Crochet Conversion Chart as you work through the pattern.
Save this pattern to your Ravelry library.
Available as a convenient, ad-free PDF download here.
Abbreviations
Pattern is written in standard US crochet terms.
- ch – chain
- dc – double crochet
- dc2tog – double crochet 2 together
- rep – repeat
- sc – single crochet
- sc3tog – single crochet 3 together
- sp(s) – space(s)
- st(s) – stitch(es)
- V-st – V-stitch
- CA–CE – Colors A through E
V-stitch (V-st): double crochet, chain 1, double crochet. Counts as 1 stitch in end-of-row counts.
Notes
- The size of the blanket can be easily customized by changing the length of the beginning chain. Chain a multiple of 26 + 4 stitches.
- Do not fasten off at the end of each row; carry colors along the side of the blanket.
With CA, ch 186.
Row 1: Work 1 dc in 4th ch from hook (counts as dc2tog), +skip next 2 ch, *work a V-st in next ch, skip next 2 ch,** rep from * to ** twice more, [V-st, ch 1, V-st] in next chain, skip next 2 ch, work from * to ** three times, work dc2tog in the 3rd and 5th ch, ++ rep from + to ++ across, drop CA, turn — 64 sts.
Row 2: Join CB, ch 2, work 1 dc in ch-1 sp of next V-st (counts as dc2tog), *work 1 V-st in the ch-1 sps of next 3 V-sts, [V-st, ch 1, V-st] in next ch-1 sp, work 1 V-st in the ch-1 sps of next 3 V-sts, work dc2tog over next 2 ch-1 sps, rep from * across working last dc2tog of row over the ch-1 sp of last V-st and the last dc, turn, drop CB — 64 sts.
Row 3: Join CC, ch 2, work 1 dc in ch-1 sp of next V-st (counts as dc2tog), *work 1 V-st in the ch-1 sps of next 3 V-sts, [V-st, ch 1, V-st] in next ch-1 sp, work 1 V-st in the ch-1 sps of next 3 V-sts, work dc2tog over the ch-1 sps of next 2 V-sts, rep from * across working last dc2tog of row over the ch-1 sp of last V-st and the last dc, turn, drop CC — 64 sts.
Row 4: Join CD, ch 2, work 1 dc in ch-1 sp of next V-st (counts as dc2tog), *work 1 V-st in the ch-1 sps of next 3 V-sts, [V-st, ch 1, V-st] in next ch-1 sp, work 1 V-st in the ch-1 sps of next 3 V-sts, work dc2tog over the ch-1 sps of next 2 V-sts, rep from * across working last dc2tog of row over the ch-1 sp of last V-st and the last dc, turn, drop CD — 64 sts.
Row 5: Join CE, ch 2, work 1 dc in ch-1 sp of next V-st (counts as dc2tog), *work 1 V-st in the ch-1 sps of next 3 V-sts, [V-st, ch 1, V-st] in next ch-1 sp, work 1 V-st in the ch-1 sps of next 3 V-sts, work dc2tog over the ch-1 sps of next 2 V-sts, rep from * across working last dc2tog of row over the ch-1 sp of last V-st and the last dc, turn, drop CE — 64 sts.
Row 6: Join CA, ch 2, work 1 dc in ch-1 sp of next V-st (counts as dc2tog), *work 1 V-st in the ch-1 sps of next 3 V-sts, [V-st, ch 1, V-st] in next ch-1 sp, work 1 V-st in the ch-1 sps of next 3 V-sts, work dc2tog over the ch-1 sps of next 2 V-sts, rep from * across working last dc2tog of row over the ch-1 sp of last V-st and the last dc, turn, drop CA — 64 sts.
Rows 7 through 51: Rep rows 2 through 6.
Fasten off all colors.
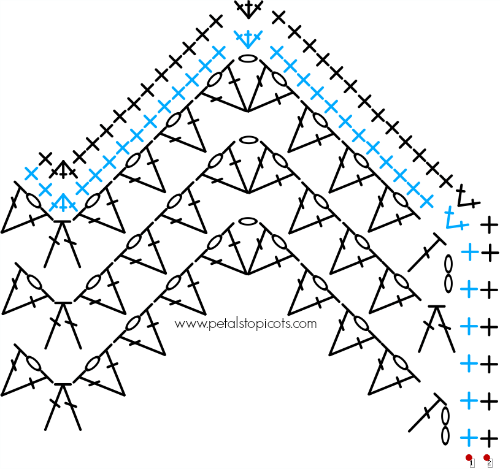
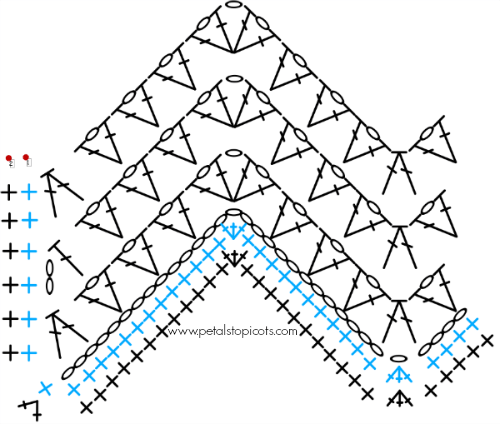
Click here to reference Crochet Stitch Chart Symbols.
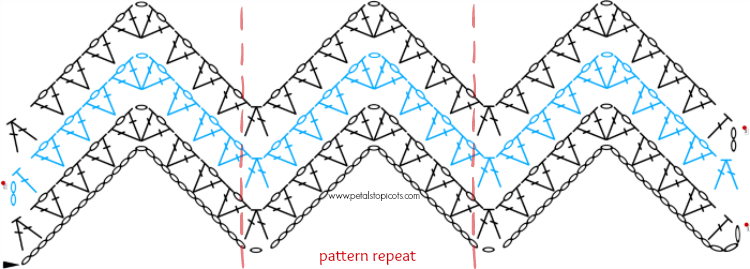
Edging
Round 1: Join CC in 1st dc of Row 51, ch 1 (does not count as st), work 2 sc in same st as join, work 1 sc in each dc and ch-sp of the next 4 V-sts, work 3 scs in next ch-1 sp, work 1 sc in each dc and ch-sp of the next 3 V-sts, work 1 sc in first dc and the ch-1 sp of next V-st, *work sc3tog over next 3 sts, work 1 sc in the ch-1 sp and last dc of next V-st, work 1 sc in each dc and ch-sp of the next 3 V-sts, work 3 scs in next ch-1 sp, work 1 sc in each dc and ch-sp of the next 3 V-sts, work 1 sc in first dc and the ch-1 sp of next V-st, rep from * across row, work 1 sc in last dc of last V-st, work 2 sc in last st. Working along the side, work evenly spaced single crochets along edge of the rows. Working along beginning edge, work 3 scs in first ch, 1 sc in each of the next 12 ch, sc3tog, 1 sc in each of the next 11 ch, **3 sc in next ch, 1 sc in each of the next 11 ch, sc3tog, 1 sc in each of the next 11 ch, rep from ** across, work 1 sc in next ch, 2 sc in last ch. Working back along next side, work evenly spaced single crochets along edge of rows equal to the number you worked along the opposite side. Join in 1st st of round. Fasten off.
Round 2: Work in the back loop of all stitches of round. Join CD in the back loop of the 2nd st of Round 1, ch 1 (does not count as st), work 2 sc in same st as join, work 1 sc in next 13 sts, work 3 sc in next st, work 1 sc in next 11 sts, *sc3tog, work 1 sc in next 11 sts, work 3 sc in next st, work 1 sc in next 11 sts, rep from * across, work 1 sc in next st, work 2 sc in last st. Work 1 sc in each st along the edge. Working along beginning edge, work 2 sc in 1st st, work 1 sc in next 12 sts, sc3tog, work 1 sc in next 11 sts, work 3 sc in next st, **work 1 sc in next 11 sts, sc3tog, work 1 sc in next 11 sts, rep from ** across, work 1 sc in next st, 2 sc in last st. Work 1 sc in each st along the edge. Join in 1st st of round. Fasten off.
Weave in ends. Block blanket if desired to shape.
Click here for more free crochet afghan patterns.
More Crochet Blanket Patterns
Looking for another cozy project? Try one of these crochet blanket and afghan patterns.
- Sea Glass Afghan
- Mitered Square Blanket Pattern
- Lakeside Throw Crochet Afghan
- Dahlia Bloom Afghan Square


Working on this pattern now an I just love it. I am glad you had a chart it helped me understand your pattern. Making this with worsted weight yarn an it looks so good. Thank you for this great pattern. It’s going to be donated for charity.
Did anyone ever get the end of the pattern figured out. I so wanted to crochet this afghan, however; the end of the row just doesn’t come out right. I get the last 3 V-stitches, but when I do the 2dctog it just doesn’t look right…..too right.
Hi Georgia 🙂 I’m not sure why it wouldn’t be looking right … perhaps it will take a few rows before you see the shape of the edges take shape? You can look through some of the projects and notes on Ravelry from others who have made the pattern and see if any of their notes might help. https://www.ravelry.com/patterns/library/v-stitch-ripple-afghan-2
Hi Kara,
Any news on a video? I’ve gotten to the end of my first row and it looks like it ends with only two V stitches after a decrease, is this correct?
Having trouble with your instruction at the end of the first row. I’ve got my 3 v stitches made, then it says to do a 2dctog, but it doesn’t look right, can u help please?
Cara- I noticed several people have asked if there is a video tutorial for this pattern but I don’t see any replies to their request. Is there an instructional video?
Hi Billie 🙂
Unfortunately I do not have a video for this right now although I do hope to make one at some point.
Thanks Kara! If I get stuck with a question can I reach out to you on here? Or would there be another (better) way to get a question answered?
Your best bet is probably via email at [email protected]
Do i do a +4 extra chains for every 26 i chain or +4 at end after im done chaining what i need
No, you do multiples of 26 (26, 52, 78 etc,) then add 4 so it would be 30 or 56, or 82. hope that makes sense. If you have never done multiples it can be confusing.
Jan
All I can say is HELP I can crochet anything I make stuff up in my head but I can’t read a pattern my daughter loves this one an I want to learn how to do it I can do the chevron an the wave but for some reason I can’t get this I I know how to make a v stitch awwwww please help can u do a live video really slow please thank you Lisa
I found the instructions awkward to understand,to many ** and++ a video would be good some people work better when they can see how to do the pattern
Like everyone else I LOVE the color combination. I woud never have thought that they would be so lovely together. Thank you for sharing.
I only want to use 2 colors an the ya bernat blanket, chenille yarn, bulky, any advice?? thank you