
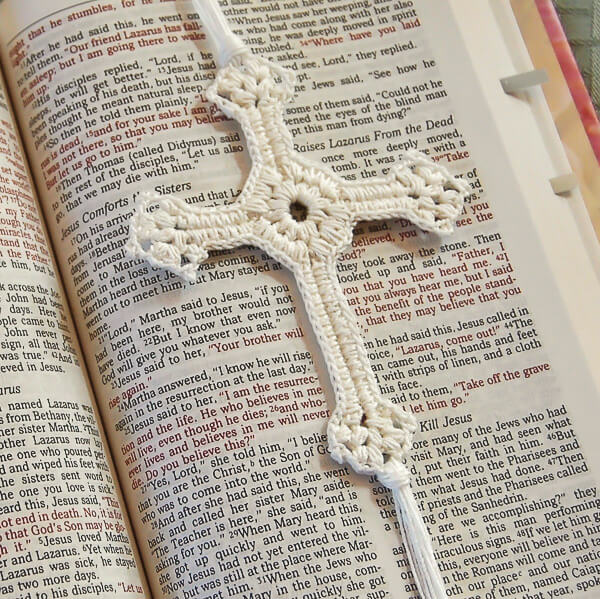
What better pattern to share for Easter than a cross! This pretty cross is made using a small steel hook and cotton crochet thread. I am so in love with how it came out! You can add a loop at the top for hanging, add a tassel for a crochet cross bookmark, or even add some beads for a little color. I would say this is more of an intermediate to advanced pattern, or a very ambitious beginner.
Jesus said to her, “I am the resurrection and the life. He who believes in me will live, even though he dies; and whoever lives and believes in me will never die.”
— John 11:25-26 (NIV)
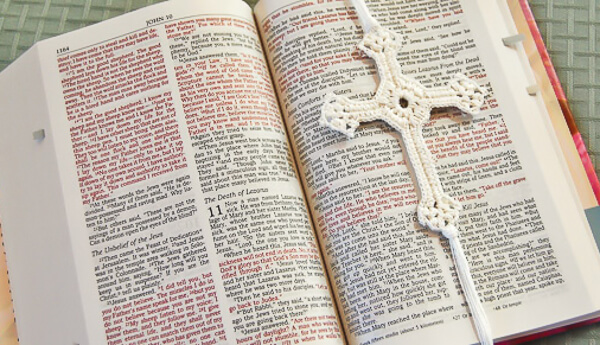
Lacy Cross Crochet Pattern
Here’s what you need:
- Size 10 crochet thread
- US-A / 2 mm steel crochet hook
- fabric stiffener
- sewing needle and scissors for finishing
- 6/0 seed beads (optional)
This free crochet pattern is written in U.S. crochet terms and abbreviations. Stitch counts are provided at the end of each round to help you keep on track.
Resources and tutorials you may find helpful for following this pattern include: Crochet Abbreviations and U.S. to U.K. Crochet Conversion Chart.
Add this pattern to your Ravelry library.
Available as a convenient printer-friendly and ad-free PDF download here.
Finished cross measures approx. 4¾ in. x 3¾ in.
Special Stitches:
Puff stitch: Yarn over hook, draw up a loop in designated stitch, repeat twice more, yarn over and pull through all 7 loops on hook.
Long single crochet (Lsc): Draw a loop through the designated stitch to the height of the row being worked, complete as single crochet (the Lsc takes the place of the next stitch in the current row).
Picot (p): Chain 3, work 1 single crochet in the third chain from the hook.
Ch 9, join in the furthest chain from the hook to form a ring.
Foundation Round: Ch 2, *work 1 puff st into ring, ch 1, rep from * 11 more times, join in top of beginning ch — 12 puff sts.
Round 1: Ch 1, work 1 sc into same ch sp as join, 2 sc in next ch sp, *ch 12, Sl st in 6th ch from hook and each of the next 6 ch, work 2 sc in each of the next 3 ch sp of Foundation Round, rep from * twice more, ch 20, Sl st in 6th ch from hook and each of the next 14 ch, work 2 sc in next ch sp of Foundation Round, 1 sc in next ch sp, join in 1st sc of round — 4 points of the cross and 24 scs.
Round 2: Ch 1, 1 Lsc over st from previous round and into same ch sp from Foundation Round, 2 Lsc over sts from previous round and into next ch sp from Foundation Round, *sk 1st sc at beginning of point and work 1 sc in each of the next 6 ch, [1 sc, ch 1, puff st, ch 1, puff st, ch 1, puff st, ch 1, 1 sc] in center of ch-5 sp, 1 Lsc over sts from previous round and into each of the next 6 ch, sk last sc, work 2 Lsc over sts from previous round and into each of the next 3 ch sp from Foundation Round, rep from * twice more, sk 1st sc at beginning of point and work 1 sc in each of the next 14 ch, [1 sc, ch 1, puff st, ch 1, puff st, ch 1, puff st, ch 1, 1 sc] in center of ch-5 sp, 1 Lsc over sts from previous round and into each of the next 14 ch, sk last sc, work 2 Lsc over sts from previous round and into the next ch sp from Foundation Round, 1 Lsc in next ch sp, join in 1st Lsc of round — 21 sts on Points 1 through 3; 37 sts on Point 4; 24 Lscs.
Round 3: Ch 1, 1 Lsc over st from previous rounds and into same ch sp from Foundation Round, 2 Lsc over sts from previous rounds and into next ch sp from Foundation Round, *work 1 Lsc over sts from previous rounds and into each of the next 6 ch, 1 Lsc into ch-5 sp, ch 1, puff st in next ch sp, ch 1, p, [puff st, ch 2, puff st] in next ch sp, ch 1, p, [puff st, ch 2, puff st] in next ch sp, ch 1, p, puff st in next ch sp, ch 2, 1 Lsc in ch-5 sp, 1 Lsc over sts from previous round and into each of the next 6 ch, work 2 Lsc over sts from previous round and into each of the next 3 ch sp from Foundation Round, rep from * twice more, *work 1 Lsc over sts from previous rounds and into each of the next 14 ch, 1 Lsc into ch-5 sp, ch 1, puff st in next ch sp, ch 1, p, [puff st, ch 2, puff st] in next ch sp, ch 1, p, [puff st, ch 2, puff st] in next ch sp, ch 1, p, puff st in next ch sp, ch 2, 1 Lsc in ch-5 sp, 1 Lsc over sts from previous round and into each of the next 14 ch, work 2 Lsc over sts from previous round and into next ch sp from Foundation Round, 1 Lsc in next ch sp, join in 1st Lsc of round — 33 sts on Points 1 through 3; 49 sts on Point 4; 24 Lscs.
Fasten off and weave in ends.
For best results, I recommend blocking these crosses. If desired, you can also brush the finished cross with either a homemade or store-bought stiffener. For stiffening instructions, see my Star of Bethlehem pattern.


For God so loved the world, that He gave His only begotten Son, that whoever believes in Him should not perish, but have eternal life. For God did not send the Son into the world to judge the world, but that the world should be saved through Him. — John 3:16-17
Did you enjoy this free pattern? Browse my free crochet patterns and find your next project today!
You may also enjoy …


Love this pattern. I have a request. I have a granddaughter who is allergic to even sensitive ear posts. I have been requested to make her cross earrings that actually would be attached to plastic posts. I would love to make her this pattern to make earrings for her- but tiny. I have no idea how to make the pattern tiny myself. Do you have a suggestion/pattern for a very small cross earring size ( she is 10)
This is a beautiful crochet pattern!
Hi, Can I get this pattern on a PDF page ?? or print it somplace?? thanks
I am trying my best not to get frustrated, especially since I paid for the download on Ravelry. However I am not able to get past where I completed the 4 arms (row 2). I have tried several times and cannot make heads or tails on how to go from that to the next row. Nothing seems to work right. Will there ever be a video tutorial? Did I miss it somewhere?
I had the same problem Michelle. I put the project aside for months. But, determined to make this beautiful cross, I tried again. Part of the problem for me, in moving on to round 3, was that I was misunderstanding some of the instructions in round 2. For example, when she says, “ work 2 Lsc over sts from previous round and into each of the next 3 ch sp from Foundation,” I was reading too many steps/stitches into this. More straightforwardly stated, you would simply say, “work 2LC in each of the next 3 ch sp…” Doing this, the 3rd ch sp always took me just under the base of the next arm (or point). I’m not sure which sc we are meant to skip, to work up the arm, I just began at the base, making sure that I had 6 slip stitches ending just below the chain 5 sp. Keeping these things in mind, I moved on to round 3 with relative ease. The tricky part there is to carefully read the instructions when you return to the ch 5 sp, now occupied by the puff stitches from round 2. The way they are written, it’s easy to miss a step. Likewise, it’s important to catch the “p” outside of the bracketed instructions. That’s the picot, which she describes in the “special stitches” section. I hope this helps!
I also loved this cross. I was able to follow the pattern. After doing this pattern, I have a few notes to share: Many are having trouble going from foundation round to round 1 OR from round 1 to round 2. Keep these things in mind: those Lsc (long single crochets) will be going into the same stitches or spaces over and over – especially the foundation round chain spaces and the “arms” of the cross (chain spaces in the foundation round and stitches in the “arms”). You may want to crochet a bit looser – especially doing the “arms” during round 1. The 4 arms are created in round 1 when you do all those chains: 3 of them with the chain 12 and the longer arm with the chain 20:. When you do one of those “arms” “ch 12, sl st in 6th ch from hook and each of the next 6 ch” you’re basically chaining up 6 stitches and then slip stitching back down to the foundation round and then continuing to work into the foundation round chain spaces. Those Lsc (long single crochets) will get “longer” and “longer” as you go since they get worked into the same areas over and over again. I found it a little hard to work those Lsc’s into the stitches on the “arms” – maybe because I was crocheting a bit tight there. I sometimes pulled/stretched the “arms” a bit and used a separate smaller hook to open the space/stitch where I was suppose to go so I could see it better. Also, when it says to “join”, I used a slip stitch. I took some pics of my progress, but I don’t know how to upload them here. I hope this helps.
Here are some pics:
https://www.ravelry.com/projects/jawhalen/lacy-cross
Thank you! Your pictures helped me to finally figure this out! Yeah.
As many are saying, this pattern does not work according to the instructions from foundation row to Row 1 and 2. What are we suppose to do now? You need to look at the directions. There is apparently a row missing. 😆
The pattern is correct as written but I can understand that the jump from Round 1 to 2 can be hard to understand at first. You are essentially chaining to create the four bars of the cross. You can check the finished projects on Ravelry to see if anyone included any helpful tips for completing theirs: https://www.ravelry.com/patterns/library/lacy-cross-5/people
I have to guess where to place the beads as well as adding the ends of ties of the cross at the top and the bottom like it is in the photo. Wondering it it has a tassel on the bottom hanging.