
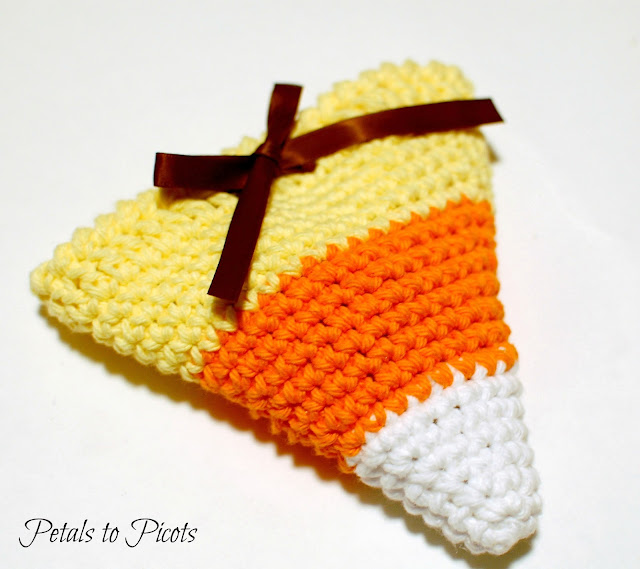
This free Halloween crochet treat bag pattern is a quick and easy project that’s perfect for holding a handful of candy and other little treats! The bag is crocheted in white, orange, and yellow to create a fun candy corn design, then finished with a ribbon that cinches the top closed.
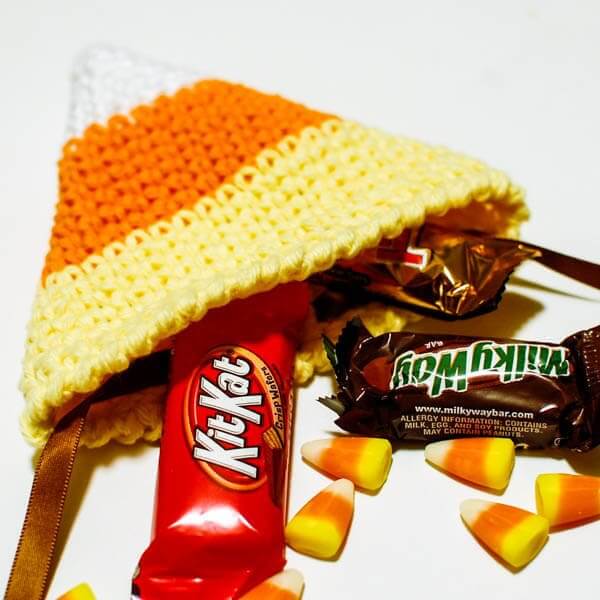
Make these cute crochet treat bags for your little ghosts and goblins, use them as Halloween party favors, or fill them with candy for a fun handmade Halloween gift. The finished bag measures approximately 6 inches high × 6 inches wide, giving you plenty of room for Halloween goodies!
Looking for the little candy corn itself? Try my Candy Corn Crochet Pattern for a cute mini Halloween decoration.
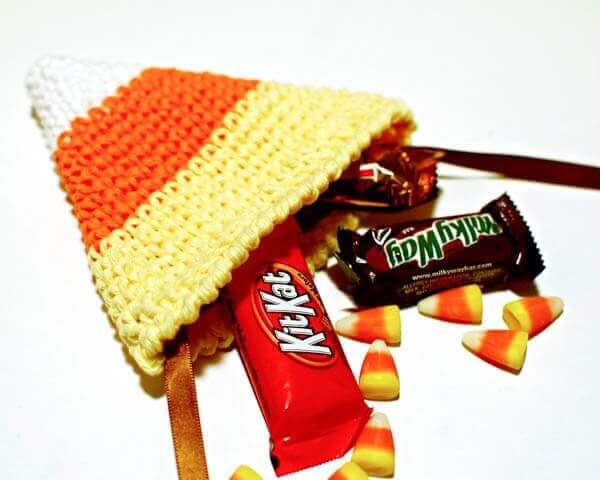
Crochet Halloween Treat Bag Pattern
Pattern Details
- Skill level: Easy
- Yarn: Worsted-weight cotton yarn
- Hook: 4 mm (US G-6)
- Finished size: Approximately 6 in. (15.2 cm) high × 6 in. (15.2 cm) wide
- Construction: Worked in the round from the bottom up
- Closure: Ribbon threaded through the double crochet round
Materials
- Worsted-weight cotton yarn in white, orange, and yellow
- 4 mm (US G-6) crochet hook
- Tapestry needle
- Ribbon
- Yummy Halloween treats! 😉
Resources and tutorials you may find helpful in following this crochet pattern: Crochet Abbreviations, U.S. to U.K. Crochet Conversion Chart, How to Make a Magic Ring {photo & video tutorial}.
Treat Bag Instructions
With white, make a magic ring.
Round 1: Ch 1 (does not count as st here and throughout), work 6 sc in ring, join — 6 sts.
Pull the tail to close the ring, and weave in to secure.
Round 2: Ch 1, work 1 sc in same stitch as join and in next st, 2 sc in next, 1 sc in each of the next 2 sts, 2 sc in next, join — 8 sts.
Round 3: Ch 1, work 1 sc in the same stitch as the join and in each of the next 2 sts, 2 sc in next, 1 sc in each of the next 3 sts, 2 sc in next, join — 10 sts.
Round 4: Ch 1, work 1 sc in the same stitch as the join and in each of the next 3 sts, 2 sc in next, 1 sc in each of the next 4 sts, 2 sc in next, join — 12 sts.
Round 5: Ch 1, work 1 sc in same stitch as join and in each of the next 4 sts, 2 sc in next, 1 sc in each of the next 5 sts, 2 sc in next, join — 14 sts.
Round 6: Ch 1, work 1 sc in same stitch as join and in each of the next 5 sts, 2 sc in next, 1 sc in each of the next 6 sts, 2 sc in next, join — 16 sts.
Round 7: Ch 1, work 1 sc in same stitch as join and in each of the next 6 sts, 2 sc in next, 1 sc in each of the next 7 sts, 2 sc in next, join — 18 sts.
Round 8: Join orange, ch 1, work 1 sc in same stitch as join and in each of the next 7 sts, 2 sc in next, 1 sc in each of the next 8 sts, 2 sc in next, join — 20 sts.
Round 9: Ch 1, work 1 sc in same stitch as join and in each of the next 8 sts, 2 sc in next, 1 sc in each of the next 9 sts, 2 sc in next, join — 22 sts.
Round 10: Ch 1, work 1 sc in the same stitch as the join and in each of the next 9 sts, 2 sc in next, 1 sc in each of the next 10 sts, 2 sc in next, join — 24 sts.
Round 11: Ch 1, work 1 sc in the same stitch as the join and in each of the next 10 sts, 2 sc in next, 1 sc in each of the next 11 sts, 2 sc in next, join — 26 sts.
Round 12: Ch 1, work 1 sc in same stitch as join and in each of the next 11 sts, 2 sc in next, 1 sc in each of the next 12 sts, 2 sc in next, join — 28 sts.
Round 13: Ch 1, work 1 sc in the same stitch as the join and in each of the next 12 sts, 2 sc in next, 1 sc in each of the next 13 sts, 2 sc in next, join — 30 sts.
Round 14: Ch 1, work 1 sc in same stitch as join and in each of the next 13 sts, 2 sc in next, 1 sc in each of the next 14 sts, 2 sc in next, join — 32 sts.
Round 15: Ch 1, work 1 sc in same stitch as join and in each of the next 14 sts, 2 sc in next, 1 sc in each of the next 15 sts, 2 sc in next, join — 34 sts.
Round 16: Join yellow, ch 1, work 1 sc in same stitch as join and in each of the next 15 sts, 2 sc in next, 1 sc in each of the next 16 sts, 2 sc in next, join — 36 sts.
Round 17: Ch 1, work 1 sc in the same stitch as the join and in each of the next 16 sts, 2 sc in next, 1 sc in each of the next 17 sts, 2 sc in next, join — 38 sts.
Round 18: Ch 1, work 1 sc in the same stitch as the join and in each of the next 17 sts, 2 sc in next, 1 sc in each of the next 18 sts, 2 sc in next, join — 40 sts.
Round 19: Ch 1, work 1 sc in same stitch as join and in each of the next 18 sts, 2 sc in next, 1 sc in each of the next 19 sts, 2 sc in next, join — 42 sts.
Round 20: Ch 1, work 1 sc in same stitch as join and in each of the next 19 sts, 2 sc in next, 1 sc in each of the next 20 sts, 2 sc in next, join — 44 sts.
Round 21: Ch 3 (counts as dc), work 1 dc in each st around, join — 44 sts.
Round 22: Ch 1 (does not count as st), work 1 rev sc in each st around, join — 44 sts.
Fasten off and weave in ends.
Finishing the Treat Bag
Weave a ribbon through the double crochet stitches of Round 21 and gently pull to cinch the bag closed. Fill with your favorite Halloween treats and tie the ribbon into a bow to secure.
Enjoy 🙂

You May Also Enjoy These Free Halloween Patterns
- Mini Pumpkin Amigurumi Pattern
- Scary-Cute Halloween Ghost Pattern
- Cauldron Halloween Treat Holder Pattern
- Crochet Spider Pattern
- More Free Halloween Crochet Patterns
Find Community
I would love to see your finished projects; share them with me on Instagram, Facebook, or the Petals to Picots Community.


Thanks for the nice pattern!
I got confused a bit but
I did fine after I realized there were two row10s.
I am trying to add a couple rows, sew the bottom
and make a potholder.
Thanks again!
Glad you figured it out! Thanks for the catch too … I corrected it now 🙂
i dont know how to do a magic ring.and when u chain one and join do u go to ur marker?cause i cant get it to look right,so if i crochet to my marker through out the pattern will it still look right? message me back charlotte
Hi Charlotte 🙂 There is a link to the magic ring tutorial in the post if you want to give it a try. If not, you can chain 2 and work the 6 sc from Round 1 into the furthest chain from hook. Then continue with the pattern as written. I didn’t use a stitch marker but instead worked in joined rounds. Hope this helps 🙂