
I am so glad you are crocheting along with me on this colorful hexy journey! Now that all our crochet hexagons are attached, it’s time to add the finishing touch.
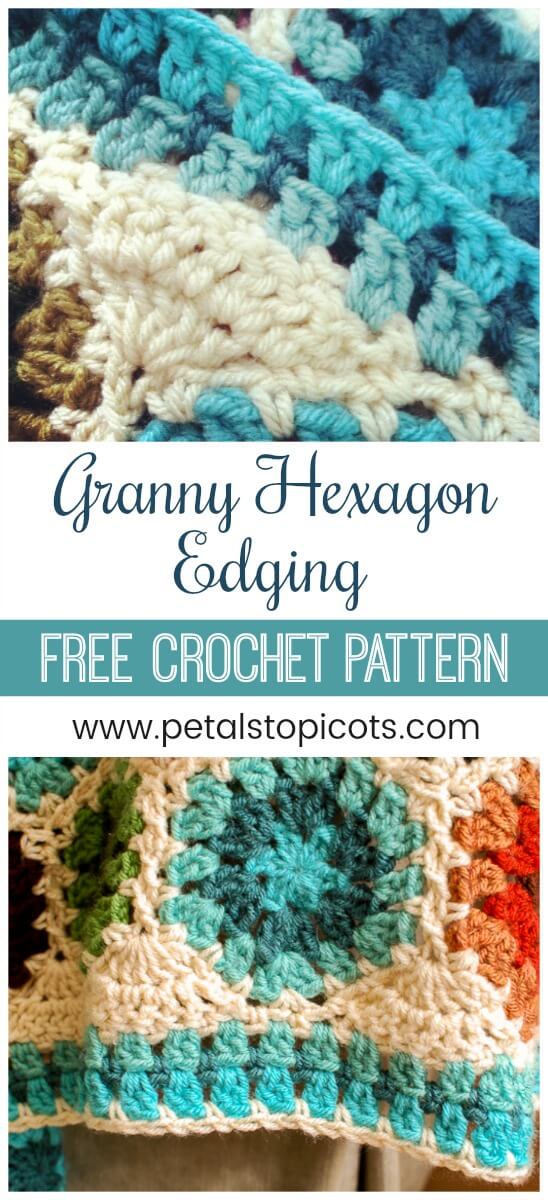
This granny hexagon crochet edging pattern fills in the V-shaped valleys between joined hexagons to create a straighter edge around your blanket. The first part of the edging fills in those spaces, and then four simple rounds create the colorful granny-style border.
If you’re just finding this tutorial and want to make the complete blanket, visit my hexagon crochet blanket pattern page, where I’ve gathered all the patterns and tutorials you’ll need in one place.
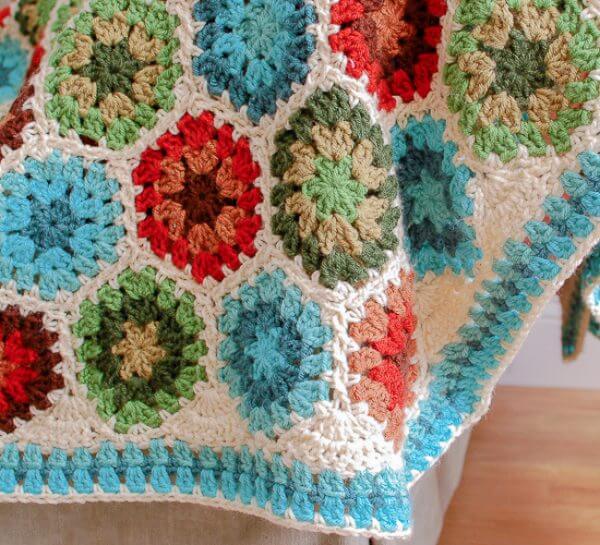
I debated for a while how I wanted to finish off my blanket … did I want to keep the pointed edges of the hexagons or fill them in to make a straight edge? In the end, I decided to straighten the edges by designing this pretty crochet border that fills in those granny valleys as you work around the afghan.
Keep in mind that I laid out my motifs in the shape of one large hexagon, so I didn’t have any half-hexagons to fill in along these edges—only the V-shaped valleys.
What You Need for Your Edging
- Your joined hexagons 🙂
- 4 colors of worsted weight yarn, shown here in Brava Worsted from KnitPicks
- H-8 / 5 mm crochet hook
- scissors and tapestry needle
This free crochet pattern is written in U.S. crochet terms and abbreviations. Stitch counts are provided at the end of each row to help you keep on track.
Helpful Crochet Resources: Refer to my Crochet Abbreviations and U.S. to U.K. Crochet Conversion Chart as you work through the pattern.
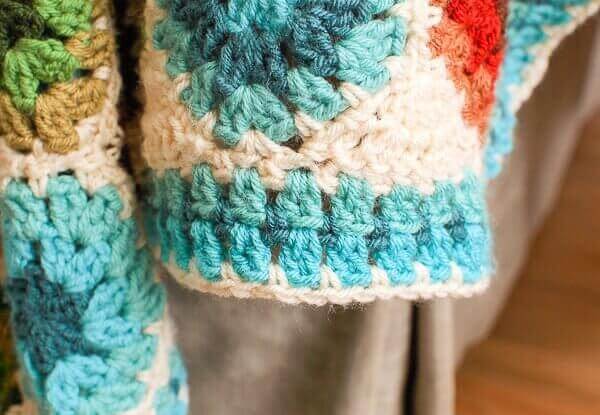
How to Crochet the Granny Hexagon Edging
The first round consists of 3 steps, which will fill in the valleys where the hexagons were joined.
Step 1
Using the same color used to join your hexagons, join yarn in the ch-1 sp from Round 4 at the top peak of any hexagon (as worked in the granny hexagon crochet pattern). Ch 1 (does not count as a stitch), work 1 sc in same ch-1 sp, ch 2, work 1 sc in next ch-2 sp along the side of the hexagon, ch 2, work 1 sc in next ch-2 sp along the side of the hexagon, work 5 dc in ch-1 sp at the bottom where two hexagons were joined, work 1 sc in the next ch-2 sp along the edge of the opposite hexagon. Turn.
Step 2
Ch 2 and work 1 sc in next ch-2 sp along edge of opposite hexagon (counts as dc), work 1 dc in next st, 1 dc in next st, 2 dc in next st, 1 dc in next st, 2 dc in next st, Sl st in sc that was worked in the first ch-2 space of Step 1. Turn.
Step 3
Ch 1, drop loop from your hook and pick it up through the first ch-2 sp made in Step 1, work 1 sc in same ch-2 sp, ch 1, skip first st, *work 1 sc in next st, ch 1 and skip next st, rep from * twice more, work 1 sc in ch-2 sp that first sc of Step 2 was made, ch 1.
Now repeat Steps 1 through 3, starting with 1 sc in the top peak of the next hexagon. Repeat across.
Click here to reference Crochet Stitch Chart Symbols.
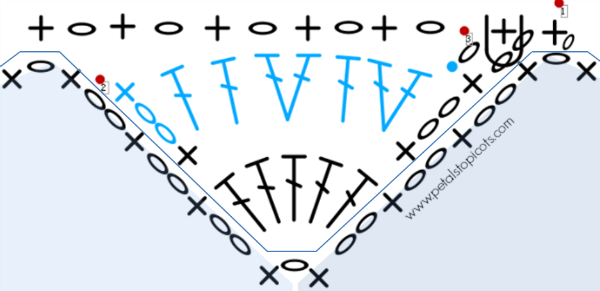
I hope I didn’t lose you! I know it seems tricky, but once you “get it,” it will be a breeze, and I think you will be very pleased with how pretty it is.
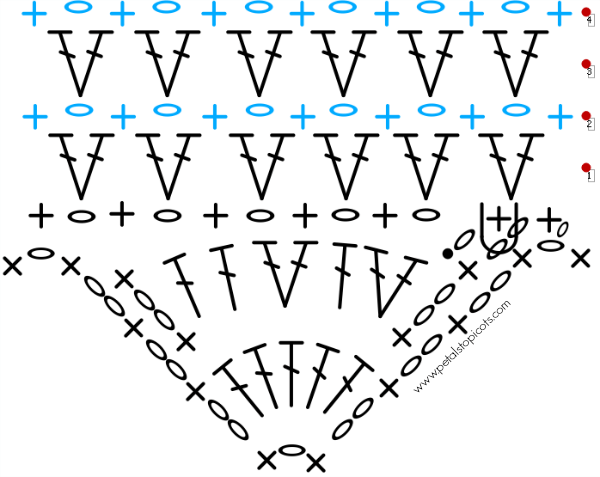
Once you’ve filled in all those little valleys, the hard part is done! The next four rounds create the colorful crochet border and are easy peasy to work. You can even use these rounds on other granny-style blankets.
Finish the Crochet Blanket Border
Round 1: Join next color in any ch-1 sp from our “fill in” round just done. Ch 3 (counts as dc), work 1 dc in same ch-sp, work 2 dc in next ch-sp, and in each ch-sp around the blanket, work [2 dc, ch 2, 2 dc] in each corner; join and fasten off.
Round 2: Join next color between any 2 dc groupings, ch 1 (does not count as a stitch), work 1 sc between the same dc grouping as join, ch 1, *work 1 sc between the next 2 dc groupings, ch 1, repeat from * around, working [1 sc, ch 1, 1 sc] in each corner space, join and fasten off.
Round 3: Join next color in any ch-1 sp, ch 3 (counts as dc), work 1 dc in same ch-sp, work 2 dc in next ch-sp and each ch-sp around blanket, working [2 dc, ch 2, 2 dc] in each corner, join and fasten off.
Round 4: Join next color between any 2 dc groupings, ch 1 (does not count as a stitch), work 1 sc between the same dc grouping as join, ch 1, *work 1 sc between next 2 dc groupings, ch 1, repeat from * around, join and fasten off.
Weave in ends.
More Crochet Blanket Patterns
- Blanket Edging Patterns
- Continuous Mitered Square Afghan Pattern
- Sea Glass Crochet Afghan Pattern
- Crochet Ripple Afghan Pattern
- Free Cluster Burst Granny Square Pattern
Find Community
I would love to see your finished projects; share them with me on Instagram, Facebook, or the Petals to Picots Community.


I was wondering if you could tell me how much yarn for the jaygo and edging? I love this beautiful Afghan.
lovely afghan! I had made a hexagon afghan and had the hardest time getting a smooth even edge – thanks for this!
Hi,
That looks great for the v-shaped bits. What do you do for the half-hex-shaped bits?
Thanks so much for the beautiful pattern.
Me gusta mucho este borde.
Un saludo,
Carmen
Hi I loved this pattern and my final product looks beautiful. But could you explain a little more what to do when I reach the shorter ends were there are the half hexagon spaces for the edging? Thank you#
Hi! I love your patterns! I am currently making this for my mom and was wondering how many hexagons you ended up making and how big your finished product was? Thanks!
Hi Holly 🙂 Sure, I was planning on putting together a final afghan post too. I used 217 hexagons and joined them to form a big hexagon blanket that measured approximated 70 in x 70 in. Hope that helps!
I’ve just completed this afghan…well kind of. I made mine into a huge rectangle using 357 hexagons. Anyway, I was fixin to start mu edging & have a big problem…I don’t know how to edge the parts that are a half hexagon instead of the triangle you have listed the directions for… How would you go about filling that part in? I was thinking of googling how to crochet a half hexagon…but figured I would try you out first. let me know please.
P.S. This afghan has turned out so beautiful. I actually impressed myself! Thank you for the pattern!
Hi Kristen 🙂 I am so happy to hear that you are pleased with your afghan!!! Here is how I took care of those edges … http://www.petalstopicots.com/2014/06/granny-hexagon-crochet-edging/
This link just put me back on the same page I was already on. I was asking for a pattern for a half hexagon. I think I got a bot answer.
Hi Kristen 🙂 No, I am not a bot. I don’t have a half hexagon pattern. I linked to my edging which is how I filled in those valleys instead of using a half hexagon.
I absolutely love how you did the edging. Now I can see this a top that I want to make.
I love all things granny and this edging is beautiful. thanks so much for sharing.
Thank you for your lovely patterns. I will have to try this one.