
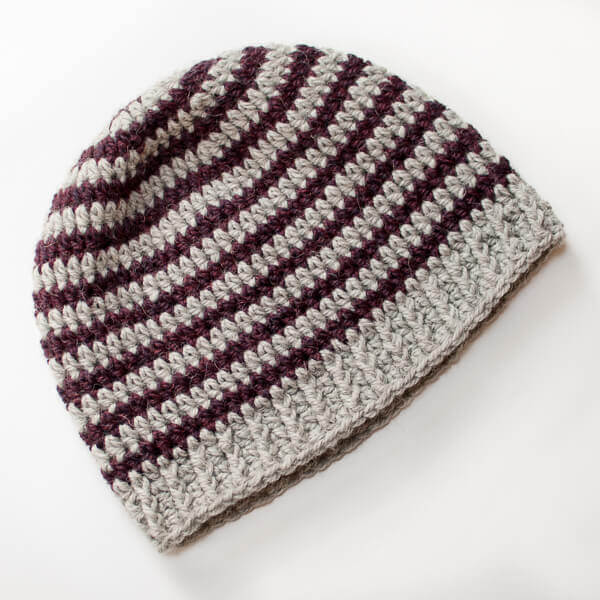
When I teach my Beyond Basics crochet classes, I like to incorporate fun projects to help students learn the techniques I cover. This basic striped crochet hat pattern is worked in half double crochets (hdc) and helps give my students a better understanding of gauge, working in the round, clean color changes, increasing, and creating a ribbed effect with post stitches. They get to learn all this while also creating something they can actually wear or give as a gift!
So whether you are trying to build on your basic crochet knowledge or just want a cute striped crochet hat, give this hdc hat pattern a go. The finished hat has a classic beanie-style fit with a simple ribbed edge. You may also like my one-color easy crochet hat pattern here.
About This Striped Crochet Hat Pattern
Pattern Details
- Skill level: Easy
- Yarn: Worsted-weight yarn in 2 colors
- Hook: 5 mm (US H-8)
- Gauge: 13 hdc × 11 rows = 4 in. (10 cm)
- Finished size: Approximately 20 in. (51 cm) circumference × 8 in. (20 cm) crown to brim
- Stitches: Half double crochet and front post double crochet
- Construction: Worked in the round from the crown down
- Size: Adult; easily adjusted using my Hat Sizing Guide
Supplies
- 2 colors worsted-weight yarn (shown here in Cascade 220)
- US H-8 / 5 mm crochet hook
- Tapestry needle and scissors
Helpful Crochet Resources: Refer to my Crochet Abbreviations and U.S. to U.K. Crochet Conversion Chart as you work through the pattern.
Add this pattern to your Ravelry library.
Notes
- I prefer starting rounds with a ch-1 followed by the first st of the round because I feel it leaves a less obvious “seam”; however, if you prefer the more traditional ch-2 start, count the ch-2 as a stitch and use it in place of the ch-1 and the first hdc (end-of-round stitch counts should remain the same).
- Choose one yarn as Color A (CA) and the second yarn as Color B (CB). Alternate colors as indicated throughout the pattern.
Abbreviations
CA = color A
CB = color B
ch = chain
FPdc = front post double crochet
hdc = half double crochet
rep = repeat
st(s) = stitch(es)
Special Stitch
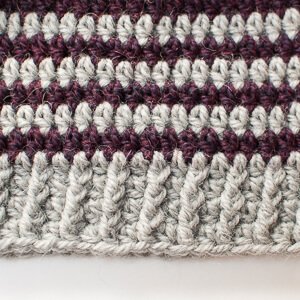
Front Post Double Crochet (FPdc): Yarn over and insert hook from the front around the back and to the front again around the post of the stitch in the previous round. Complete as a regular double crochet.
Striped Crochet Hat Instructions
With CA, make a magic ring (or, as an alternative to the magic ring, you can ch 2 and work Round 1 in the second ch from hook).
Round 1: Continuing with CA, ch 1 and work 8 hdc in ring; join in top of 1st hdc with CB, and tug tail gently to close the hole — 8 sts.
Round 2: Continuing with CB, ch 1 (does not count as st here and throughout; see note), work 2 hdc in same st as join and in each st around, join with CA — 16 sts.
Round 3: Continuing with CA, ch 1, work 2 hdc in same st as join, 1 hdc in next st, *2 hdc in next st, 1 hdc in next st, rep from * around, join with CB — 24 sts.
Round 4: Continuing with CB, ch 1, work 2 hdc in same st as join, 1 hdc in each of the next 2 sts, *2 hdc in next st, 1 hdc in each of the next 2 sts, rep from * around, join with CA — 32 sts.
Round 5: Continuing with CA, ch 1, work 2 hdc in same st as join, 1 hdc in each of the next 3 sts, *2 hdc in next st, 1 hdc in each of the next 3 sts, rep from * around, join with CB — 40 sts.
Round 6: Continuing with CB, ch 1, work 2 hdc in same st as join, 1 hdc in each of the next 4 sts, *2 hdc in next st, 1 hdc in each of the next 4 sts, rep from * around, join with CA — 48 sts.
Round 7: Continuing with CA, ch 1, work 2 hdc in same st as join, 1 hdc in each of the next 5 sts, *2 hdc in next st, 1 hdc in each of the next 5 sts, rep from * around, join with CB — 56 sts.
Round 8: Continuing with CB, ch 1, work 2 hdc in same st as join, 1 hdc in each of the next 6 sts, *2 hdc in next st, 1 hdc in each of the next 6 sts, rep from * around, join with CA — 64 sts.
Round 9: Continuing with CA, ch 1, work 1 hdc in the same st as the join and in each st around, join with CB — 64 sts.
Round 10: Continuing with CB, ch 1, work 1 hdc in same st as join and each st around, join with CA — 64 sts.
Rounds 11 through 18: Repeat Rounds 9 and 10. After completing Round 18, fasten off CB only.
Round 19: Continuing with CA, ch 1, work 1 hdc in same st as join and each st around, join — 64 sts.
Round 20: Ch 1, work 1 hdc in same st as join, 1 FPdc around next hdc, *1 hdc in next st, 1 FPdc around next, rep from * around, join — 64 sts.
Rounds 21 and 22: Ch 1, work 1 hdc in same st as join, 1 FPdc around next FPdc, *1 hdc in next st, 1 FPdc around next FPdc, rep from * around, join — 64 sts.
Fasten off and weave in ends.
More Crochet Hat Patterns
- Easy Crochet Hat Pattern for Beginners
- Little Sweetheart Child Hat Pattern
- Mod Cluster Stitch Crochet Hat Pattern
- O’Hara Hat Crochet Pattern
More Crochet Tutorials
Find Community
I would love to see your finished projects; share them with me on Instagram, Facebook, or the Petals to Picots Community.


Hi and thanks for the pattern! I’m still not sure how to close the rounds – do I do it with a slip stitch (in the new color) and then do a CH 1 etc.?
Thanks!
Hi,
Can you please explain how to do the ribbing with the correction
Thanks
Hi! I love the look of this pattern, but I would like to do it all in one color. Do I still need to join with a slip stitch and chain one every round, or can I go with a more modern, seamless style where I just crochet in continuous rounds? Additionally, would it be possible for you to post the same pattern with the hat done up in all the same color?
Thanks,
Gen
Hi Gen 🙂 You can absolutely work up this hat in one color and work in a spiral instead of joining rounds. You would probably want to use a stitch marker so you can keep track of your rounds though. I don’t have this pattern worked up in one color to post at this point.
Hi, my name is Khara and I just made this pattern. It was easy to follow which I loved, but for some reason, it turned out really loose. Am I supposed to keep the yarn tight while working or what? Help please!
Hi I’m having trouble with the ribbing. Could you should us how to obtain this please
Hi, thank you for the pattern. As I was working along I realized my hat was turning more into a bowl-shape! I think i was placing the stitches in the wrong loops. Since it’s HDC, are we working the hook into the front two, back two, or all 3 loops of the HDC stitch? I think I was working in the two front (inner part of the hat) which is why it was curling. Thank you 🙂
Hi Stacy 🙂 You should be working through the top two loops of the stitch … not the back or front bars. Hope that helps!