
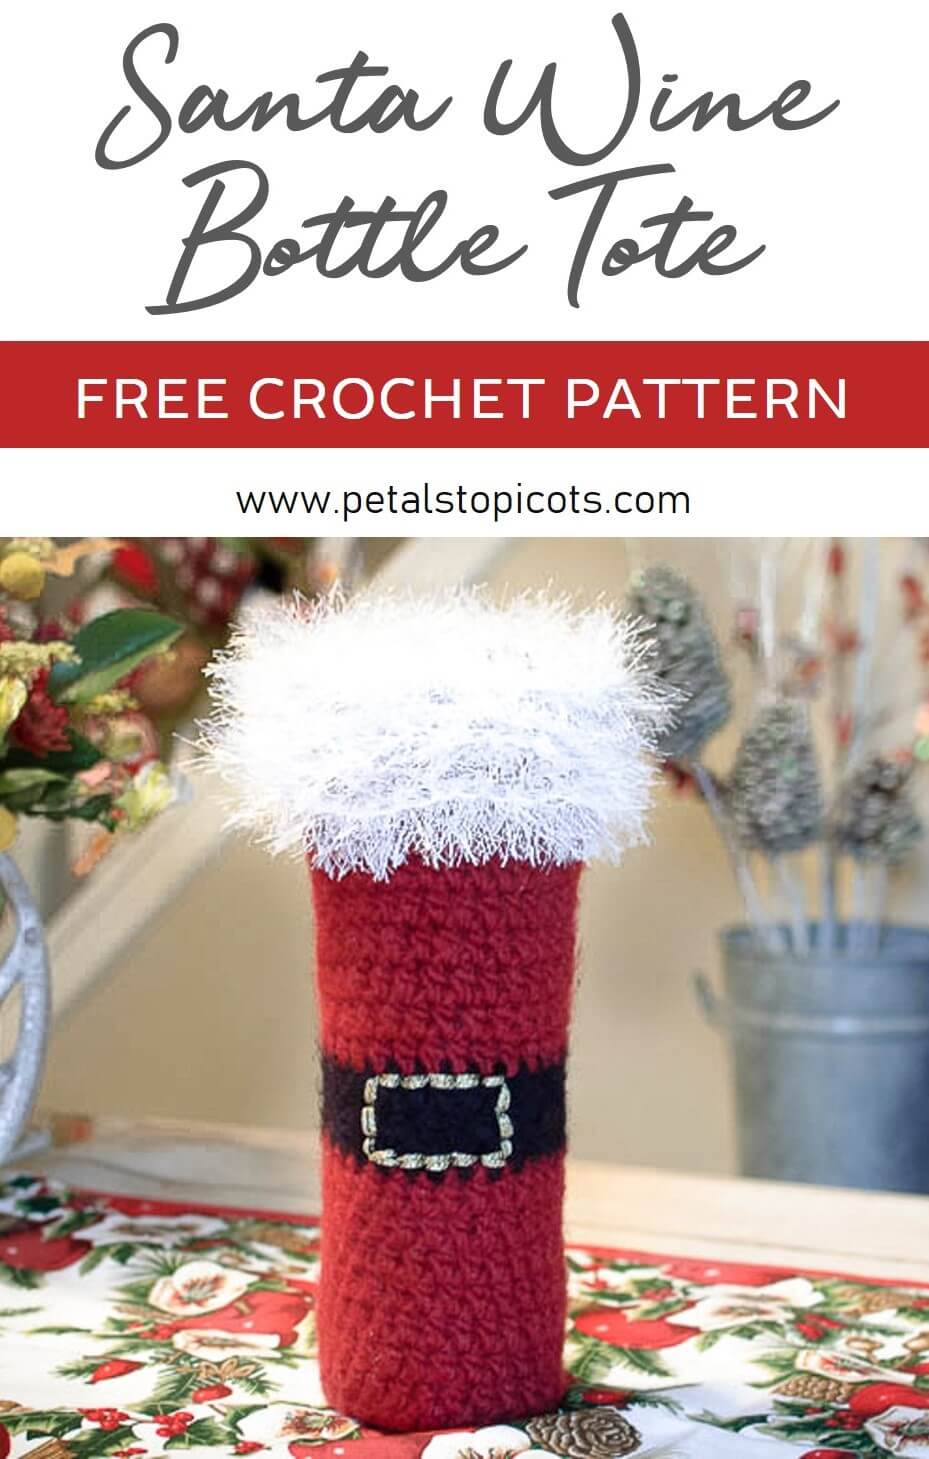
This free felted Santa wine bottle tote crochet pattern turns a standard bottle of wine into a festive handmade Christmas gift. The tote is crocheted with red and black feltable wool, then finished with fluffy white trim and an embroidered gold belt buckle.
Felting creates a dense, durable fabric that helps the bag hold its shape without stretched or sagging stitches. Before felting, the tote measures approximately 14 × 6 in. (35.6 × 15.2 cm) when laid flat. After felting, it is sized to fit a standard 750 ml wine bottle.
Bring it to a Christmas party as a hostess gift, place it under the tree, or use it as festive wrapping for a favorite bottle. For a nonholiday version, try my Everyday Striped Felted Wine Tote Crochet Pattern.
New to felting? My Felting Knitting and Crochet Guide explains how the process works and how to choose suitable yarn.
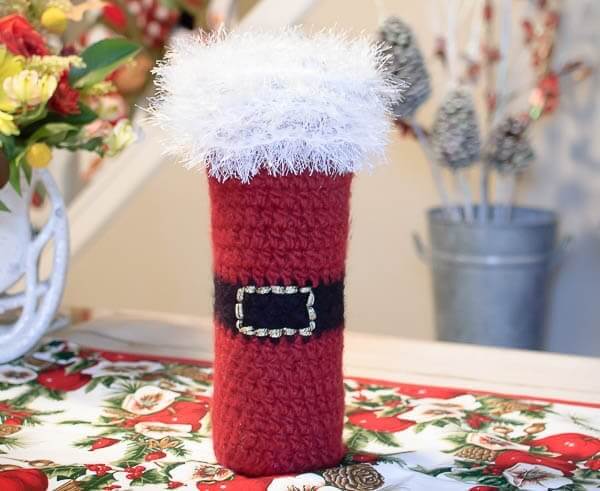
Felted Santa Wine Bottle Tote Crochet Pattern
Pattern Details
- Skill level: Intermediate
- Yarn: Bulky-weight feltable wool with eyelash or faux-fur yarn for the trim
- Main hook: 6.5 mm (US K-10½)
- Trim hook: 3.5 mm (US E-4) or another small, sharp crochet hook
- Size before felting: Approximately 14 × 6 in. (35.6 × 15.2 cm), laid flat
- Finished size: Fits a standard 750 ml wine bottle after felting
- Gauge before felting: 10 hdc × 12 rounds = approximately 4 in. (10 cm)
- Construction: Worked from the bottom up in joined rounds, then felted and embellished
Supplies
- 1 skein red bulky-weight feltable wool, approximately 93 yd (85 m); shown here in Lion Brand Local Grown 100% Wool Red
- 1 skein black bulky-weight feltable wool, approximately 93 yd (85 m); shown here in Lion Brand Local Grown 100% Wool Black
- 1 skein white fur or eyelash yarn, approximately 55 yd (50 m); such as Lion Brand Go For Faux® or Haute Stitches Shaggy Chic in White
- Small amount of lightweight gold metallic yarn or crochet thread; the sample used Lion Brand Glitterspun in Antique Gold
- 6.5 mm (US K-10½) crochet hook
- 3.5 mm (US E-4) crochet hook or another small, sharp crochet hook
- Yarn needle
- Scissors
- Washing machine or supplies for your preferred wet-felting method
- Standard 750 ml bottle for checking the size and shaping the tote
Resources and tutorials you may find helpful in following this crochet pattern include Crochet Abbreviations, the U.S. to U.K. Crochet Conversion Chart, How to Make a Magic Ring, and How to Felt Knitting and Crochet.
Crochet Abbreviations
- ch = chain
- hdc = half double crochet
- rep = repeat
- sc = single crochet
- sl st = slip stitch
- st(s) = stitch(es)
This pattern is written in U.S. crochet terms.
Pattern Notes
- Use non-superwash wool or another yarn specifically labeled as feltable.
- Acrylic, cotton, and superwash wool will not felt properly.
- The tote is worked from the bottom up in joined rounds.
- Do not turn after completing a round.
- The beginning ch-2 counts as the first hdc.
- The beginning ch-1 does not count as a stitch.
- Join each round with a sl st unless otherwise instructed.
- Keep the red yarn attached while working the black belt rounds and carry it loosely up the inside of the tote.
- Weave in the wool ends loosely before felting so they can shrink with the fabric.
- Add the gold buckle and white fur trim only after the tote has been felted and dried.
- Felting results vary by yarn and washing method. Check the tote frequently and stop when it fits your bottle properly.
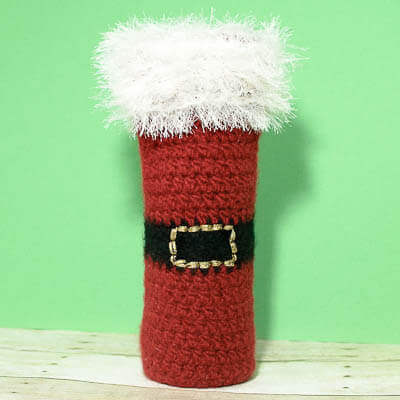
Crochet Wine Tote Instructions
With red yarn, make a magic ring.
As an alternative, ch 4 and join with a sl st in the farthest ch from the hook to form a ring.
Tote Base
Round 1: Ch 2 (counts as the first hdc here and throughout), work 7 hdc in the ring, join in the top of the beginning ch-2 — 8 sts.
Round 2: Ch 2, work 1 hdc in the same st as the join, then work 2 hdc in each remaining st around. Join in the top of the beginning ch-2 — 16 sts.
Round 3: Ch 2, work 1 hdc in the same st as the join and 1 hdc in the next st, *work 2 hdc in the next st and 1 hdc in the following st; rep from * around. Join in the top of the beginning ch-2 — 24 sts.
Round 4: Ch 2, work 1 hdc in the same st as the join and 1 hdc in each of the next 5 sts, *work 2 hdc in the next st and 1 hdc in each of the next 5 sts; rep from * around. Join in the top of the beginning ch-2 — 28 sts.
Santa Suit
Rounds 5 through 11: Ch 2, work 1 hdc in each of the next 27 sts, join in the top of the beginning ch-2 — 28 sts.
Drop the red yarn but do not fasten off.
Black Belt
Rounds 12 through 14: Join black yarn. Ch 2, work 1 hdc in each of the next 27 sts, join in the top of the beginning ch-2 — 28 sts.
Fasten off the black yarn.
Upper Suit
Rounds 15 through 22: Resume the red yarn. Ch 2, work 1 hdc in each of the next 27 sts, join in the top of the beginning ch-2 — 28 sts.
Crochet Tote Handles
Round 23: Ch 1 (does not count as a st), work 1 sc in the same st as the join and in each of the next 5 sts, ch 10, skip the next 7 sts, work 1 sc in each of the next 7 sts, ch 10, skip the next 7 sts, and work 1 sc in the final st. Join in the first sc — 34 sts and chs.
Round 24: Ch 1, work 1 sc in the same st as the join and in each st and ch around, join in the first sc — 34 sts.
Rounds 25 and 26: Ch 1, work 1 sc in the same st as the join and in each remaining st around, join in the first sc — 34 sts.
Round 27: Sl st in each st around, join — 34 sts.
Fasten off and loosely weave in the ends.
Using red yarn and a yarn needle, wrap or whipstitch evenly around each handle opening to reinforce it. Secure the yarn and weave in the ends loosely.
Felting the Crochet Wine Tote
The tote will look too large for a 750 ml bottle before felting. The additional size allows for the shrinkage that occurs during the felting process.
Place the tote in the washing machine with a load of like-colored jeans or towels. Wash it in hot water using a setting that provides enough agitation to felt the wool. Consider possible color transfer just as you would when washing a new garment.
Check the tote every 5 to 10 minutes when possible. Stop the felting process when the fabric is dense, and the tote fits comfortably around a standard 750 ml bottle.
Rinse the tote in cool water. Place it between two towels and press or roll gently to remove excess moisture. Do not wring or twist it.
Place a clean, empty 750 ml bottle or similarly sized form inside the tote to shape it. Arrange the bottom, sides, and handles, then allow the tote to dry completely.
Embroidering Santa’s Belt Buckle
Thread a yarn needle with gold metallic yarn or crochet thread.
With the chosen front of the tote facing you, use backstitch to embroider a rectangular buckle in the center of the black belt. The buckle on the sample spans approximately 5 stitches across and all 3 black rounds in height.
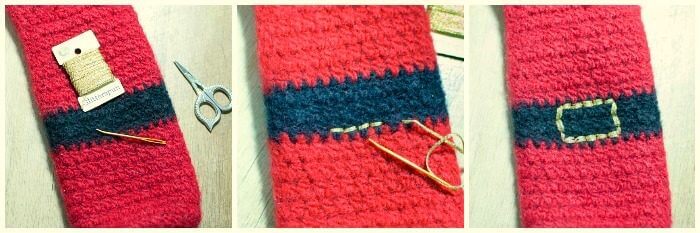
Secure the yarn inside the tote and weave in the ends.
Adding the White Fur Trim
Using white fur or eyelash yarn and the smaller crochet hook, work surface slip stitches evenly around Round 22.
Continue adding surface slip stitches around Rounds 23 through 27 to create Santa’s fluffy white trim. If the felted fabric is too dense for the hook, use a sharp crochet hook or a yarn needle to pull the fur yarn through the fabric.
Add additional fur yarn around the top edge if you would like fuller trim.
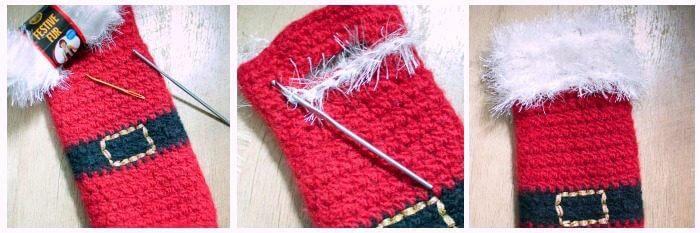
Fasten off and weave in the ends securely.
Your felted Santa wine bottle tote is ready for holiday giving!
More Wine Bottle and Felting Patterns
More Christmas Crochet Patterns
- Santa Crochet Gift Card Holder Pattern
- Lace Angel Crochet Pattern
- Peppermint Crochet Scrubby Pattern
- Fair Isle Snowflake Christmas Stocking Crochet Pattern

Hello! I love this! I am crafting up a blog post on gifts you can make with an old sweater. Hope you don’t mind if I post a picture and link back to your blog for others to see how to make this?
Lovely pattern. Listed it on our website for awesome patterns for Christmas Wine bags 🙂