
This free rectangular crochet basket pattern is perfect for organization and storage! Worked in super bulky yarn or T-shirt yarn, these baskets are sturdy and durable, with built-in handles that make them easy to carry from room to room.
Perhaps my favorite part is the handles, which make it easy for little hands to tote around their treasures. My son loved using these baskets to store and carry his Legos!
The pattern includes instructions for two rectangular basket sizes. Make the large or small basket on its own, or crochet both so they can nest neatly together when not in use.
I found that a 10 mm (US N/P-15) crochet hook worked well with super bulky yarn and gave me the firm fabric I wanted for support and structure. If your basket feels too floppy, try going down a hook size to create a tighter, stiffer fabric.
Grab some yarn from your stash and follow the free crochet basket pattern below!
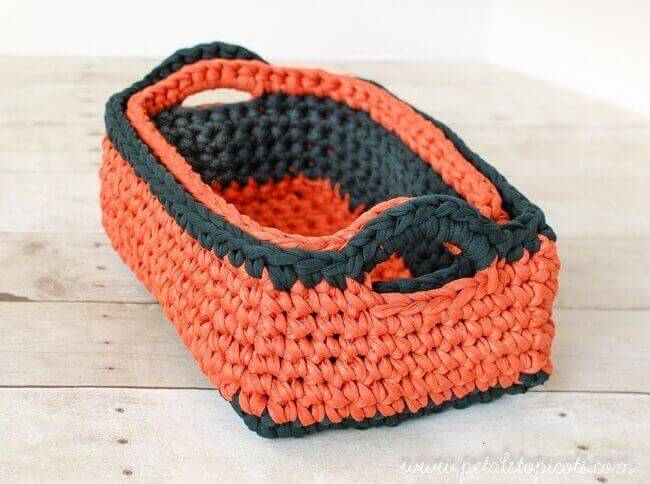
About This Crochet Basket Pattern
Skill level: Easy
Yarn: Super bulky yarn or T-shirt yarn
Yardage: Approximately 160 yd each (320 yd total)
Hook: 10 mm (US N/P-15)
Finished size: Large: Approximately 11 in. long × 8 in. wide × 4¾ in. tall (28 × 20 × 12 cm); Small: Approximately 10 in. long × 7 in. wide × 4 in. tall (25.5 × 18 × 10 cm).
Construction: Rectangular base worked in rows with sides worked in joined rounds
Features: Built-in handles; two sizes nest together
What You’ll Need
- 2 colors of Super Bulky (such as Lazy Days™ Thick & Quick® Yarn) or T-shirt yarn, approx. 160 yd each (320 yd total)
- 10 mm (US N/P-15) crochet hook
- Stitch markers (optional to track the beginning of the rounds)
- Scissors
Abbreviations
CA = Color A
CB = Color B
ch = chain
sc = single crochet
sl st = slip stitch
st(s) = stitch(es)
Pattern note: Join each round with a slip stitch in the first stitch unless otherwise indicated. The beginning ch 1 does not count as a stitch.
This free crochet pattern is written in U.S. crochet terms and abbreviations. Stitch counts are provided throughout the pattern to help you keep on track.
Helpful Crochet Resources: Refer to my Crochet Abbreviations and U.S. to U.K. Crochet Conversion Chart as you work through the pattern.
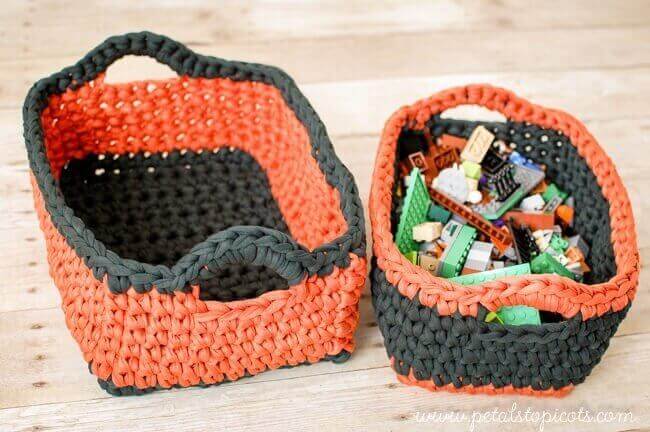
Large Rectangular Crochet Basket
Finished size: Approximately 11 in. long × 8 in. wide × 4¾ in. tall (28 × 20 × 12 cm).
Bottom
With CA, ch 11.
Row 1: Work 1 sc in 2nd ch from hook and each ch across, turn — 10 sts.
Row 2: Ch 1, work 1 sc in each st across, turn — 10 sts.
Rows 3 through 19: Repeat Row 2; do not fasten off.
Sides
Round 1: Continuing with CA, ch 1, work 1 sc in each st across, work 1 sc on the edge of each row along the side, work 1 sc in each st across, work 1 sc on the edge of each row along the remaining side, join and fasten off CA — 58 sts.
Round 2: Join CB in the same st as the join, ch 1, work 1 sc in the same st as the join and in each st around, join — 58 sts.
Round 3: Ch 1, work 1 sc in the same st as the join and in each st around, join — 58 sts.
Rounds 4 through 6: Repeat Round 3.
Working the Handles
Round 7: Ch 1, work 1 sc in same st as join and in each of the next 2 sts, ch 6, skip next 4 sts, 1 sc in each of the next 25 sts, ch 6, skip next 4 sts, 1 sc in each of the next 22 sts, join and fasten off CB — 50 sts and 2 ch-6 loops.
Round 8: Join CA in same st as join, ch 1, work 1 sc in same st as join and in each of the next 2 sts, work 8 sc around ch-6 loop, 1 sc in each of the next 25 sts, work 8 sc around ch-6 loop, 1 sc in each of the next 22 sts, join and fasten off — 66 sts.
Weave in ends.
Small Rectangular Crochet Basket
Finished size: Approximately 10 in. long × 7 in. wide × 4 in. tall (25.5 × 18 × 10 cm).
Bottom
With CB, ch 9.
Row 1: Work 1 sc in 2nd ch from hook and each ch across, turn — 8 sts.
Row 2: Ch 1, work 1 sc in each st across, turn — 8 sts.
Rows 3 through 17: Repeat Row 2; do not fasten off.
Sides
Round 1: Continuing with CB, ch 1, work 1 sc in each st across, work 1 sc on the edge of each row along the side, work 1 sc in each st across, work 1 sc on the edge of each row along the remaining side, join and fasten off CB — 50 sts.
Round 2: Join CA in the same st as the join, ch 1, work 1 sc in the same st as the join and in each st around, join — 50 sts.
Round 3: Ch 1, work 1 sc in the same st as the join and in each st around, join — 50 sts.
Rounds 4 through 5: Repeat Round 3.
Working the Handles
Round 6: Ch 1, work 1 sc in same st as join and in next st, ch 5, skip next 4 sts, 1 sc in each of the next 21 sts, ch 5, skip next 4 sts, 1 sc in each of the next 19 sts, join and fasten off CA — 42 sts and 2 ch-5 loops.
Round 7: Join CB in same st as join, ch 1, work 1 sc in same st as join and in next st, work 7 sc around ch-5 loop, 1 sc in each of the next 21 sts, work 7 sc around ch-5 loop, 1 sc in each of the next 19 sts, join and fasten off — 56 sts.
Weave in ends.
Other Free Crochet Patterns to Keep You Organized …


Nice basket! Just a question on rounds 2 and 3. How is the piece increased? Patterns says to make one stitch in each stitch.
I’m wondering what it would loook like and how it would stand up using Bernat Velvet Yarn…
I finished the bottom but do not understand how to stitch into the side stitches of the long side of the bottom. To me it’s not clear where the stitches should go. Help!
I am crocheting the smaller basket, however, it does look like a rectangle, looks more like a canoe, am I doing something wrong?
What does CA & CB mean?
Color A and Color B 😊
That took me a minute to figure out too. I’ve always seen it as MC (main color) and CC (contrast color); never as CA and CB.
Really like these, but I have terrible time with the fabric yarn. It just never stands up – always squishy, and never holds its shape. Any suggestions?
How do you get the sides to turn up
Hi,
I love the rectangular baskets and have started making the larger one. I’ve only been crocheting a few months but can do the basics. I thought I was doing ok with the basket but have completed row six of the upper part and mine is really wonky! The sides are kind of flopping outwards and curled down and not nice and straight like yours. The stitches seem snug and I used Premier t shirt yarn. Any ideas what I’m doing wrong? I’m determined to get it right! Thanks so much!
Hi Susan 🙂 Perhaps using a smaller hook size will keep the fabric more rigid.
I don’t know where I can find t-shirt yarn in Australia, would it be possible to use something else?.
You can actually make you own! 🙂 i know that there’s tutorials on youtube
It’s incredibly easy (& cost efficient!!) I go to thrift store and buy king sized, Jersey sheets for 2 or 3 dollars, wash em, then just follow the instructions on ‘how to cut fabric into one continuous piece’-which are fairly easy, especially once you’ve done it once! I wound up with what i would GUESS (total guess based on prices ive seen for store bought tshirt yarn) atleast $80 worth of tshirt yarn that looks as good, …if not better then store bought!!
Love this idea. Never thought of it.
I saw a tutorial once for using cut strips of plastic grocery bags, woven together at the end of each strip to make it continuous. I’ve got all these plastic garbage bags saved and left over from before covid-19 happened. I think these might be a little sturdier than yarn if I double or triple up the strands (in the form of a braid, maybe?) and therefore might work quite well for this. I might have to spray paint it or something, though. They are probably not the prettiest colors after being worked up.