
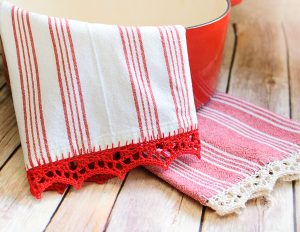
The blanket stitch is an easy hand-sewing stitch used to finish the edges of fabric and create a decorative border. It’s also a great way to prepare a fabric edge when you want to add a crochet edging, which is how I use it for my crochet-edged tea towels.
In this step-by-step blanket stitch tutorial, I’ll show you how to start a blanket stitch, work the stitch evenly along the edge of your fabric, and finish it off when you reach the end.
All you need to get started is your fabric, a sewing needle, and thread. I use crochet thread when I’m preparing an edge for crochet because it creates a sturdy base for working the crochet stitches.
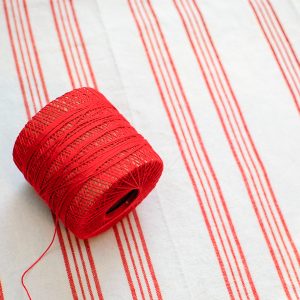
What Is a Blanket Stitch?
A blanket stitch is a simple hand-sewing stitch worked along the edge of fabric. Traditionally, it was used to finish and reinforce raw fabric edges, especially on blankets, but today it’s also commonly used as a decorative edging on felt, fleece, appliqués, and other fabric projects.
The stitch creates a row of evenly spaced loops along the edge of the fabric. Those loops can also provide a foundation for working a crochet border, which is how I’m using the blanket stitch in this tutorial.
What You’ll Need
- Fabric
- A sewing needle
- Crochet thread, such as Aunt Lydia’s Crochet Thread
- Water-erasable fabric marker (optional)
You don’t have to use crochet thread for a blanket stitch. The best thread will depend on your project and fabric. Embroidery floss or another sturdy sewing thread can also work well.
How to Start a Blanket Stitch
Prepare your fabric by marking even intervals along the edge with a water-erasable marking pen. For this project, I space my stitches about ¼ in. (6 mm) apart. You can adjust the spacing depending on the fabric, thread, and look you want. You can definitely eyeball your stitches, but I find marking them out creates a more uniform edge.
To set up, thread your needle and knot the end of your thread. If possible, I insert the needle through a side opening in the hem to hide the knot. If that isn’t an option with your fabric, start from the back side of your piece.
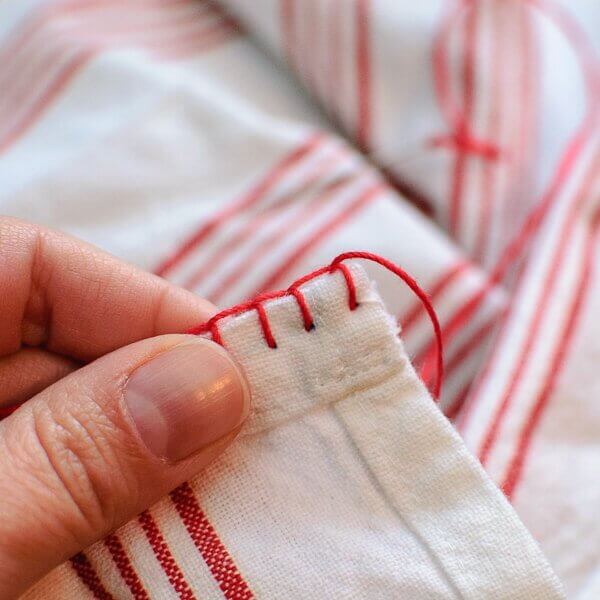
Bring the needle through your first mark, go over the top edge of the fabric, and bring the needle back through the same hole again. You will now have a vertical stitch spanning both sides of the fabric edge. Now bring your needle diagonally through that vertical bar; this places your thread along the top.
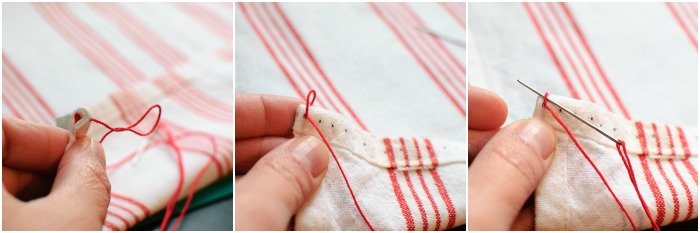
How to Do a Blanket Stitch
You are now in the starting position to begin blanket stitching across. Insert your needle into the next mark, but before pulling the thread tight, insert it up through the loop you created. Insert your needle into the next mark, bring the needle up through the loop, then gently pull the thread tight. Repeat these steps across the edge.
As you work, pull the thread just tight enough for the loop to sit neatly along the edge of the fabric. Try not to pull too tightly or the fabric may pucker. Keeping your stitch spacing and tension consistent will give you a nice, even edge.
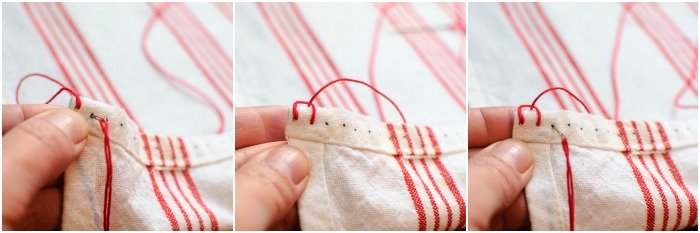
How to Finish a Blanket Stitch
When you reach the end of your piece, bring the thread back over the last loop and bring your needle through the same hole to secure the final stitch. Knot the thread on the back of the fabric, then weave the tail into the hem to hide it.
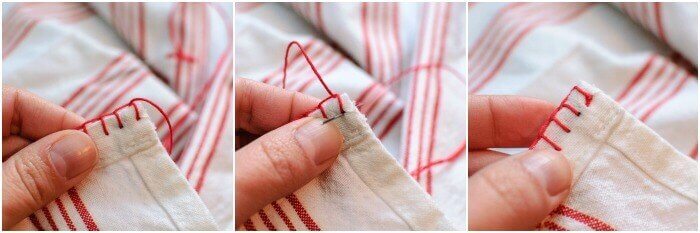
Ready to Add a Crochet Edge?
Now that you know how to work a blanket stitch, you can use it to create a foundation for adding crochet to fabric. Try the technique with my Crochet-Edged Tea Towel Pattern.
Find More Helpful Tutorials
- How to Block Knit and Crochet Items
- How to Make Plarn
- Making Fabric into Yarn
- Needle Felting 101: Introduction to Needle Felting


I am wanting to put a lace edge on my granddaughters table cloth I am making for her and I was wondering about the corners. Could you please give me some tips on how to keep the corners from bunching up.
Thank you
I have a useful hint that I use for my counted cross stitch pictures that eliminates the knots. Cut the thread twice the length you want. Then fold in half. Thread the loose ends through the needle. Come thru the back and then going over the top pass the needle through the loop made by the end of the thread. Pull taunt and continue on. No knots to hide!!!
Awesome tip!! I do that too for embroidery but never thought to do it for crochet too!
Would this also work if I wanted to do a crochet topper?
Yep 🙂
Thank you for making this so simple! So excited about adding crochet borders now. 😊
What if the edges add up to a lot of length? How do you tie off the stitches and add more thread?
You would just knot the thread and start a new length 🙂
Thanks for the demonstration. I have just purchased a skip stitch blade and attempted to use it on a hand towel (so pleased I had one for just practising on) but am having trouble keeping the line straight.
Might give the blanket stitch a go instead.
Can’t wait to see your towels ! I have always wanted to try this !
Kara, this is very useful. Thank you for a great post. I’ll be using this for sure!
Thank you for this! Now I need to go to town!