
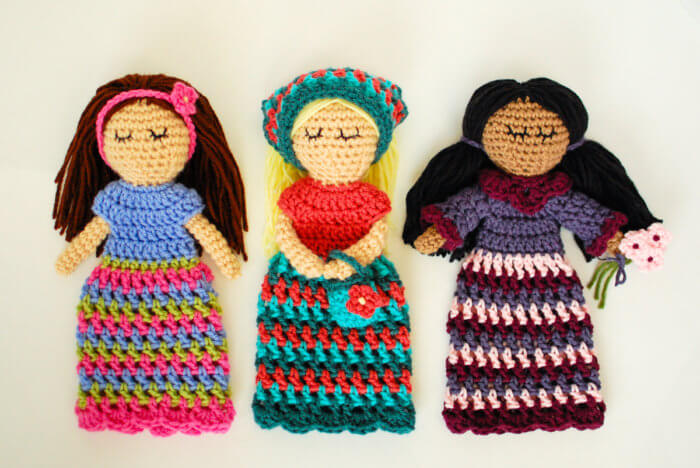
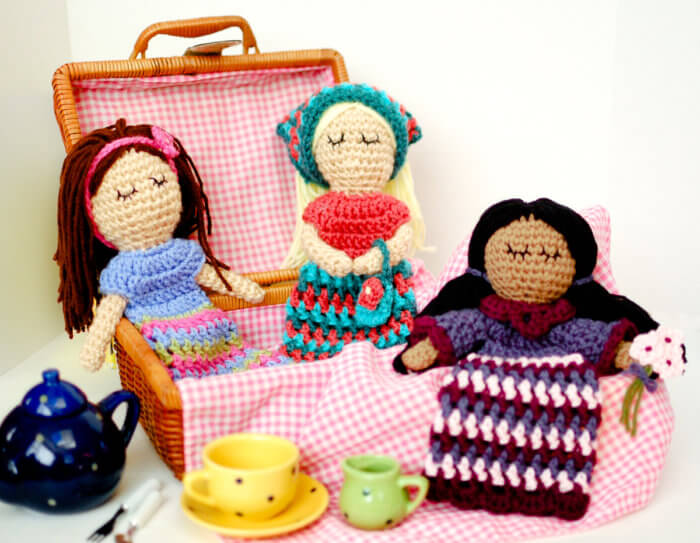
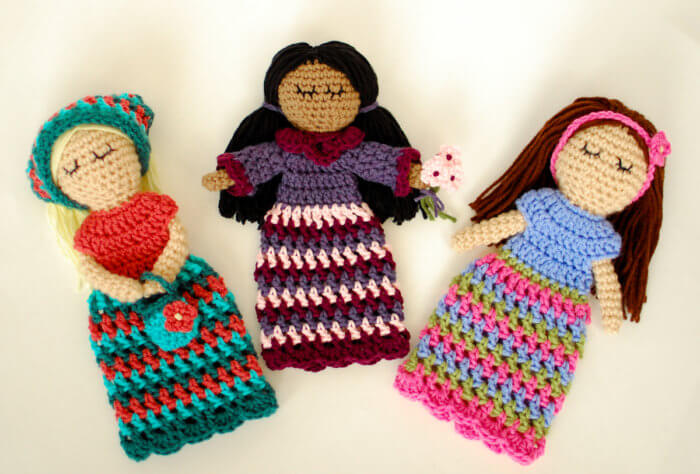
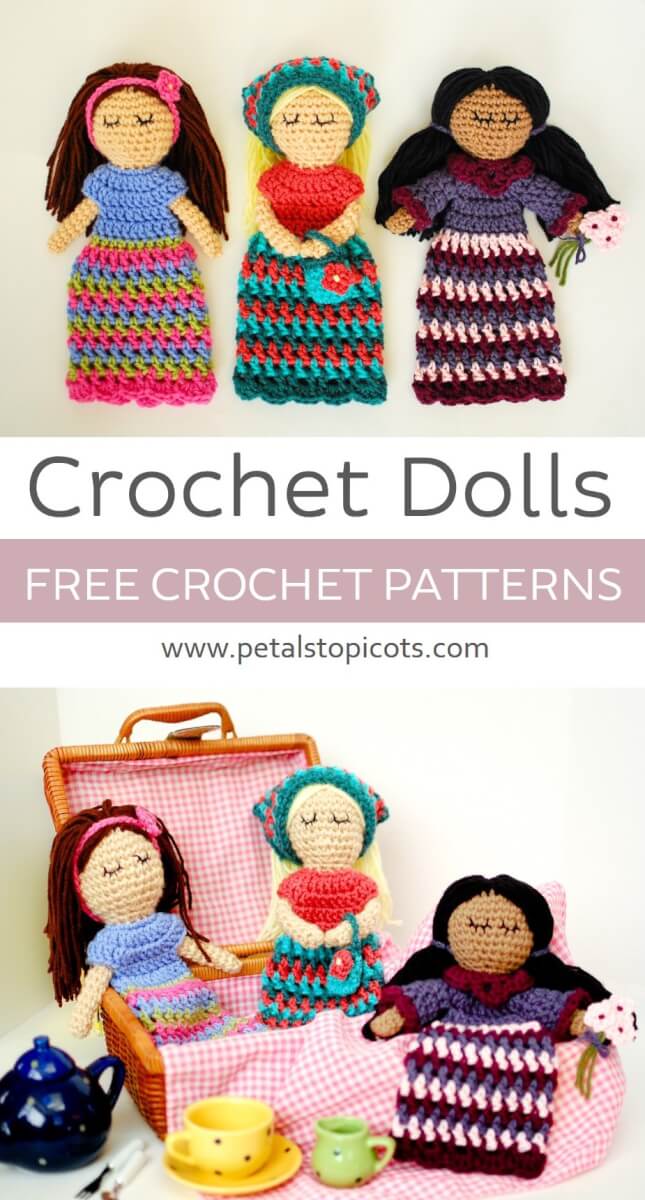
This free crochet doll pattern is so much fun to customize! The doll is crocheted with a soft, lovey-style body and comes with instructions for making her dress, yarn hair, and a variety of cute clothing and accessories.
Once you’ve finished the basic doll, you can make her completely your own. I’ve included ideas for different hairstyles along with crochet patterns for a purse, kerchief, collar, long sleeves, and little flower embellishments. Mix and match colors and accessories to create a one-of-a-kind doll for someone special.
The finished crochet doll measures approximately 12 inches (30.5 cm) tall by 5 inches (12.7 cm) wide. You’ll also find lots of step-by-step photos throughout the pattern to help you along the way.
Find more patterns to crochet for kids here!
About This Crochet Doll Pattern
Pattern Details
Skill level: Intermediate
Yarn: Worsted-weight yarn
Hook: 5 mm (US H-8), plus approx. 2 mm hook for hair
Finished size: Approx. 12 in. × 5 in. (30.5 × 12.7 cm)
Construction: Head worked in continuous rounds; dress crocheted directly onto the head
Customization: Hairstyles, purse, kerchief, collar, sleeves, and flowers
Materials
- Worsted-weight yarn (3 coordinating colors for dress and colors for skin and hair, less than 200 yds each)
- 5 mm (US H) crochet hook
- Small steel crochet hook (approx. 2 mm) for attaching the doll’s yarn hair
- Size 10 crochet thread (such as Aunt Lydia’s Crochet Thread) in black or brown for embroidering the eyes
- Fiberfill stuffing
- Stitch markers
- Yarn needle and scissors for finishing
Resources and tutorials you may find helpful in following this crochet pattern: Crochet Abbreviations, U.S. to U.K. Crochet Conversion Chart, How to Make a Magic Ring {photo & video tutorial}.
Notes
- Safety note: As with all handmade items, check the crochet doll regularly for loose ends or unraveling stitches that could pose a hazard to babies or small children. Never leave babies or small children unattended while playing with handmade items.
- Instead of fiberfill stuffing, you can also use an old pair of nylon pantyhose instead of fiberfill; this works especially well for darker yarn colors
Add this pattern to your Ravelry library.
Available as a convenient, ad-free pdf download here.
How to Crochet the Doll
Doll Head
Work the head in continuous, unjoined rounds. Use a stitch marker to keep track of the beginning of each round.
Using an H hook and the yarn color chosen for the skin, crochet a magic ring.
Round 1: Ch 1 (does not count as st), work 6 sc into ring, pull beginning tail to close up ring —6 sts.
Round 2: 2 sc in each st around — 12 sts.
Round 3: *2 sc in next st, 1 sc in next, rep from * around — 18 sts.
Round 4: *2 sc in next st, 1 sc in each of the next 2 sts, rep from * around — 24 sts.
Round 5: *2 sc in next st, 1 sc in each of the next 3 sts, rep from * around — 30 sts.
Round 6 through 10: 1 sc in each st around — 30 sts.
Round 11: *Sc2tog, 1 sc in each of the next 3 sts, rep from * around — 24 sts.
Round 12: *Sc2tog, 1 sc in each of the next 2 sts, rep from * around — 18 sts.
Round 13: *Sc2tog, 1 sc in each next st, rep from * around — 12 sts.
Round 14: 1 sc in each st around — 12 sts.
Round 15: 1 sc in the back loop only of each st around — 12 sts.
***Stuff head with fiberfill stuffing, taking care not to overstuff.***
Round 16: Sc2tog around — 6 sts.
This is the bottom of the head. Fasten off, leaving a tail about 6 inches long. Using a tapestry needle, weave the tail through each stitch and pull gently to tighten. Weave in ends.
Attaching the Dress
The dress pattern uses worsted weight yarn in your choice of three colors: CA = bodice; CB, CC, and CA for skirt.
With the base of the head facing up, join CA into the first unworked loop from Round 15 of the head and continue as directed in the pattern below.
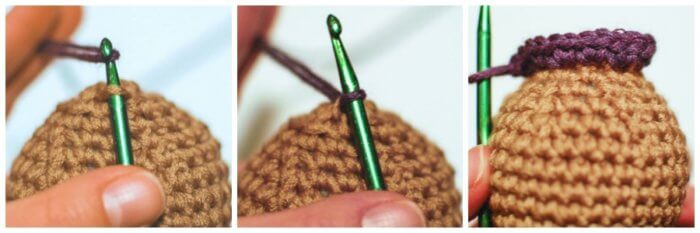
Round 1: Ch 1 (does not count as st), work 2 sc into same st, 1 sc in next, *2 sc in next, 1 sc in next, rep from * around, join — 18 sts.
Round 2: Ch 3 (counts as dc here and throughout), work 1 dc in same st as join, 1 dc in each of the next 2 sts, *2 dc in next, 1 dc in each of the next 2 sts, rep from * around, join — 24 sts.
Round 3: Ch 3, work 1 dc in same st as join, 1 dc in each of the next 3 sts, *2 dc in next, 1 dc in each of the next 3 sts, rep from * around, join — 30 sts.
Round 4: Ch 3, work 1 dc in same st as join, 1 dc in each of the next 3 sts, 2 dc in next st, 1 dc in each of the next 3 sts, skip next 7 sts, 2 dc in next, 1 dc in each of the next 3 sts, 2 dc in next, 1 dc in each of the next 3 sts, skip next 7 sts, join in top of beginning ch 3 — 20 sts.
Round 5: Ch 3, work 1 dc in next st and each st around, join, drop CA — 20 sts.
Round 6: Join CB, ch 4 (counts as dc plus ch 1), *work 1 dc in next st, ch 1, rep from * around, join in 3rd ch of beginning ch 4, drop CB — 20 sts.
Round 7: Join CC in next ch-1 sp, ch 4 (counts as dc plus ch 1), *work 1 dc in next ch-1 sp, ch 1, rep from * around, join in 3rd ch of beginning ch 4, drop CC — 20 sts.
Rounds 8 through 16: Beginning with CA again and continuing color sequence CB-CC-CA, rep Rounds 7 — 20 sts.
Round 17: Continuing with CB, *Sl st in next ch-1 sp, work 3 dc in next ch-1 sp, rep from * around, join — 40 sts.
Fasten off and weave in ends.
Crochet the Arms
Work the arms in continuous, unjoined rounds. Use a stitch marker to keep track of rounds.
With your chosen skin color, make a magic ring.
Round 1: Ch 1, work 6 sc into ring, pull beginning tail to close up ring — 6 sts.
Round 2: Work 1 sc in each st — 6 sts.
Rounds 3 and on: Rep Round 2 until you have a length of approximately 8½ in.
Fasten off, leaving a tail about 6 inches long. Using a tapestry needle, weave the tail through each stitch and pull gently to tighten. Weave in ends.
Insert arms through armholes in dress. Make sure the arm lengths are even on both sides, then sew the center of the arm piece to the base of the head.
Adding Yarn Hair to the Doll
With your chosen yarn color for the hair, cut lengths of yarn of about 12 to 14 in.
Take a length of yarn and fold it in half to form a loop on one side. Using a small crochet hook (about 2 mm or so), pull the loop through the first st in Round 1 of the head. Pull the yarn ends through the loop and tug gently to tighten.
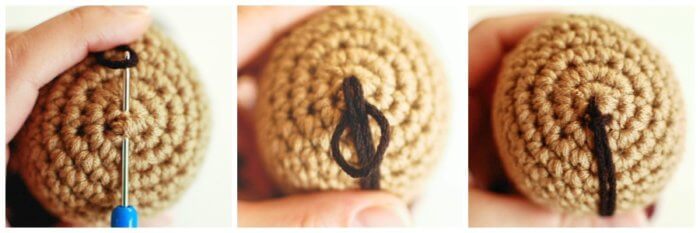
Repeat for each st around through Row 4. It may be helpful to place a stitch marker in the last st of Row 4 to keep track of where to stop.
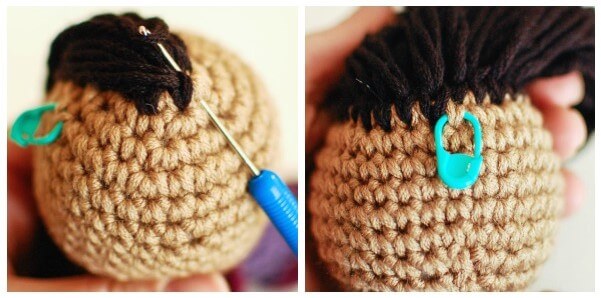
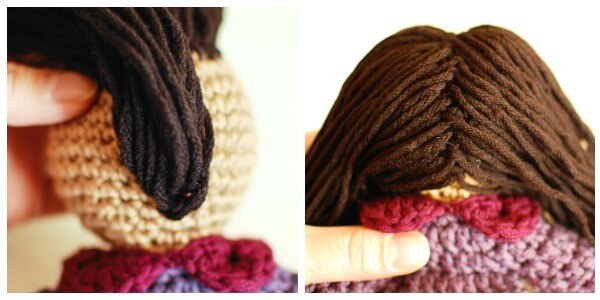
If you are going to style the doll’s hair in side ponytails, also fill in the center of the head so that it looks nice when the hair is parted to the sides.
Customizing Your Crochet Doll
Now is the fun part!
Add accessories and embellishments to make your crochet doll truly unique or customized for the special person you intend it for. Here are some ideas to get you started …
Embroidering the Eyes
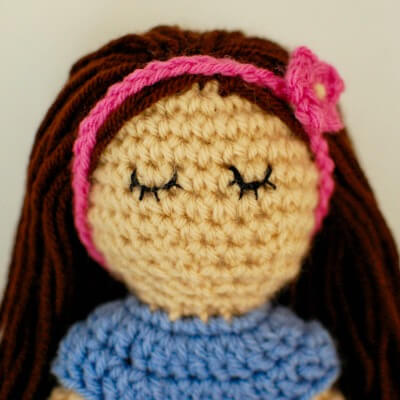
Using a sewing needle and size 10 black or brown crochet thread, embroider eyes as shown.
Crochet Doll Hairstyles
Be creative … cut the doll’s hair to the desired length. Leave it down, add a hair band, make a bun, or make a ponytail … whatever you want. Here are my tips for making the dolls’ ponytails and hairbands, as shown in the photos.
Ponytails
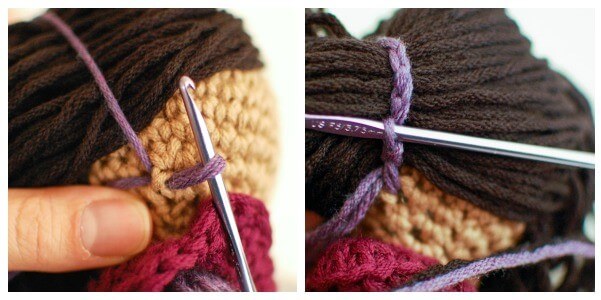
To make ponytails, join the yarn to the side base of head, chain around the hair, and join back in same stitch. Repeat on other side.
Hairband
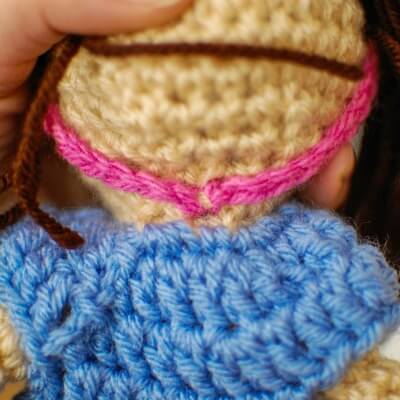
To make a hairband, join in the back base of the head, chain around, and join back in the same stitch.
Crochet Doll Clothes & Accessories
Purse
Ch 6 (counts as foundation chain and 1st hdc).
Round 1: Work 1 hdc in the 3rd ch from hook, 1 hdc in the next 2 ch, and 3 hdc in the last ch; working along the other side of the chain, work 1 hdc in each of the next 2 ch, 1 hdc in the same ch as the first st made, then join — 10 sts.
Round 2: Ch 2 (counts as 1 hdc), work 1 hdc in the next st and each st around, then join — 10 sts.
Round 3: Repeat Round 2.
Round 4: Join new color, ch 1 (does not count as st), work 1 sc in the same st as the join and in each st around, join — 10 sts.
Fasten off.
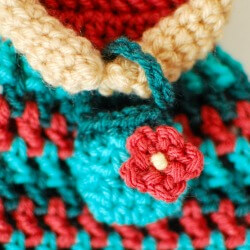
Join in the same color as used in Round 4 to the side of the purse, chain to the desired handle length, and join in the other side of the purse. Fasten off. Weave in ends.
Attach a flower from the pattern below if desired.
Flower
Make a magic ring.
Round 1: *Ch 3, Sl st in ring, rep from * 4 more times — 5 ch-3 petals.
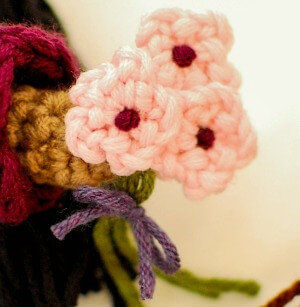
Fasten off and pull beginning tail to close up ring. Weave in ends. Make a French knot in the center. Add flower stems if desired.
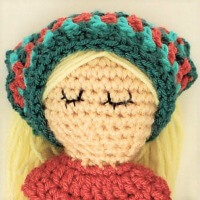
Kerchief
The kerchief uses the same three yarn colors as the dress.
With CA, ch 5 (counts as chain 1 plus 1 dc).
Row 1: Work 1 dc in furthest ch from hook, ch 1, 1 dc in same st, turn — 3 sts.
Row 2: Join CB, ch 4 (counts as dc plus ch 1), work 1 dc in next ch-1 sp, ch 1, rep from * across, work 1 sc in 3rd ch of turning ch from row below, turn — 4 sts.
Rows 3 through 12: Beginning with CC and continuing color sequence, rep Row 2. Each row will increase by 1 st, ending with 14 sts in Row 12.
Row 13: Ch 1 (does not count as st), work 1 sc in first st and each st and ch-sp across, do not turn — 27 sts.
Edging: Work 1 sc in the same st as last and along the edge, working 2 sc per row and 3 sc in the bottom point; work the last sc in the same st as the first sc of Row 13.
Fasten off, weave in ends.
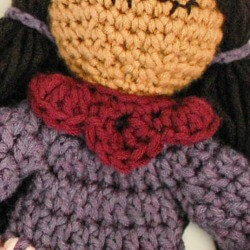
Collar
With CC used for dress, ch 26.
Row 1: Work 1 sc in 2nd ch from hook, *skip 1 ch, 5 dc in next, skip 1 ch, 1 sc in next, rep from * across, do not turn — 37 sts.
Row 2: Work 2 sc in same ch as last st made, working along opposite side of beginning ch, skip next ch, 1 sc in next (opposite 5 dc shell from Row 1), skip next ch, 1 sc in next (opposite sc from Row 1), rep from * across ending with 2 sc in same st as first sc of Row 1, join — 15 sts.
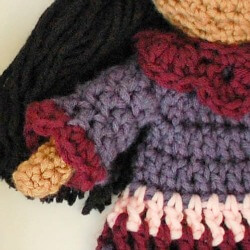
Long Sleeves
Working in skipped stitches from Round 4 of the dress, join CA in 1st skipped st.
Round 1: Ch 3 (counts as dc), work 1 dc in same st as join, 1 dc in each of the next 2 sts, 2 dc in next, 1 dc in each of the next 2 sts, 2 dc in last st, join — 10 sts.
Round 2: Ch 3 (counts as dc), work 1 dc in next st and each st around, join — 10 sts.
Round 3: Repeat Round 2.
Round 4: Join CC, ch 1 (does not count as st), Sl st in same st as join, work 3 hdc in next st, * 1 Sl st in next, 3 hdc in next, rep from * around, join — 20 sts.
Now that your crochet doll is complete, I’d love for you to show it off! Show it off on Instagram and tag me @petalstopicots.
You may also enjoy …
- Free Crochet Baby Patterns
- Crochet Bowling Set: Bowling Pin and Ball
- Amigurumi Crochet Patterns
- Crochet Lovey Patterns
Find Community
I would love to see your finished projects; share them with me on Instagram, Facebook, or the Petals to Picots Community.


Love the dolls, can’t wait to start making them. Thank you so much 💓 ☺️
Hello. Still waiting for a response. Thank you, Heidi
Hello. I would like to make these for a mission trip to Guatemala. I’m new to crocheting though and some yarn I’ve used for my daughters’ doll carriers were slick and tended to come unknotted. I haven’t used cotton yet. My question is, which would be the best yarn to use for this project? Thank you
Oh, wow! These are stunning and would make a lovely gift!!!
These are just gorgeous. Such a lovely gift idea. Pinning.
These dolls are adorable! Really like the lovey style! Thank you!
I can not get the Pinterest button to work 😢