
This free crochet napkin edging pattern adds a delicate lace trim to plain cloth napkins or other table linens. The simple one-row edging combines double crochet shells with small picots for a pretty finish that works with everyday, holiday, or special-occasion table settings.
Crochet the edging along one side as a decorative accent or add it to all four sides. A finished set makes a lovely handmade gift for a wedding, bridal shower, housewarming, or holiday.
If your napkins already have suitable stitching around the edges, you may be able to crochet directly into it. Otherwise, begin by sewing an evenly spaced blanket stitch along each edge you would like to trim.
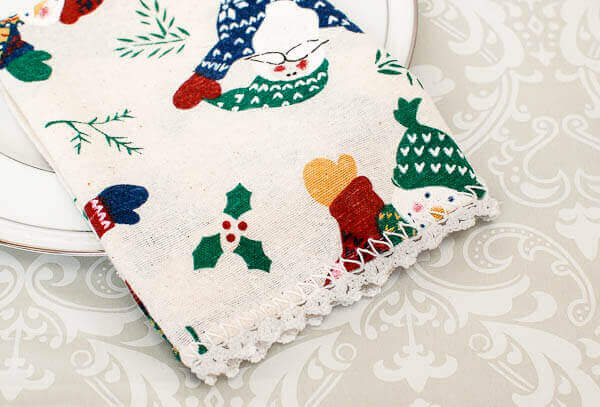
Crochet Napkin Edging Pattern
Pattern Details
- Skill level: Easy
- Yarn: Size 10 crochet thread
- Hook: 2.5 mm crochet hook
- Finished size: Customizable to fit your napkins or linens
- Construction: A blanket-stitch foundation is followed by one row of crochet shells and picots
- Gauge: Not essential
Supplies
- Cloth napkins or other linens
- Size 10 crochet thread, such as Aunt Lydia’s Classic Crochet Thread
- 2.5 mm crochet hook
- Sewing needle
- Matching sewing thread or crochet thread for the blanket-stitch foundation
- Scissors
- Piercing crochet hook, optional
Resources and tutorials you may find helpful in following this crochet pattern include Crochet Abbreviations, Crochet Stitch Chart Symbols, and the U.S. to U.K. Crochet Conversion Chart.
Crochet Abbreviations
- ch = chain
- dc = double crochet
- rep = repeat
- sl st = slip stitch
- st(s) = stitch(es)
This pattern is written in U.S. crochet terms.
Special Stitch
Picot: Ch 3 and sl st in the 3rd ch from the hook.
Pattern Notes
- The edging instructions are written for one straight napkin edge.
- Complete and fasten off each edge separately.
- Work an odd number of blanket stitches along every edge you plan to crochet.
- Space the blanket stitches as evenly as possible.
- If trimming all four sides, use the same number of blanket stitches on opposite sides so the edging looks balanced.
- The beginning ch-3 counts as the first dc.
- Adjust your blanket-stitch spacing as needed for the fabric and size of your napkins.
Preparing the Napkins
If your napkins already have evenly spaced stitching around the edges, you may be able to crochet directly into those stitches.
If they do not, use a sewing needle and thread to work an evenly spaced blanket stitch along each edge you would like to trim. Follow my How to Do a Blanket Stitch Tutorial if you need help with this step.
Work an odd number of blanket stitches along each selected edge.
As another option, use a piercing crochet hook to work directly through the fabric. You can see this technique in my tutorial for Adding Crochet Edgings to Fabric and Fleece Blankets.
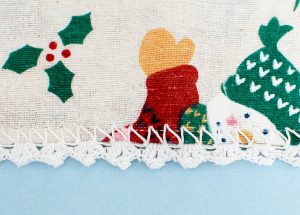
Crochet Lace Edging Instructions
Join the crochet thread in the first blanket st and pull up a loop.
Ch 3 (counts as the first dc). Work [1 dc, picot, 2 dc] in the same st.
Skip the next blanket st.
*Work [2 dc, picot, 2 dc] in the next blanket st, then skip the following blanket st; rep from * across until 1 blanket st remains.
Work [2 dc, picot, 2 dc] in the final blanket st.
Fasten off and weave in the ends.
Repeat the edging instructions separately along each additional napkin edge you would like to trim.
Crochet Edging Stitch Diagram
See my Crochet Stitch Chart Symbols guide if you need help reading the diagram.

Finishing the Lace-Trimmed Napkins
Gently shape the crochet edging so the shells and picots lie evenly. If needed, lightly block the edging according to the care instructions for your napkin fabric and crochet thread.
Make a coordinating set for your table or tie several finished napkins together with ribbon for an easy handmade gift.
More Crochet Edging Patterns
- Crochet-Edged Tea Towel Pattern
- Quick and Easy Crochet Edging Patterns
- Cluster Burst Afghan Crochet Edging Pattern
- Free Crochet Border Pattern
- Ruffle-Edged Crochet Baby Blanket Pattern


Leave a Reply