
I love these little fabric nesting baskets! They are perfect for organizing your office, counter tops, baby’s room, or anywhere else you need an attractive storage solution. The fabric yarn used to make these baskets gives them a cozy charm and makes them more durable to use for storage than baskets made from regular yarn. You can make your own fabric yarn with my tutorial Making Fabric into Yarn. Or if you prefer you can just as easily work these up in T-shirt yarn.
Fabric Nesting Baskets
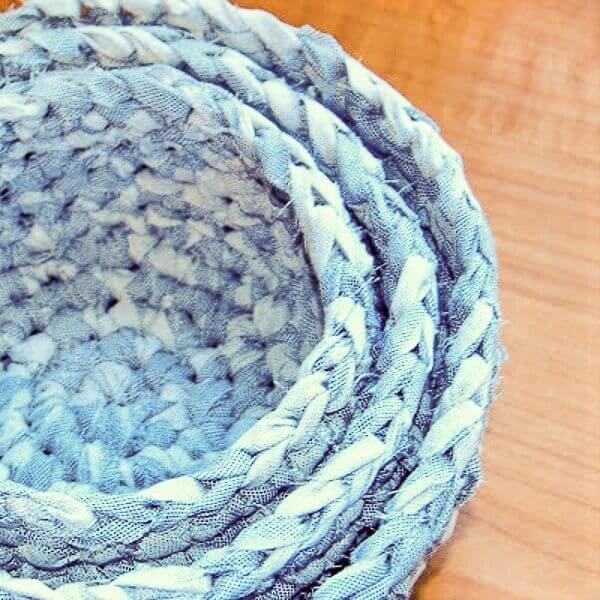
Here’s what you need:
- approx. 200 yd fabric or T-shirt yarn
- US M-13 / 9 mm crochet hook
- tapestry needle and scissors for finishing
This free crochet pattern is written in U.S. crochet terms and abbreviations. Stitch counts are provided at the end of each row to help you keep on track.
Resources and tutorials you may find helpful for following this pattern include: Crochet Abbreviations and U.S. to U.K. Crochet Conversion Chart.
Add this pattern to your Ravelry library.
Finished baskets measure as follows: Small = approx. 6 in. x 2½ in.; Medium = approx. 7 in. x 3 in.; Large = approx. 8 in. x 3½ in.
Tip: Use a stitch marker to keep track of rounds.
Small
Ch 2
Foundation Round: Work 6 sc in furthest ch from hook, do not join — 6 sts.
Round 1: Work 2 sc in each st around, do not join — 12 sts.
Round 2: *Work 2 sc in next st, 1 sc in next, rep from * around, do not join — 18 sts.
Round 3: *Work 2 sc in next st, 1 sc in each of the next 2 sts, rep from * around, do not join — 24 sts.
Round 4: *Work 2 sc in next st, 1 sc in each of the next 3 sts, rep from * around, join and turn — 30 sts.
Round 5: Ch 1, work 1 sc in same st as join and in each st around, join — 30 sts.
Rounds 6 through 9: Repeat Round 5.
Fasten off and weave in ends.
Medium
Ch 2
Foundation Round: Work 6 sc in furthest ch from hook, do not join — 6 sts.
Round 1: Work 2 sc in each st around, do not join — 12 sts.
Round 2: *Work 2 sc in next st, 1 sc in next, rep from * around, do not join — 18 sts.
Round 3: *Work 2 sc in next st, 1 sc in each of the next 2 sts, rep from * around, do not join — 24 sts.
Round 4: *Work 2 sc in next st, 1 sc in each of the next 3 sts, rep from * around, join and turn — 30 sts.
Round 5: *Work 2 sc in next st, 1 sc in each of the next 4 sts, rep from * around, join and turn — 36 sts.
Round 6: Ch 1, work 1 sc in same st as join and in each st around, join — 36 sts.
Rounds 7 through 11: Repeat Round 6.
Fasten off and weave in ends.
Large
Ch 2
Foundation Round: Work 6 sc in furthest ch from hook, do not join — 6 sts.
Round 1: Work 2 sc in each st around, do not join — 12 sts.
Round 2: *Work 2 sc in next st, 1 sc in next, rep from * around, do not join — 18 sts.
Round 3: *Work 2 sc in next st, 1 sc in each of the next 2 sts, rep from * around, do not join — 24 sts.
Round 4: *Work 2 sc in next st, 1 sc in each of the next 3 sts, rep from * around, join and turn — 30 sts.
Round 5: *Work 2 sc in next st, 1 sc in each of the next 4 sts, rep from * around, join and turn — 36 sts.
Round 6: *Work 2 sc in next st, 1 sc in each of the next 5 sts, rep from * around, join and turn — 42 sts.
Round 7: Ch 1, work 1 sc in same st as join and in each st around, join — 42 sts.
Rounds 8 through 13: Repeat Round 7.
Fasten off and weave in ends.



Do you know the approx length of strips needed for each of the sizes individually? I’d like to use some of my smaller stash pieces that won’t give me the 200 yds you specify, which I assume is the length needed to make one each of all 3 sizes.
Kara, I just made the small one using Bernat Baby Blanket and an N hook. Came out SO cute. Going use for a gift with some sample size goodies, powder lotion, etc. Thanks for the pattern its super easy.
Love this pattern! I recently discovered several basket patterns that I want to do. Crocheting with fabric is new to me but as a quilter It looks like so much fun!
Hi!
I was curious how you would make this larger, to put a newborn in.
I know this tutorial and the comments have been out there a while, but I am hoping someone will see my question. I am very new to crocheting….have only crocheted a couple of rectangular rag rugs.
At the end of nearly every step it says “do not join” or it says “join and turn”….what does that mean?
Where it says “do not join” you are crocheting in a continuous circle, you will crochet in the next stitch. It’s a good idea to mark the beginning of the row so you know where you started.
“Join and turn” means when you reach the beginning of the row you will join the last stich to the first stitch with a slip stitch, chain one, and turn the project so you are starting back the way you just came.
Good luck on your project.
Sikke en super ide. En meget personlig gave til f.eks dåb/navngivning eller fødselsdag så kan man slippe for alt det pingel pangel folk giver, som man aldrig får brug for læs små sølvdåser og dyr:-)Synes det er sjovt med stjernetegn:-)nogle gange passer det, andre gange ikke.
I know you used an old sheet for the material used but, how wide did you make the strips of fabric and did you tie them at the ends or just worked the ends in? I also plan to tea-dye the fabric first. (using an old white sheet). I plan to make handles on the baskets and use the basket for my crocheting.y
I cut the strips about an inch wide and made a continuous ball of yarn with it. You can see the link in the pattern for a tutorial on how I did it 🙂
These are similar to what we called rag rugs, same principle you folded a strip of material in thirds so that the exposed edge was on the inside and them you sewed three strips together and started to braid. It was a great use of old material/clothes/sheets/curtains etc and the cost, free can’t get much better than that.
So pretty and such a great idea. I noticed that you allow pinning so I pinned from this page.
You can never have enough cute baskets around! So awesome that you made them recycled linens, that’s my favorite part, of course!
Thanks so much for linking up at my greener linky party! I’ll probably be linking to your fabric yarn tutorial later this week for my reusing linens and clothes post 🙂 Have a great weeekend.